Automation for AWS services
CloudCADI helps you efficiently clean orphaned AWS resources and create ECR lifecycle policies directly from your AWS console.
Automation integration permission set up has 2 options:
- CloudFormation : Uses a stack to manage required permissions automatically.
- IAM role : Uses an existing role with permissions.
Note
- Use only one of the following approaches. These approaches must not be combined.
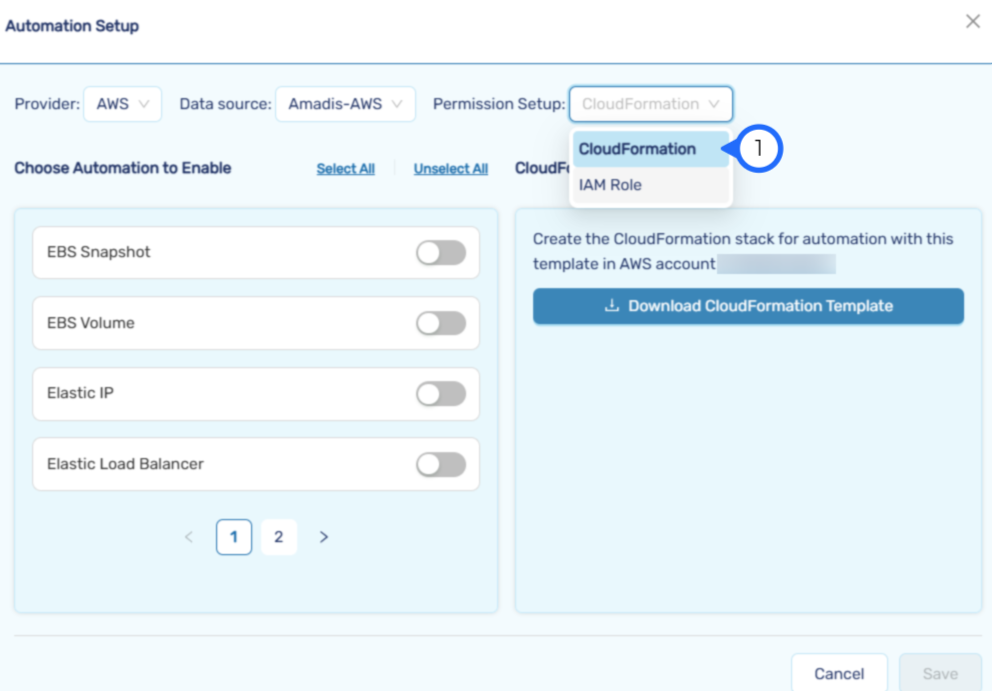
CloudFormation
- CloudFormation automates permission setup by creating the required IAM policies using a template.
Step 1 - Ceate CloudFormation template
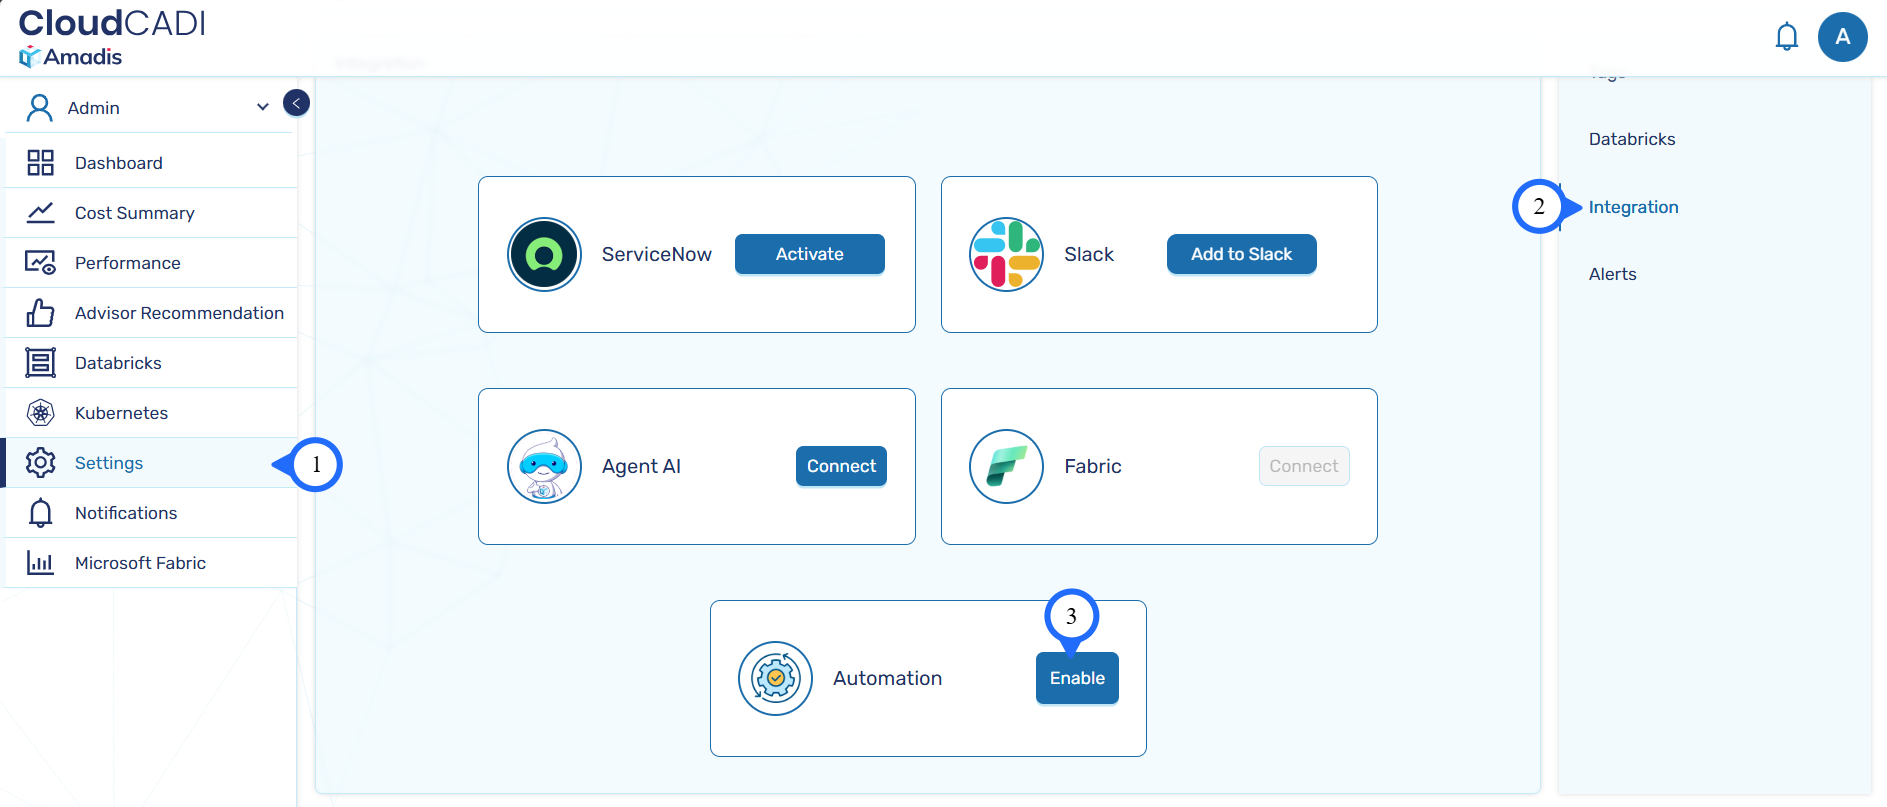
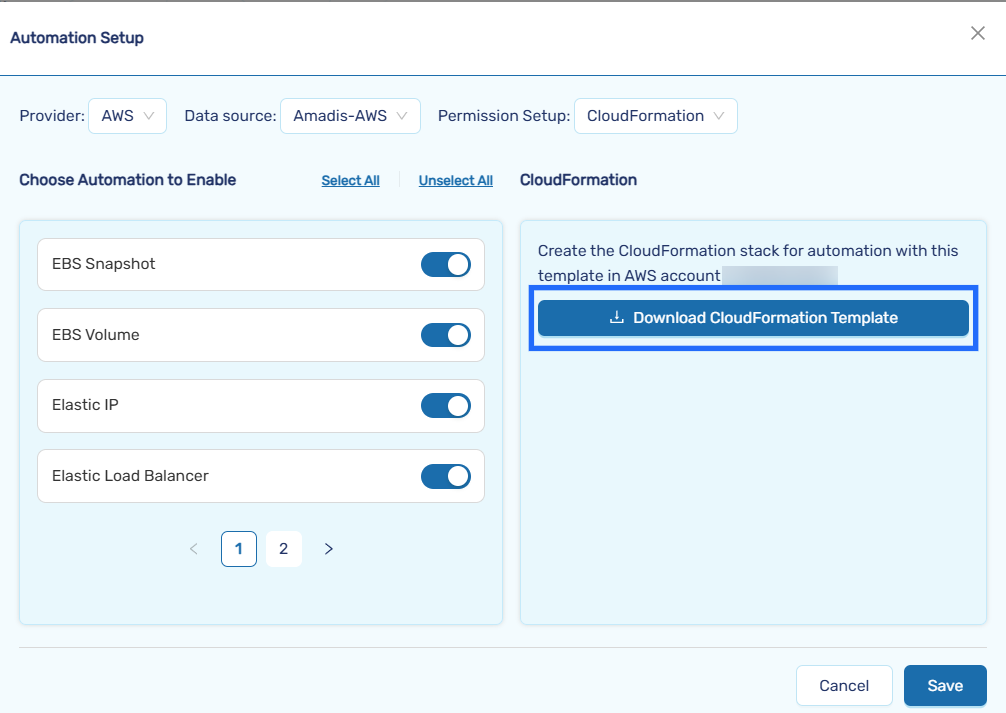
- To enable automation, navigate to Settings → Integration → Automation and click Enable.
-
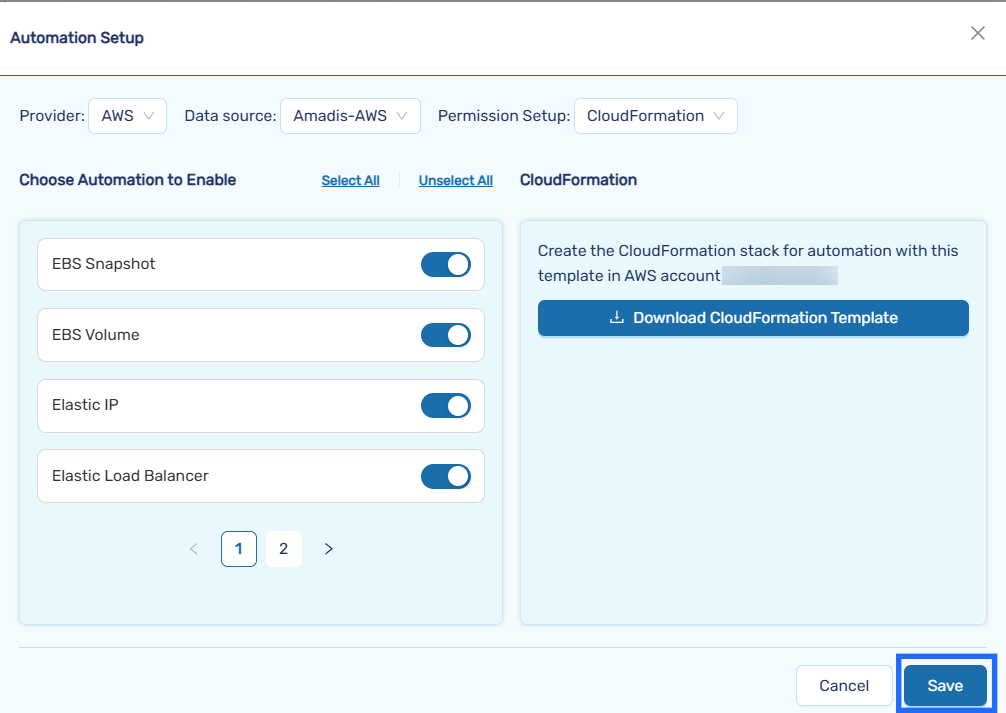
Choose CloudFormation
-
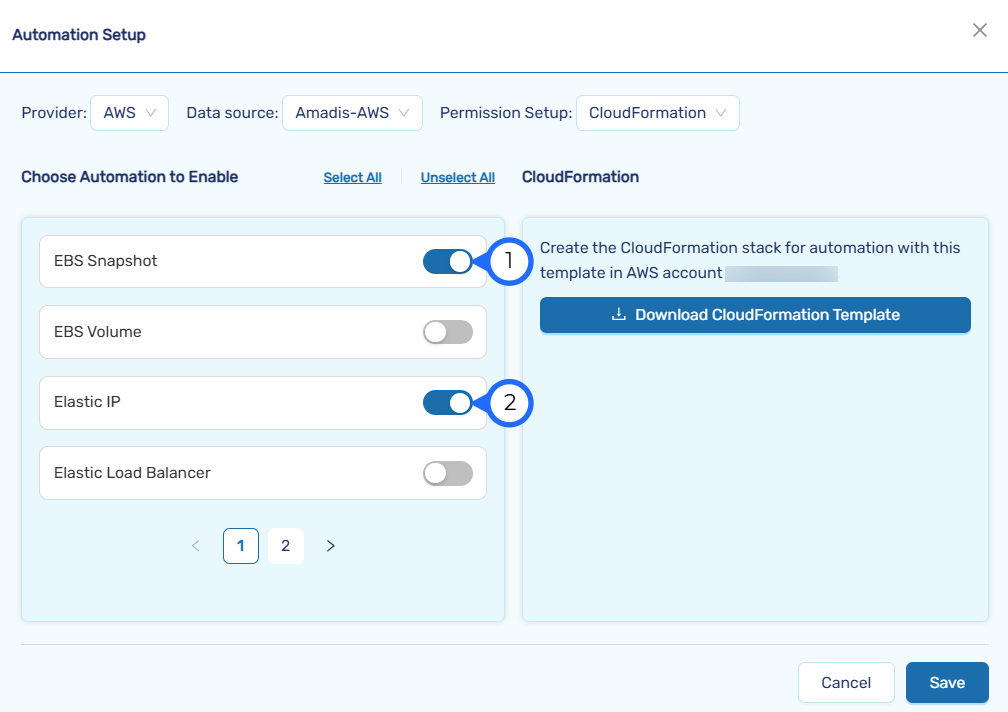
Toggle on the services for which automation permissions are required. Only selected services will be included in the CloudFormation template.
-
Click Download CloudFormation template button
-
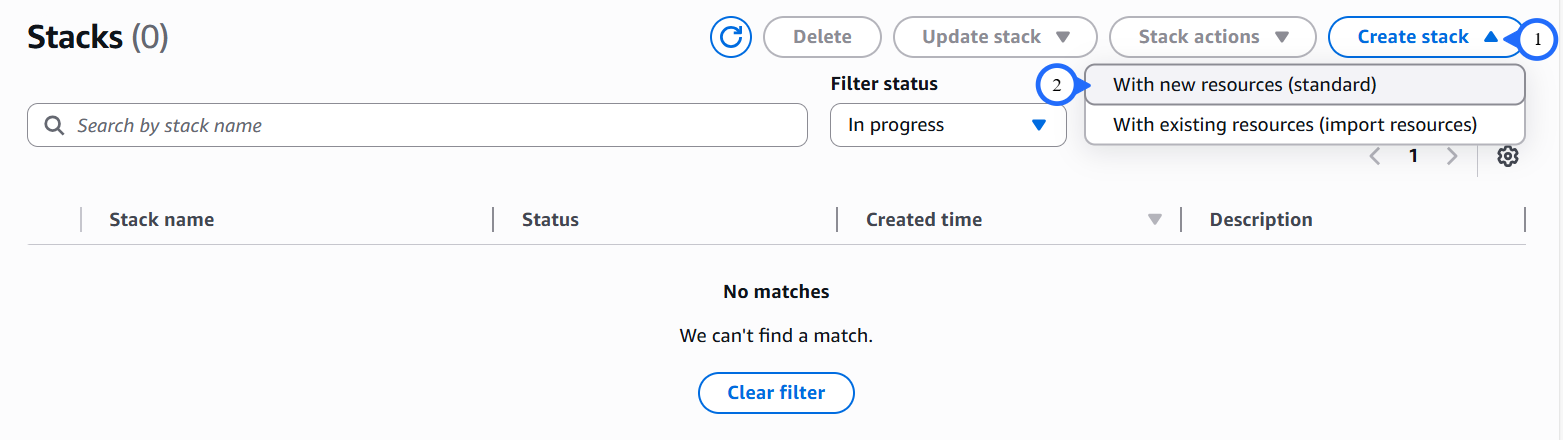
Click Create stack and click With new resources(standard)
-
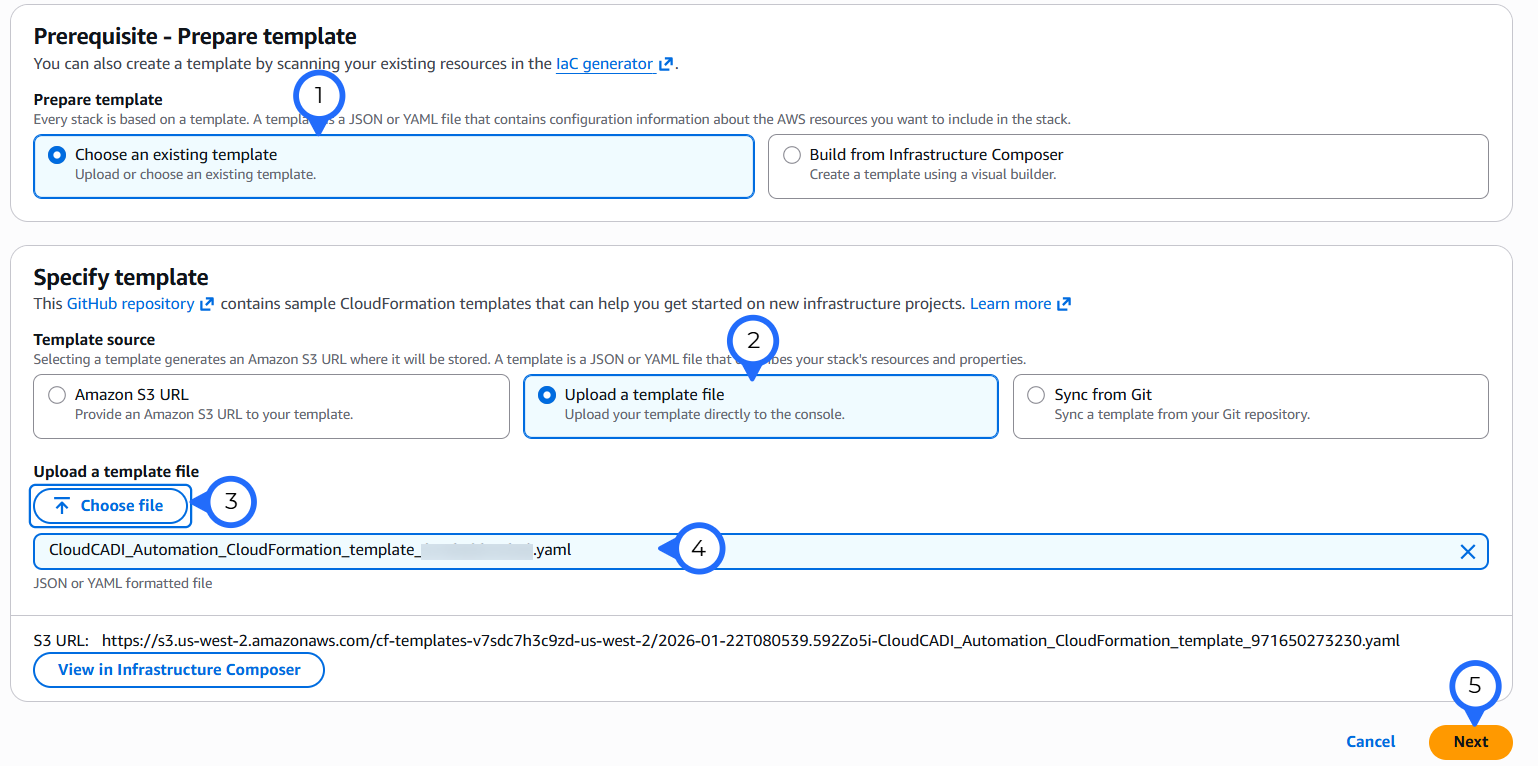
Click Choose an existing template → Upload a template file → Choose a file → Next.
-
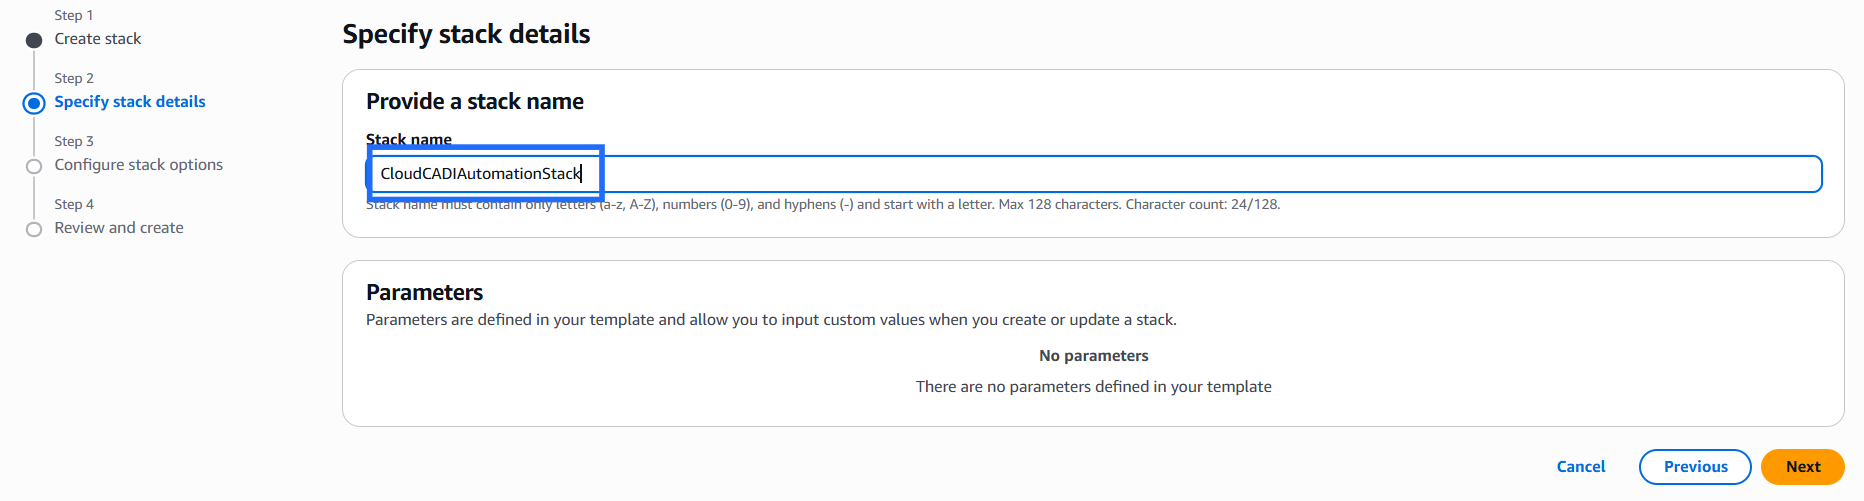
Enter the name - CloudCADIAutomationStack and click Next
-
Enter the tag key and tag value.Click Next.

-
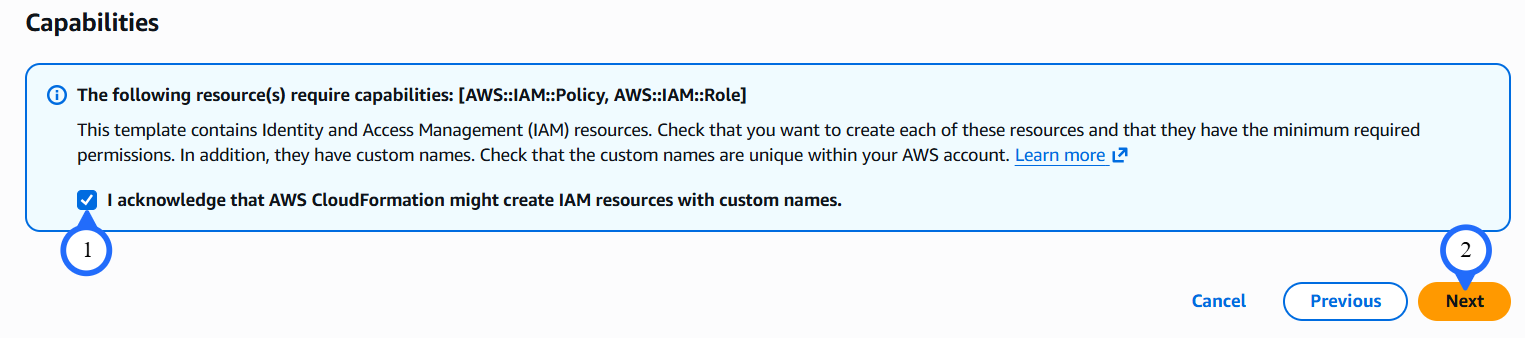
Review the details, and click Submit.
-
Stack will be created and The permission will be attached to the IAM role.

-
Click Save after permission setup to activate automation for enabled services.
Step 2 - Update CloudFormation template
-
To enable automation, navigate to Settings → Integration → Automation and click Enable.
-
Choose CloudFormation
-
Toggle services on or off for which additional automation permissions are required. Only the selected services will be included in the CloudFormation template.
-
Click Download CloudFormation template button , which will have the updated template.
-
Select the existing stack -CloudCADIAutomationStack and click Update Stack → Make a direct update.

-
In the update stack click Replace existing template → Upload a template file → Choose a file → Upload the updated CloudFormatiion template → Next.
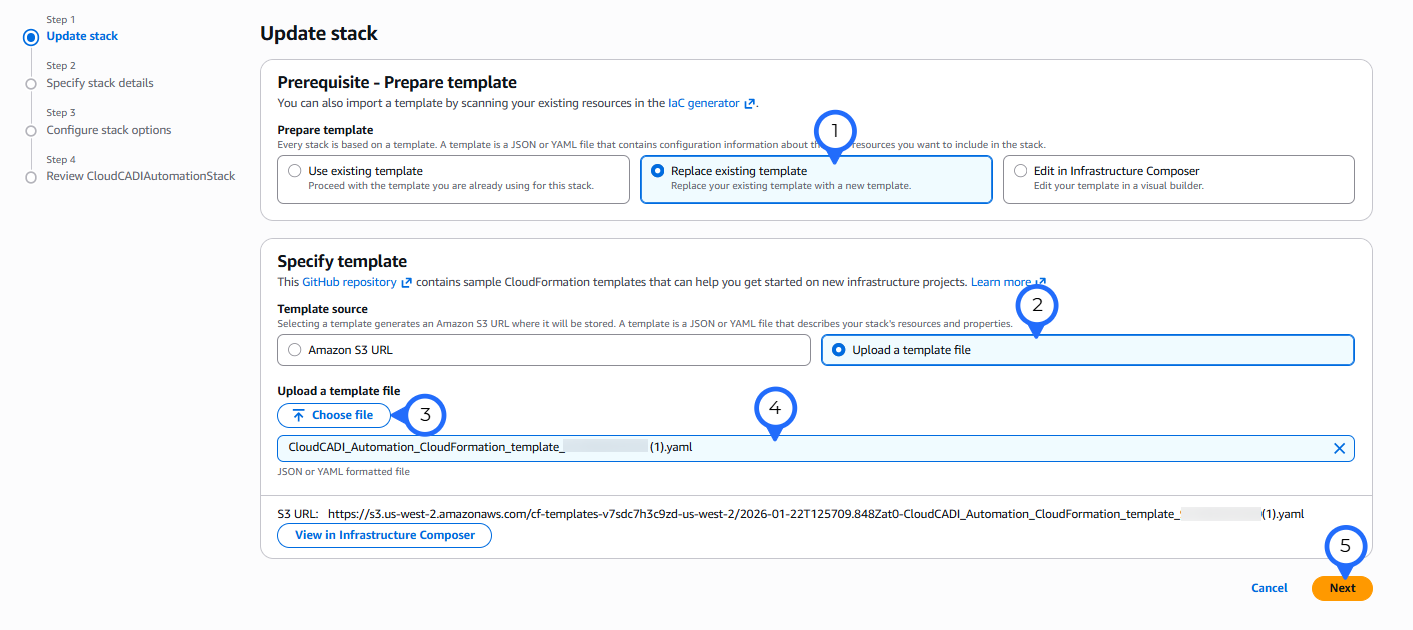
-
Click Next and Enter the tag key and tag value.Click Next.


-
Review the details, and click Submit.
-
Stack will be Updated and The permission will be attached to the IAM role.

-
Click Save after permission setup to activate automation for enabled services.
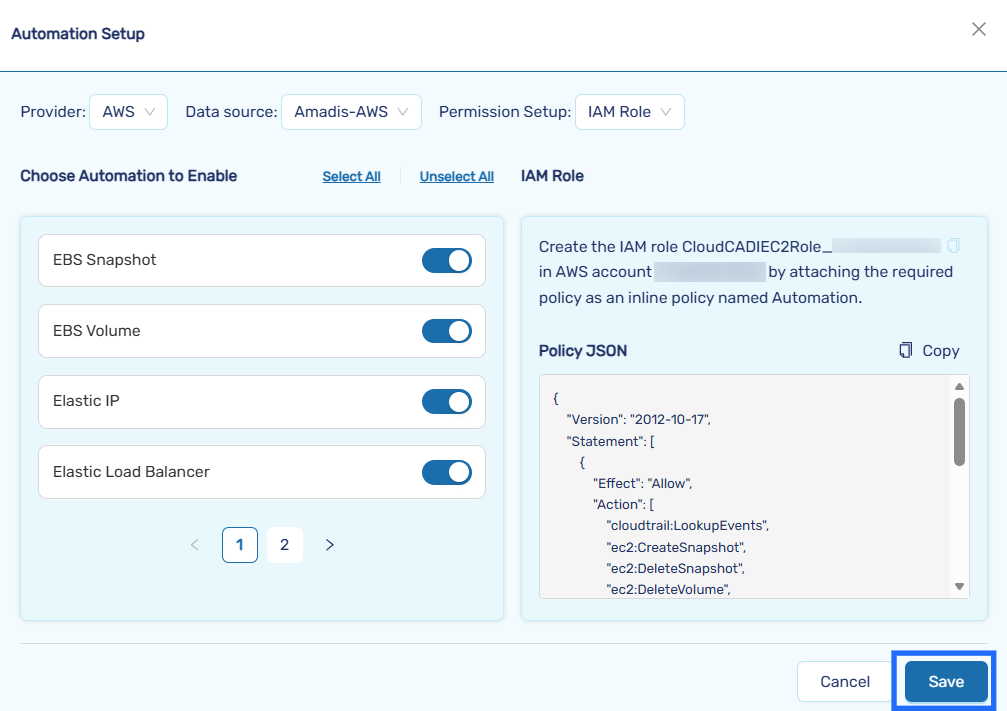
IAM role
- The IAM Role setup allows manual control over permissions by attaching a generated policy to an existing IAM role.
Step 1 - Create IAM policy
-
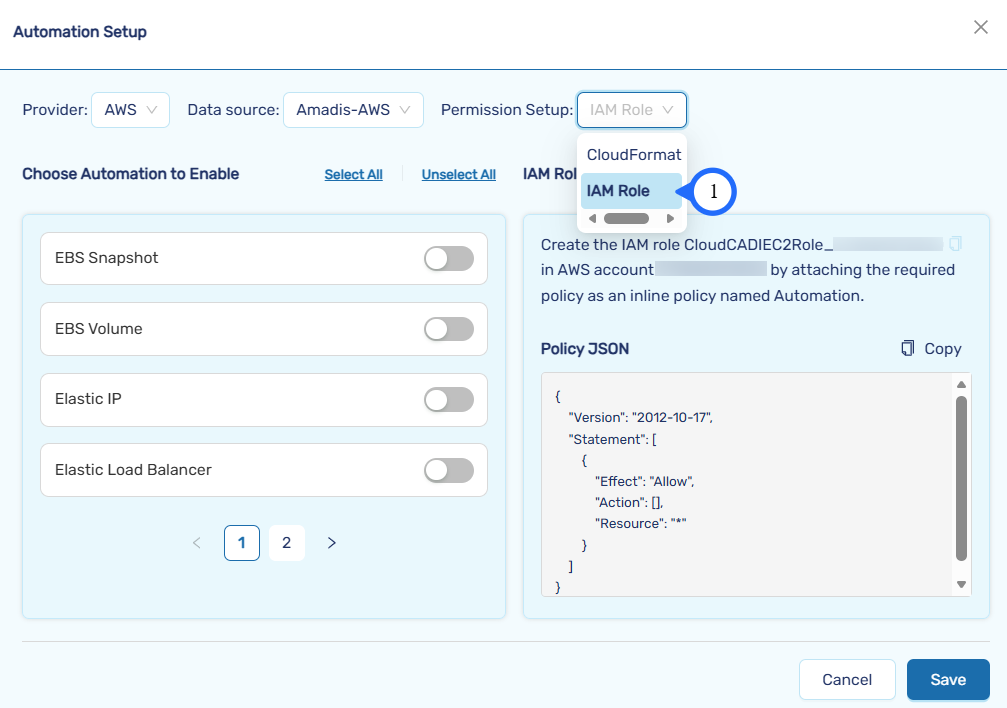
To enable automation, navigate to Settings → Integration → Automation and click Enable.
-
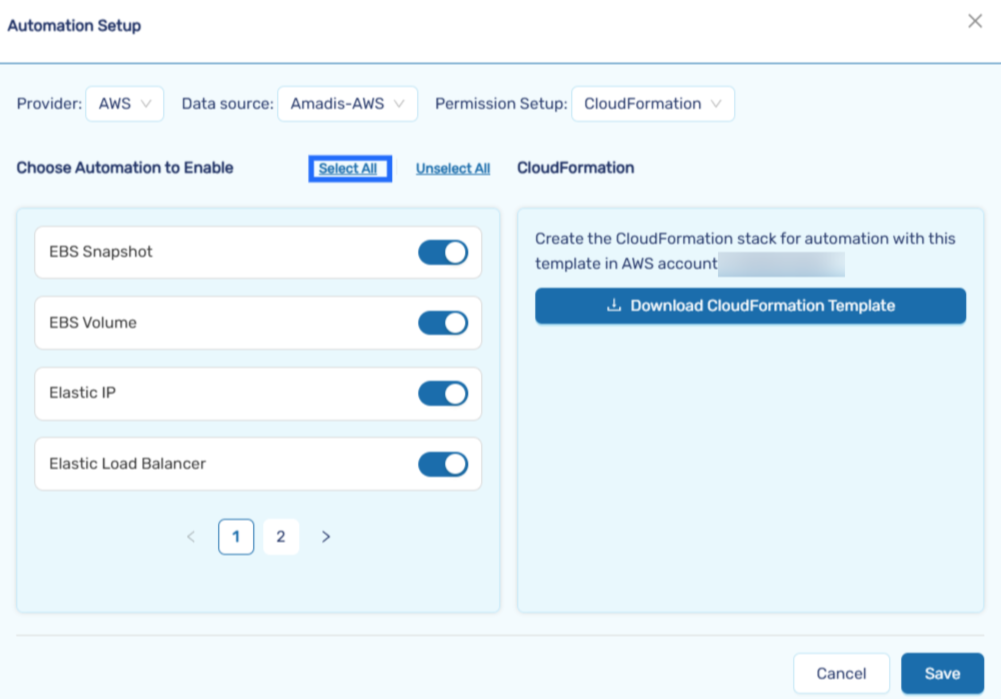
Choose IAM role
-
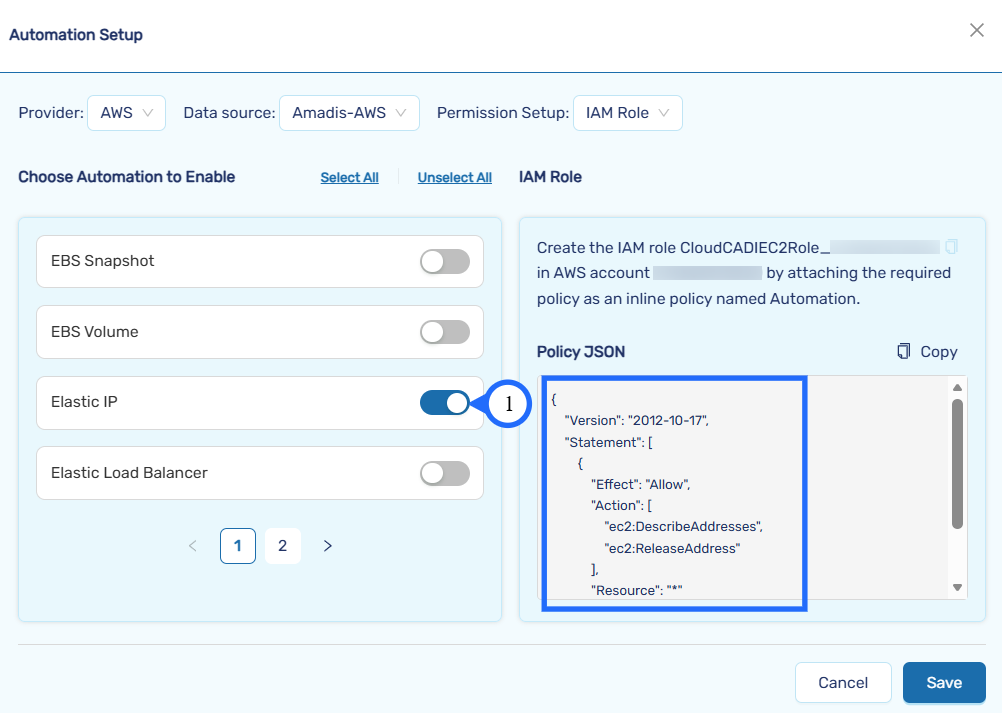
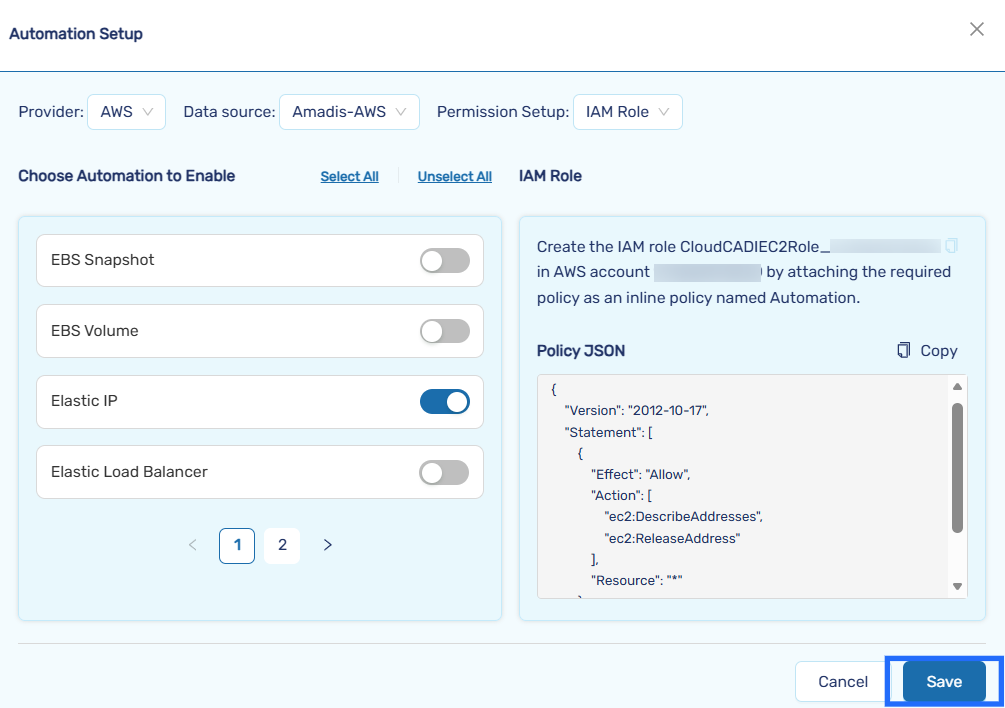
Enable the toggle for each required service to generate the corresponding IAM permissions.Use select all if you want to enable all the automation services.
-
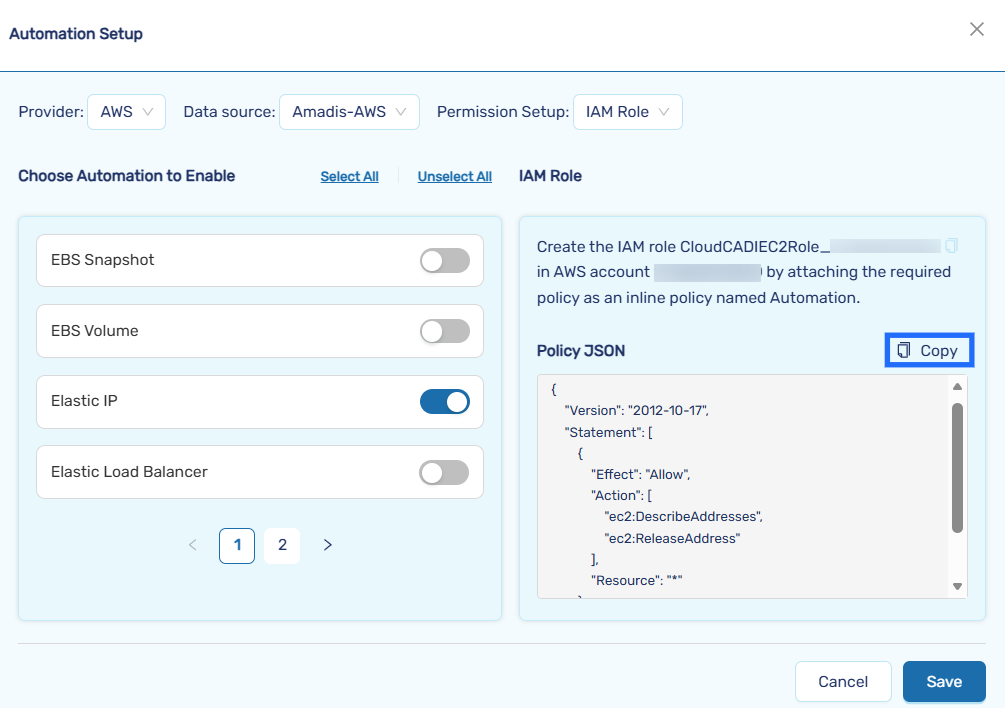
Copy the generated policy JSON
-
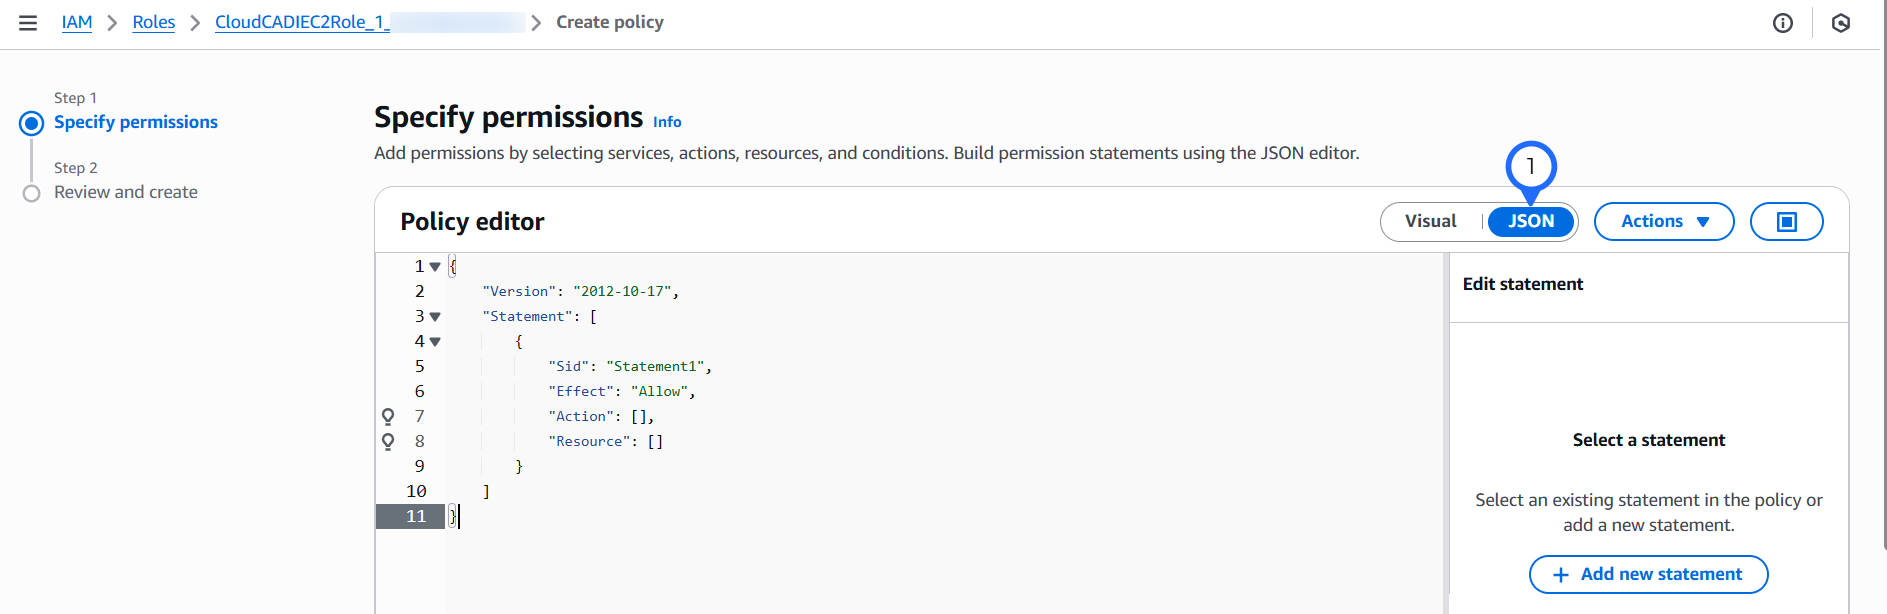
Select the IAM role and Click Add permission → Create inline policy


-
In the Specify permissions switch to JSON and then paste the copied policy JSON and click Next.
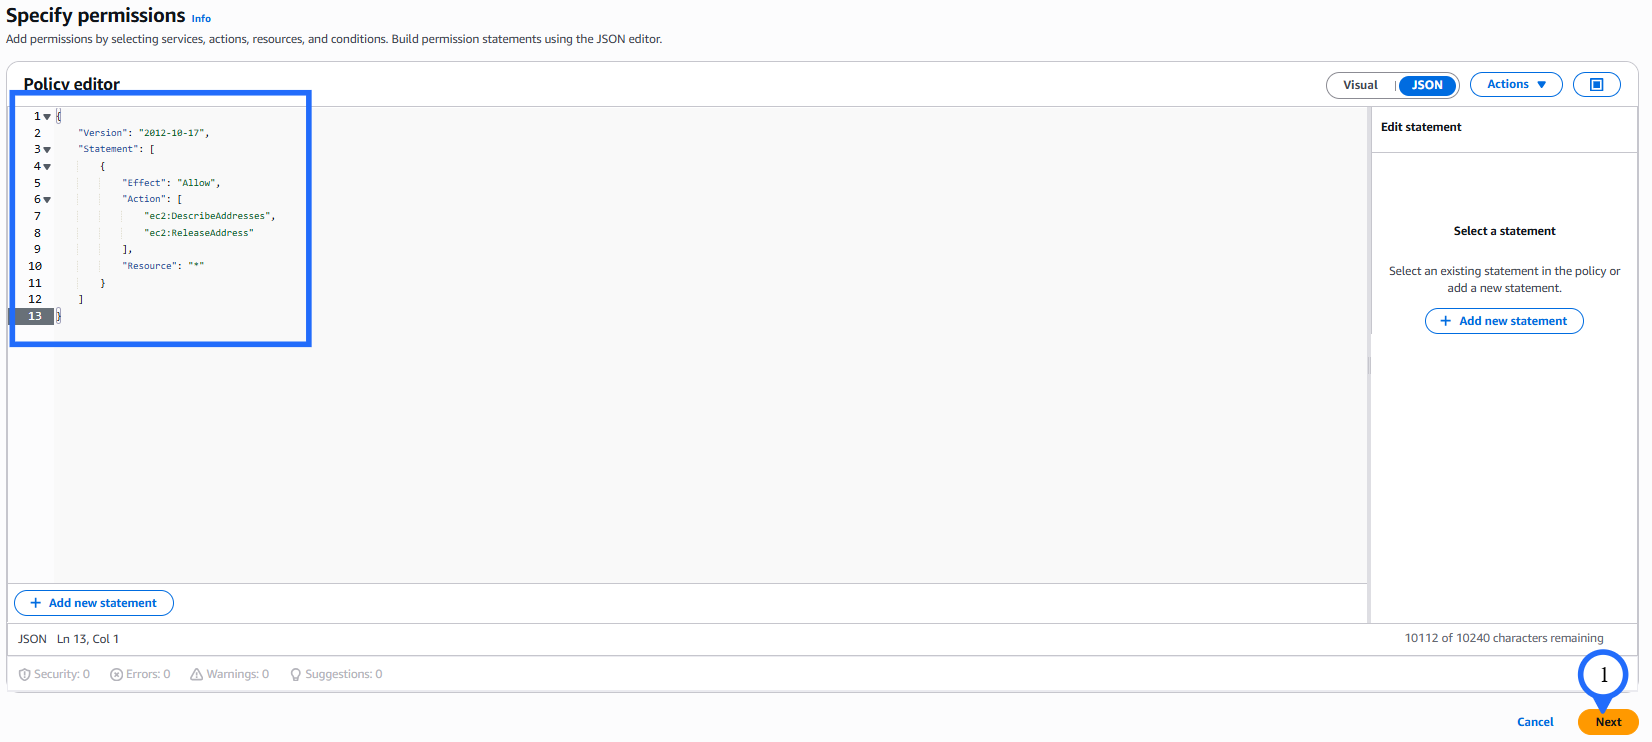
-
Enter the name - CloudCADIAutomationPolicy and click Create Policy, policy will be attached for the IAM role.


-
Click Save after permission setup to activate automation for enabled services.
Step 2 - Update IAM policy
-
To enable automation, navigate to Settings → Integration → Automation and click Enable.
-
Choose IAM role
-
Enable or disable service toggles to generate updated IAM permissions. Use Select All to enable all services, then copy the policy JSON.

-
Select the IAM role and Select the exiting policy - CloudCADIAutomationPolicy and click Edit.
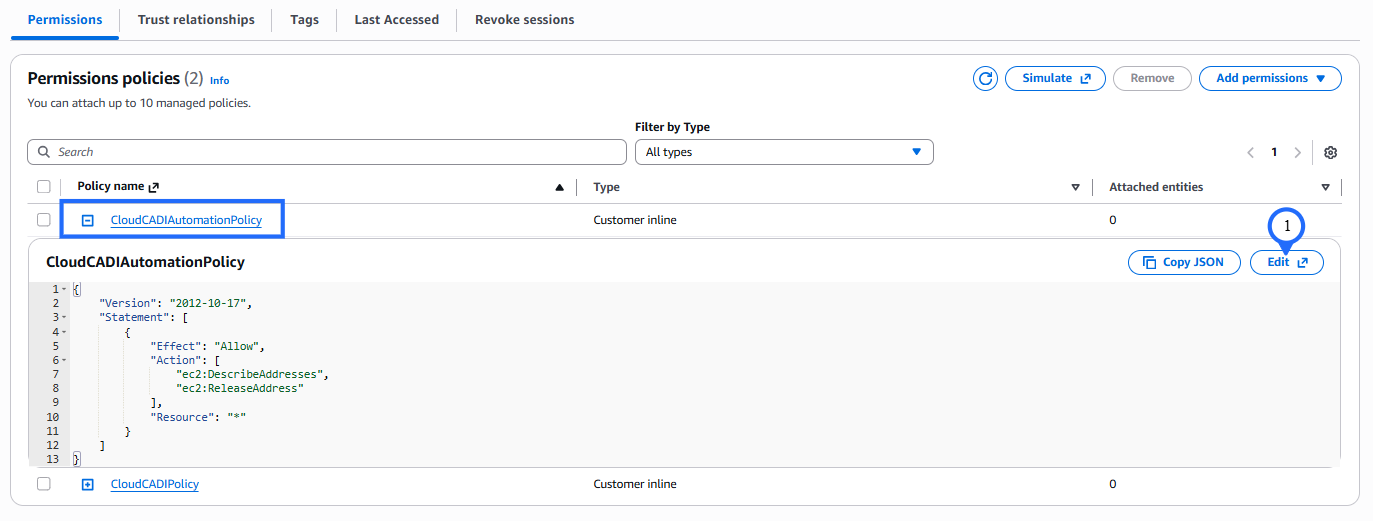
-
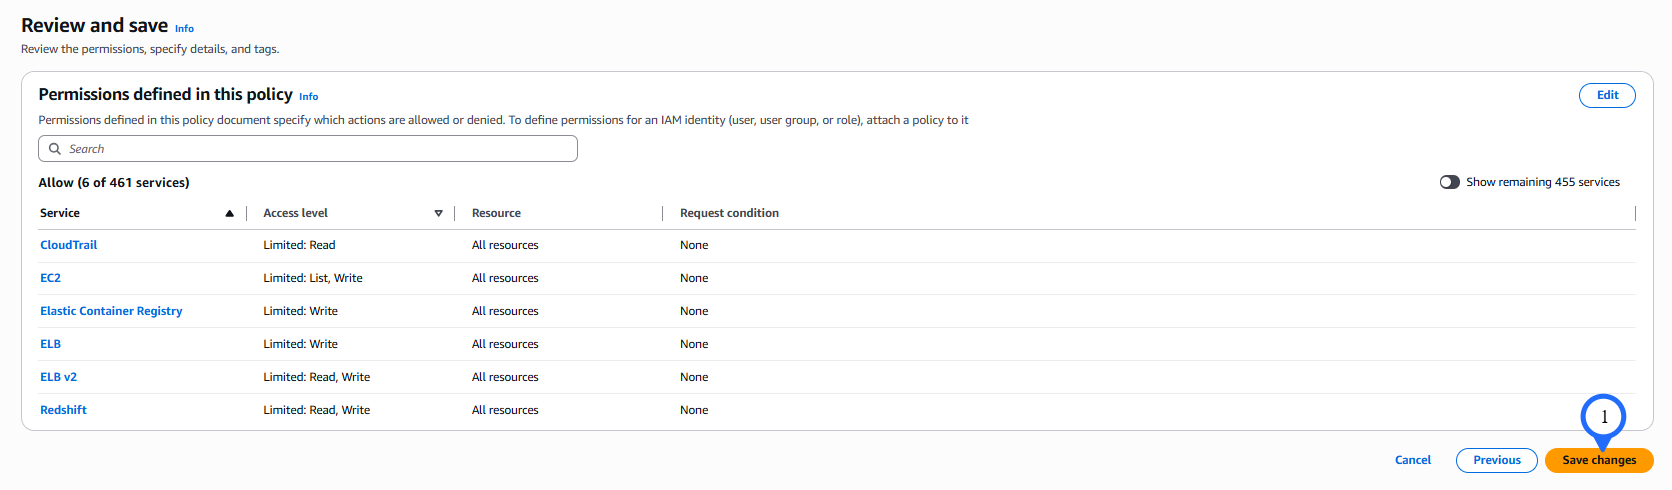
In the Modify permissions switch to JSON and then paste the copied policy JSON and click Next.
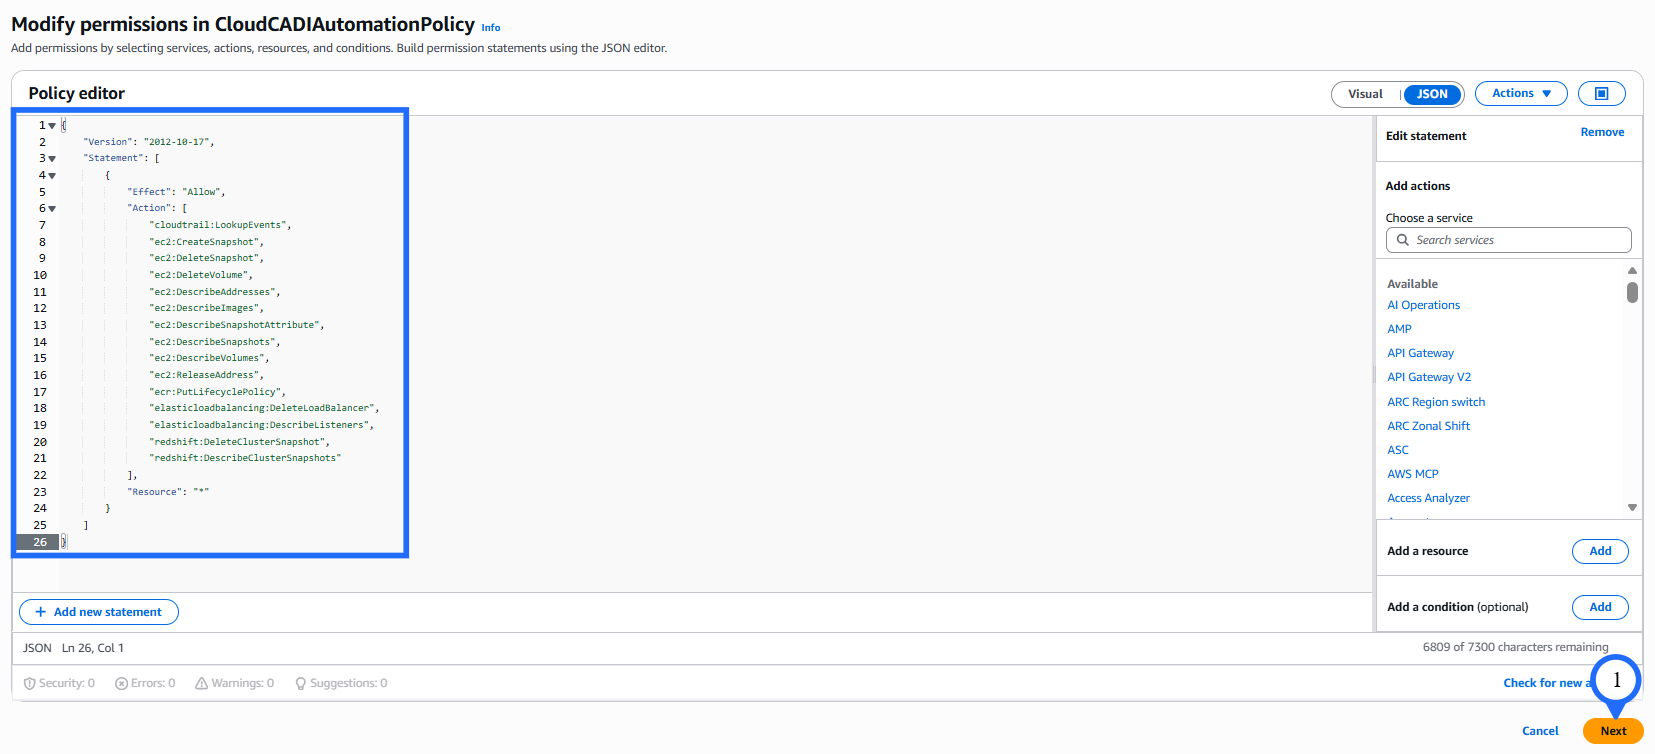
-
Review and click Save Changes, policy will be updated for the IAM role.
-
Click Save after permission setup to activate automation for enabled services.