CloudFormation Stack Deployment
Step 1 - CloudFormation
Note
CloudCADI is recommended to be deployed in the management account
Steps to create stack :
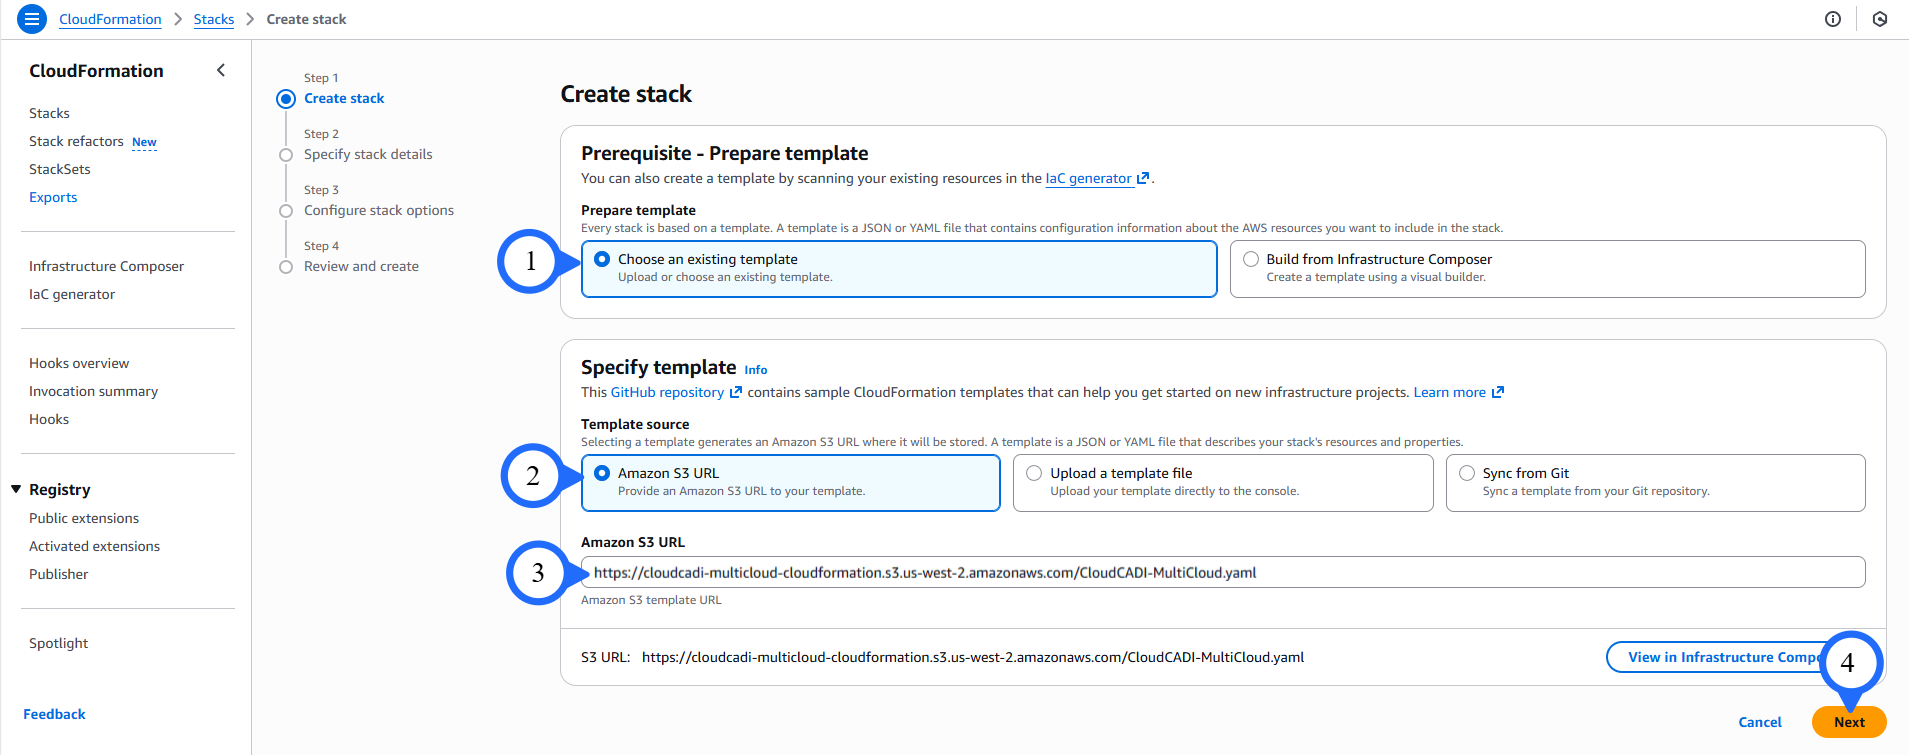
- Go to the AWS CloudFormation Console.
- Select Choose an Existing Template.
- Under Specify template, select Amazon S3 URL.
- Copy the following Amazon S3 URL and paste it into the Amazon S3 URL field:
https://cloudcadi-deployment.s3.us-east-1.amazonaws.com/CloudCADI-Multicloud-deployment.yaml - Proceed to click on Next.
Step 2 - Specify Stack Details
-
Provide the following details:
Stack name:
CloudCADI-MultiCloudEC2InstanceType:
m5.largePort 22 (SSHCIDR): Enter 0.0.0.0/0 (used only for EC2 Instance Connect).
Port 80 (HTTPCIDR): Enter your public IP or 0.0.0.0/0 to access CloudCADI UI.
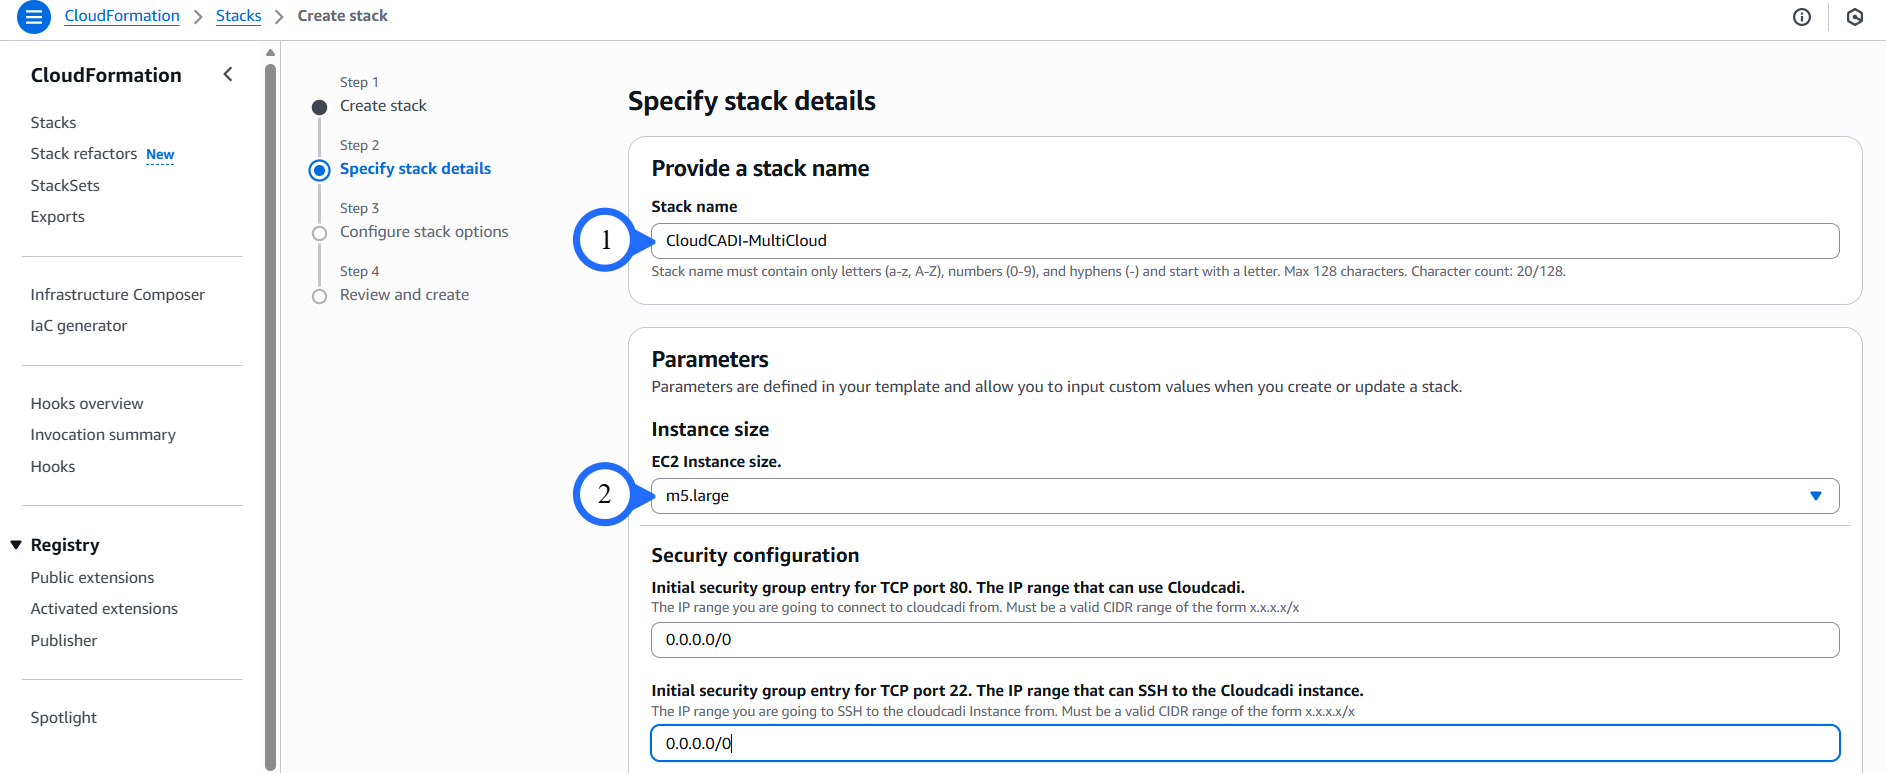
S3 bucket name: Enter the bucket name. (Refer to Cost & Usage Data Export)
DBName: Enter the database name.
DBPassword: Enter the database password.
DBUsername: Enter the database username.

-
Proceed to click on Next.
Step 3 - Configure Stack Options
Add the tags & click Next.

Step 4 - IAM Access Configuration
- Acknowledge the creation of IAM custom roles by the CloudFormation template.
- Review the configuration and click Submit.

- Resource creation may take up to 15 minutes.
Step 5 - Accessing CloudCADI
- Once the stack creation is complete, navigate to: CloudFormation → Stacks
- Select the newly created CloudCADI stack.
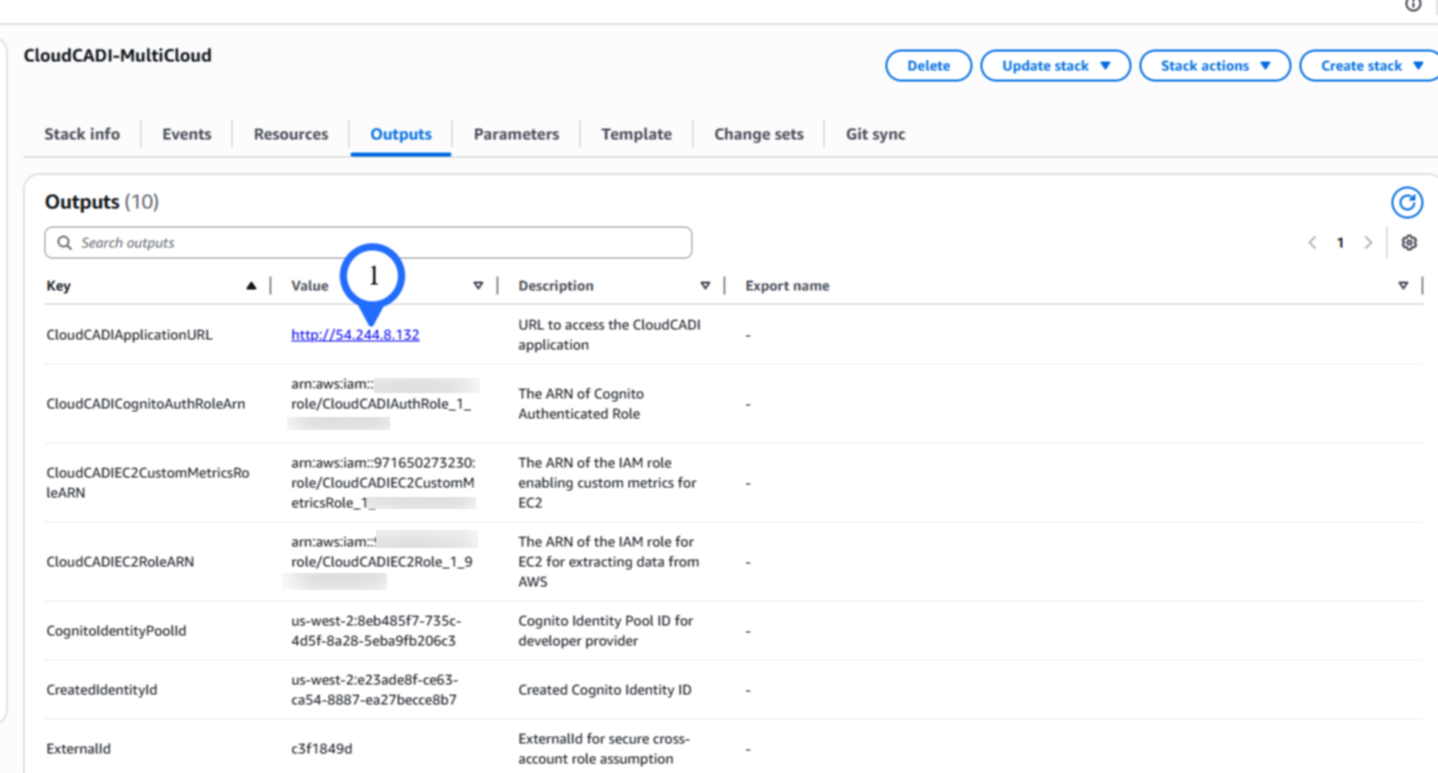
- Access the CloudCADI application URL from the stack outputs.
- You will be redirected to the CloudCADI login page.