Azure Tenant Onboarding
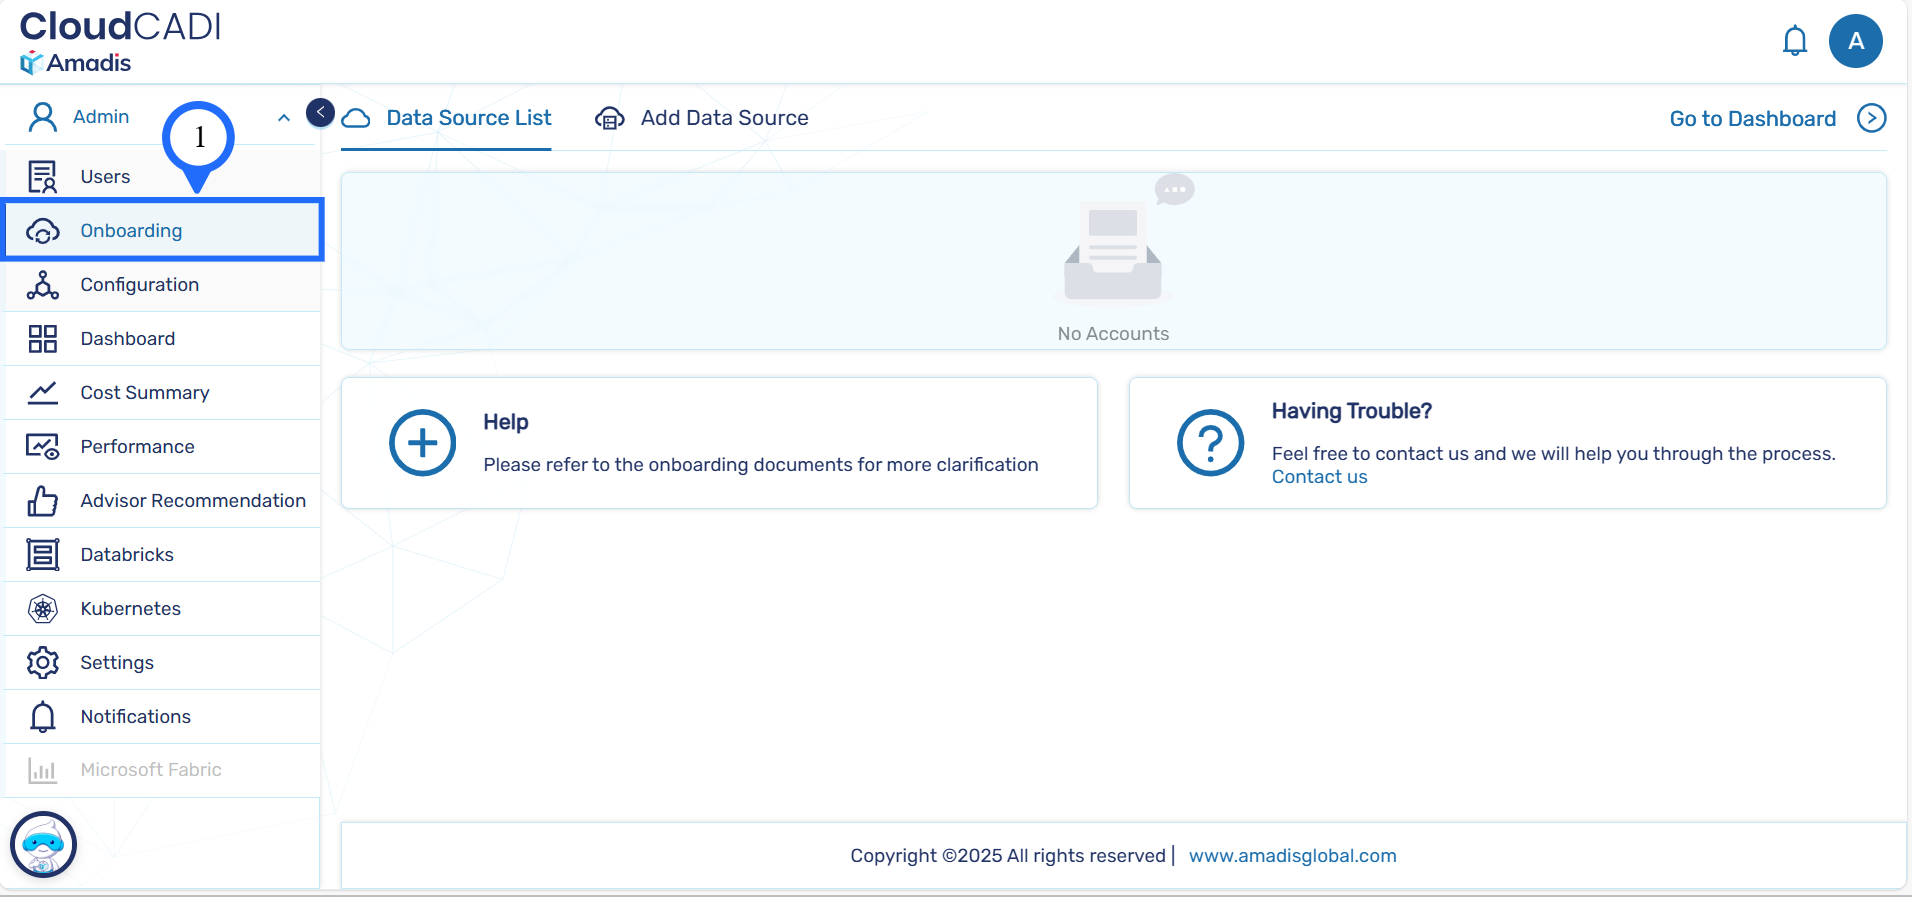
Step 1: Access the CloudCADI Onboarding Section
-
Log in to CloudCADI using an Admin account.
-
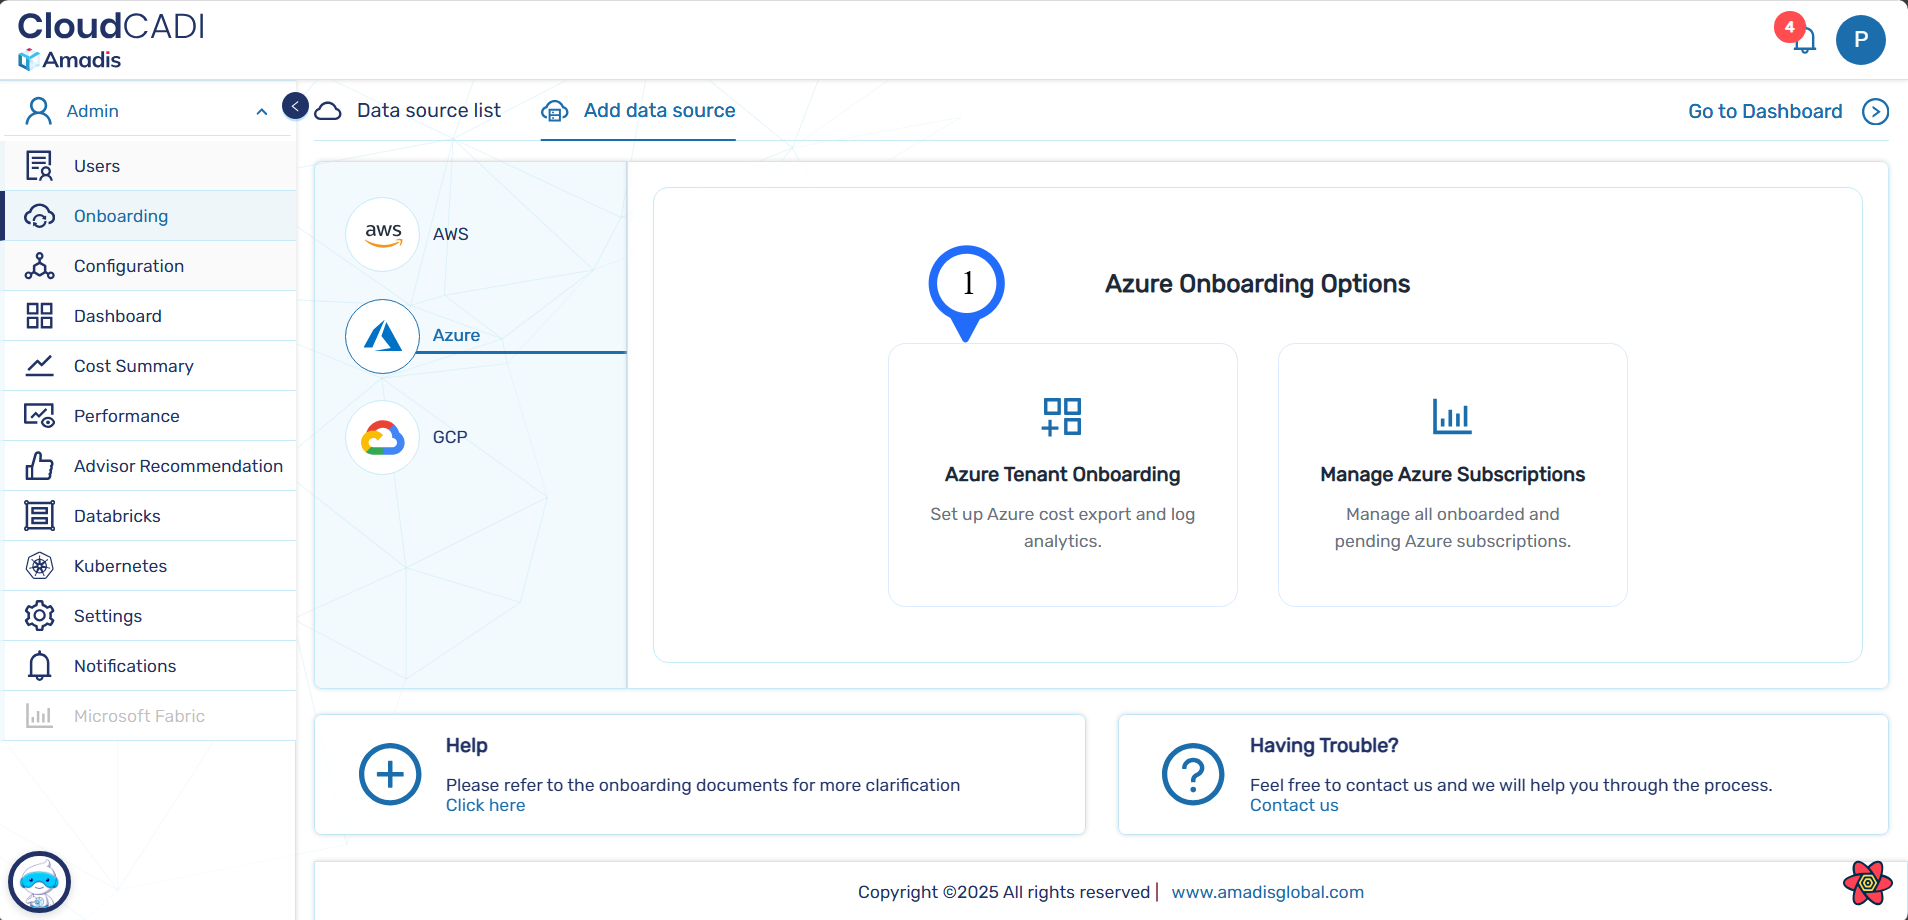
From the left navigation menu, click Onboarding.
-
You will be redirected to the Data Source List page.
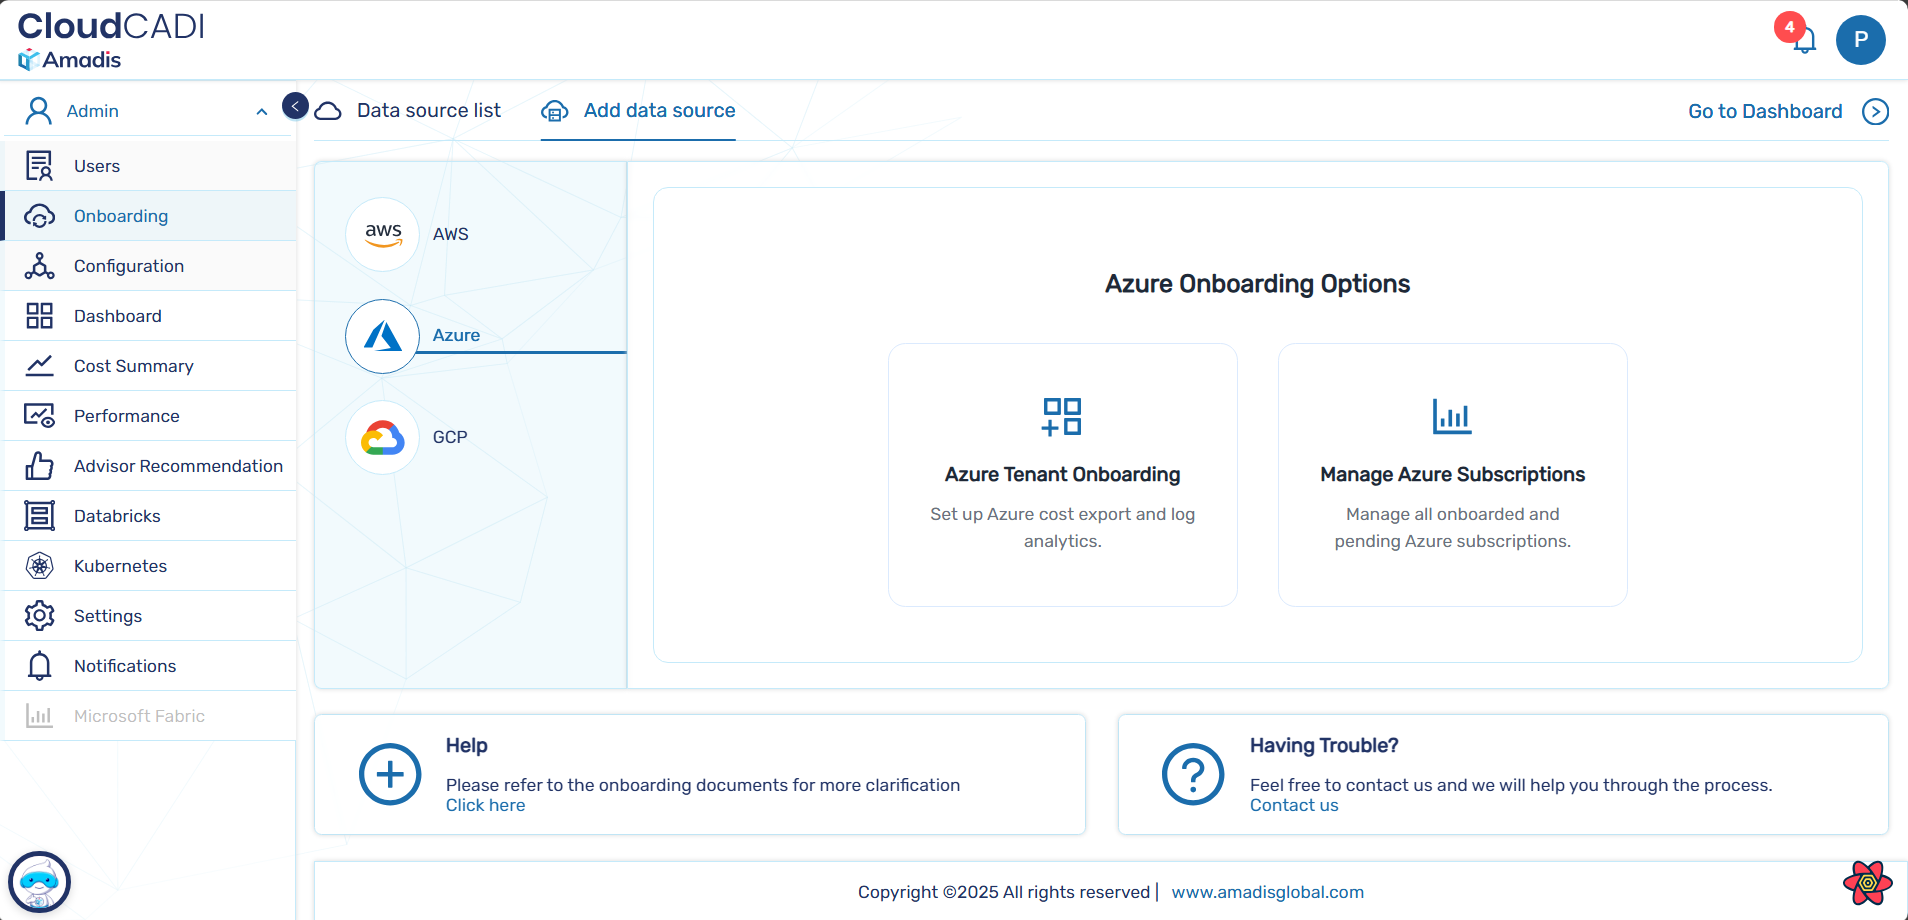
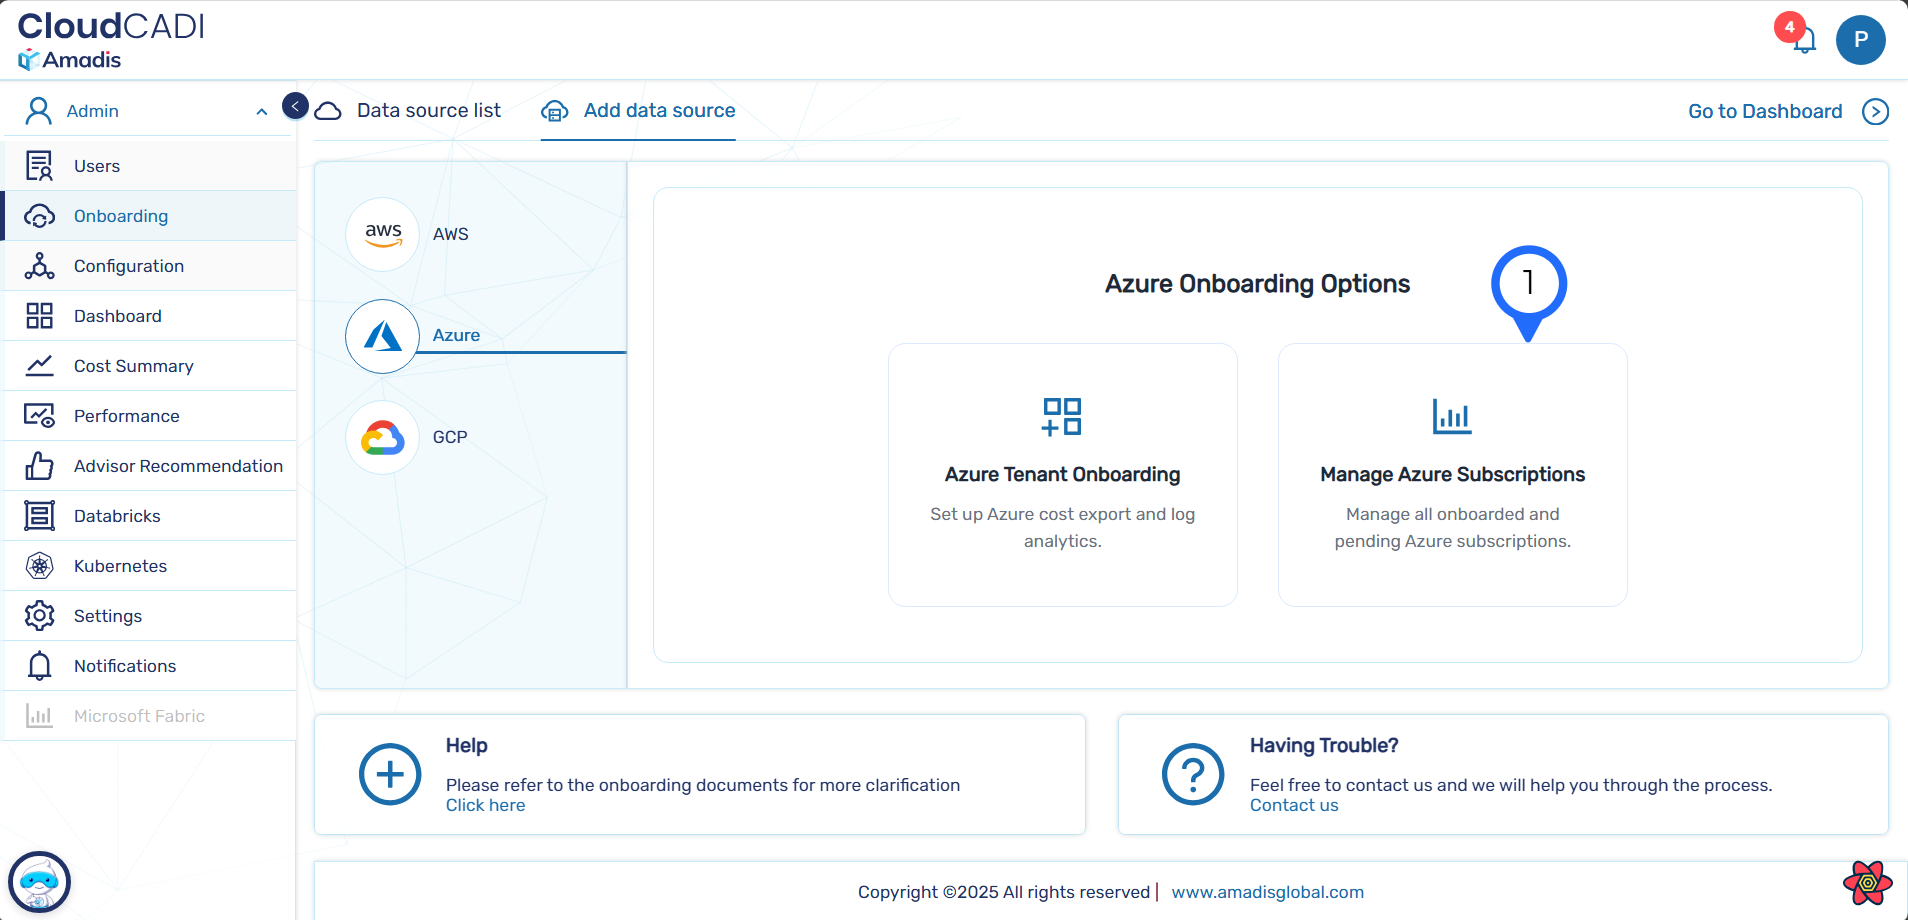
Step 2: Add a New Data Source
- Click Add Data Source at the top of the page.
- From the list of cloud providers, select Azure.
-
There are two types of onboarding options.
- Azure Tenant Onboarding
- Manage Azure Subscriptions
Azure Tenant Onboarding
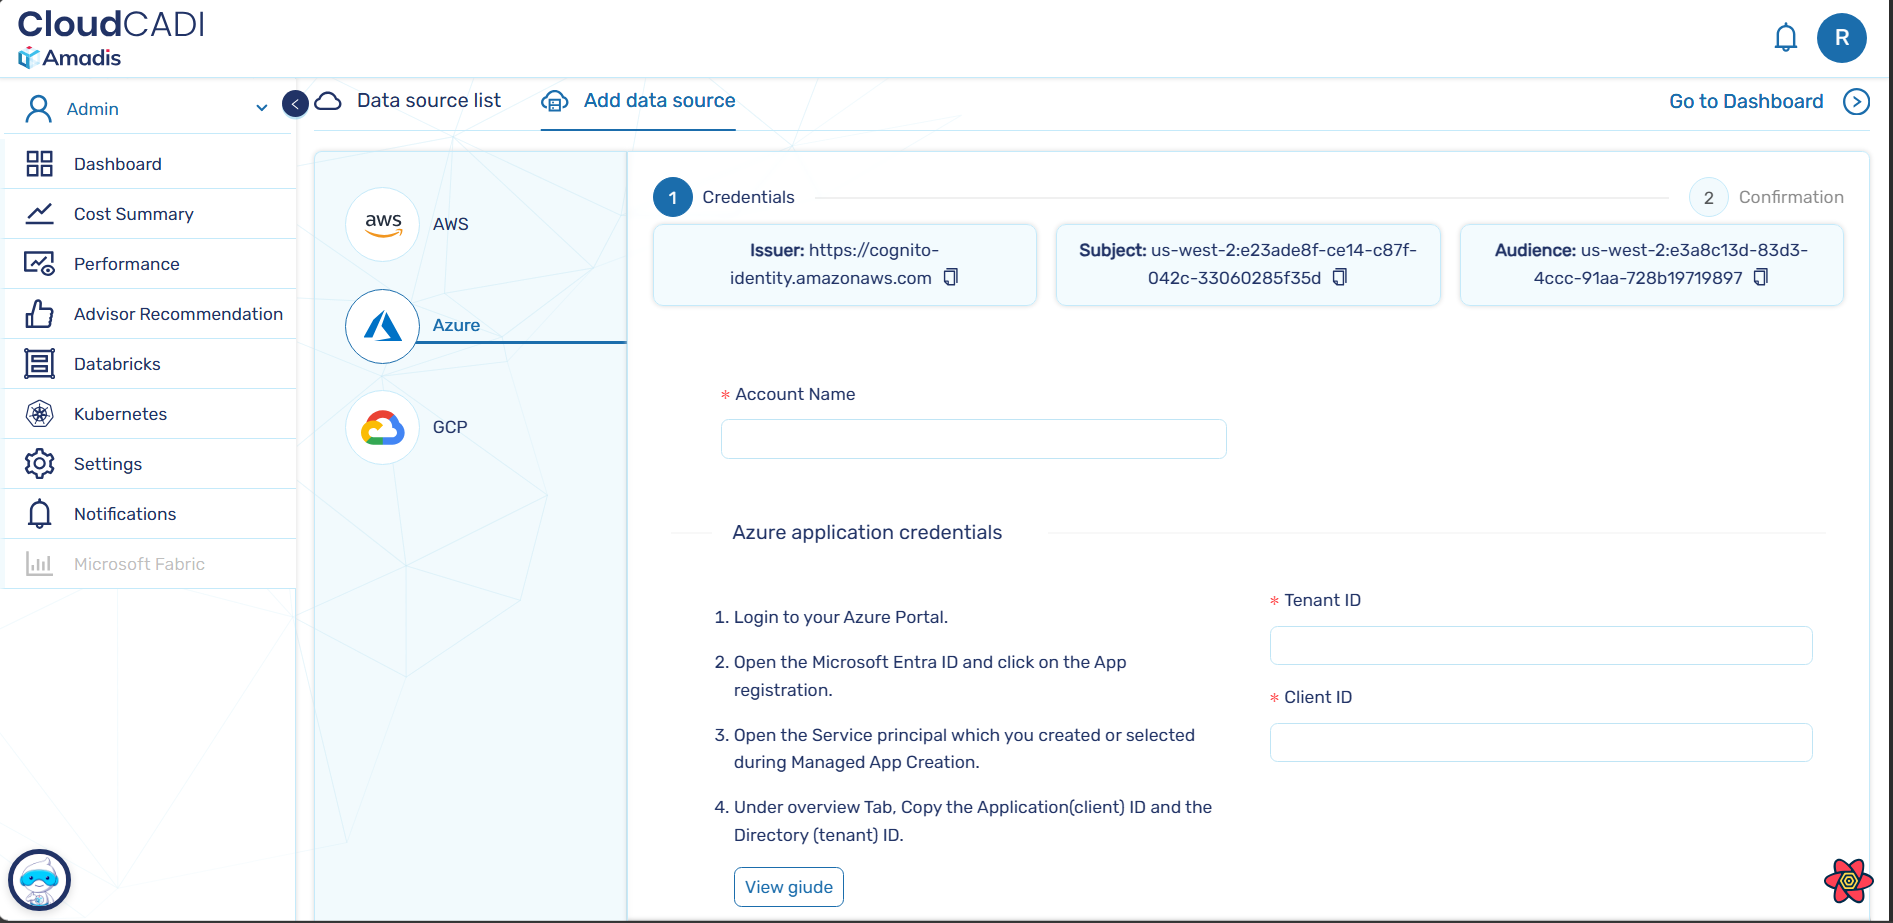
- Select Azure Tenant Onboarding.
- Enter the required fields Acount name and DCR name(Data Collection Rule).
- Get the tenant,client details from the Azure portal.
- Get the Workspace Id from Azure portal.
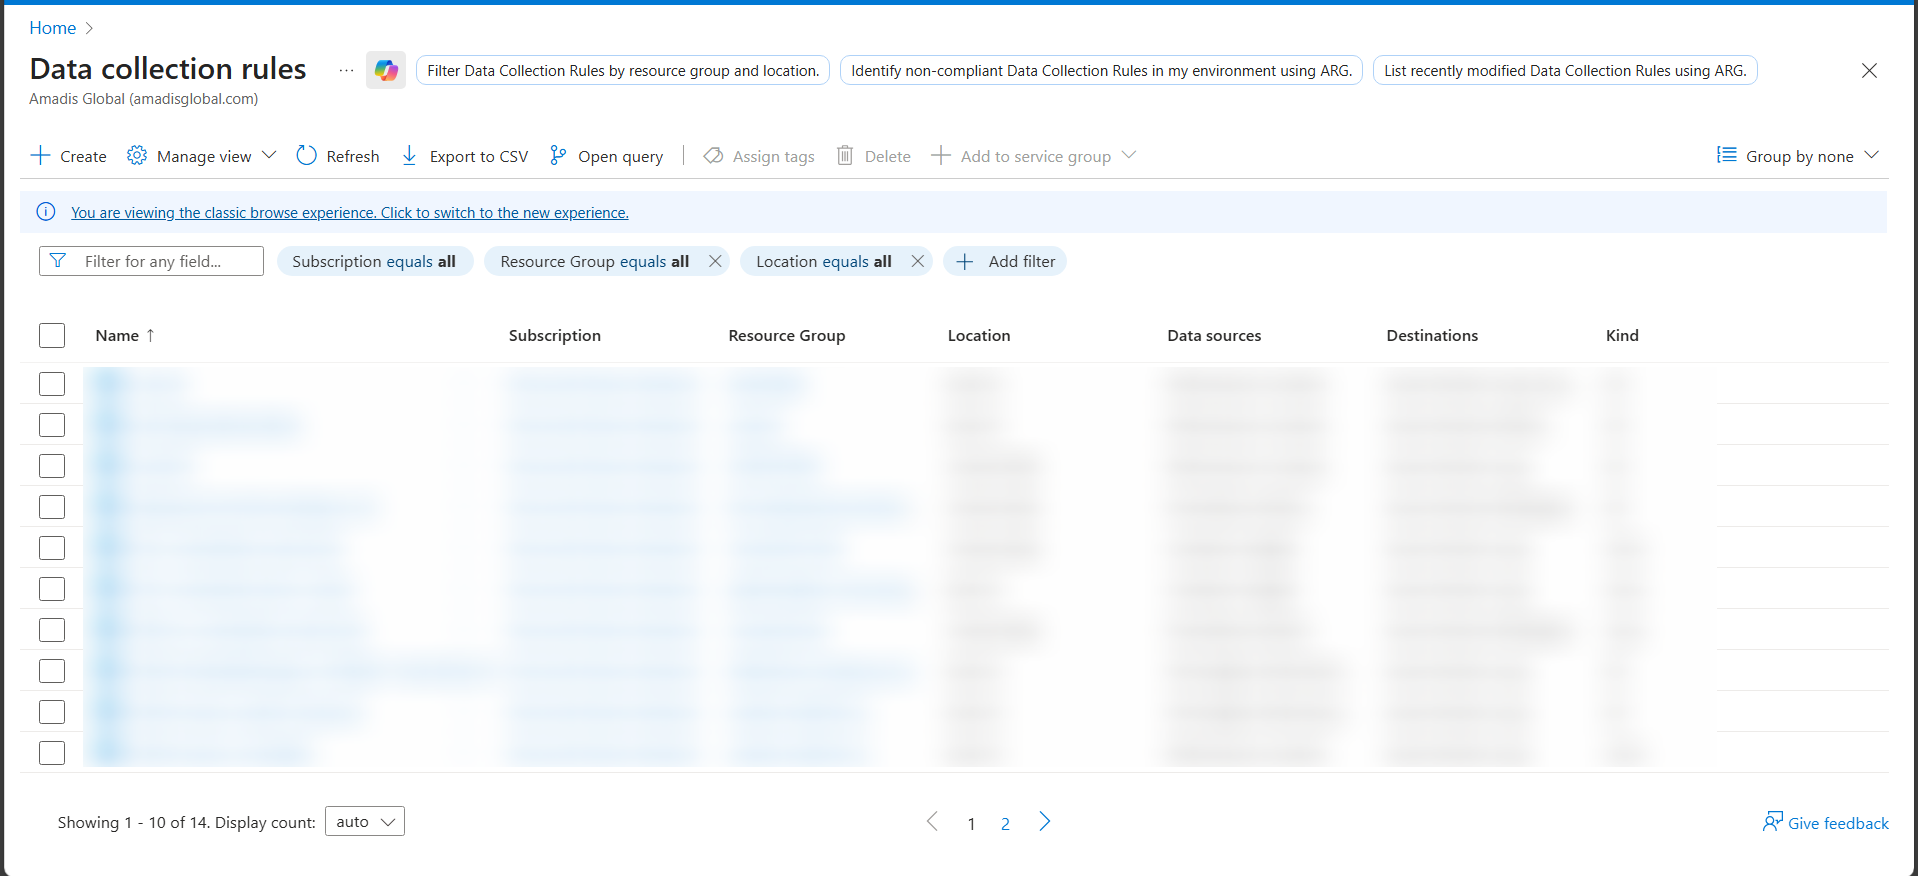
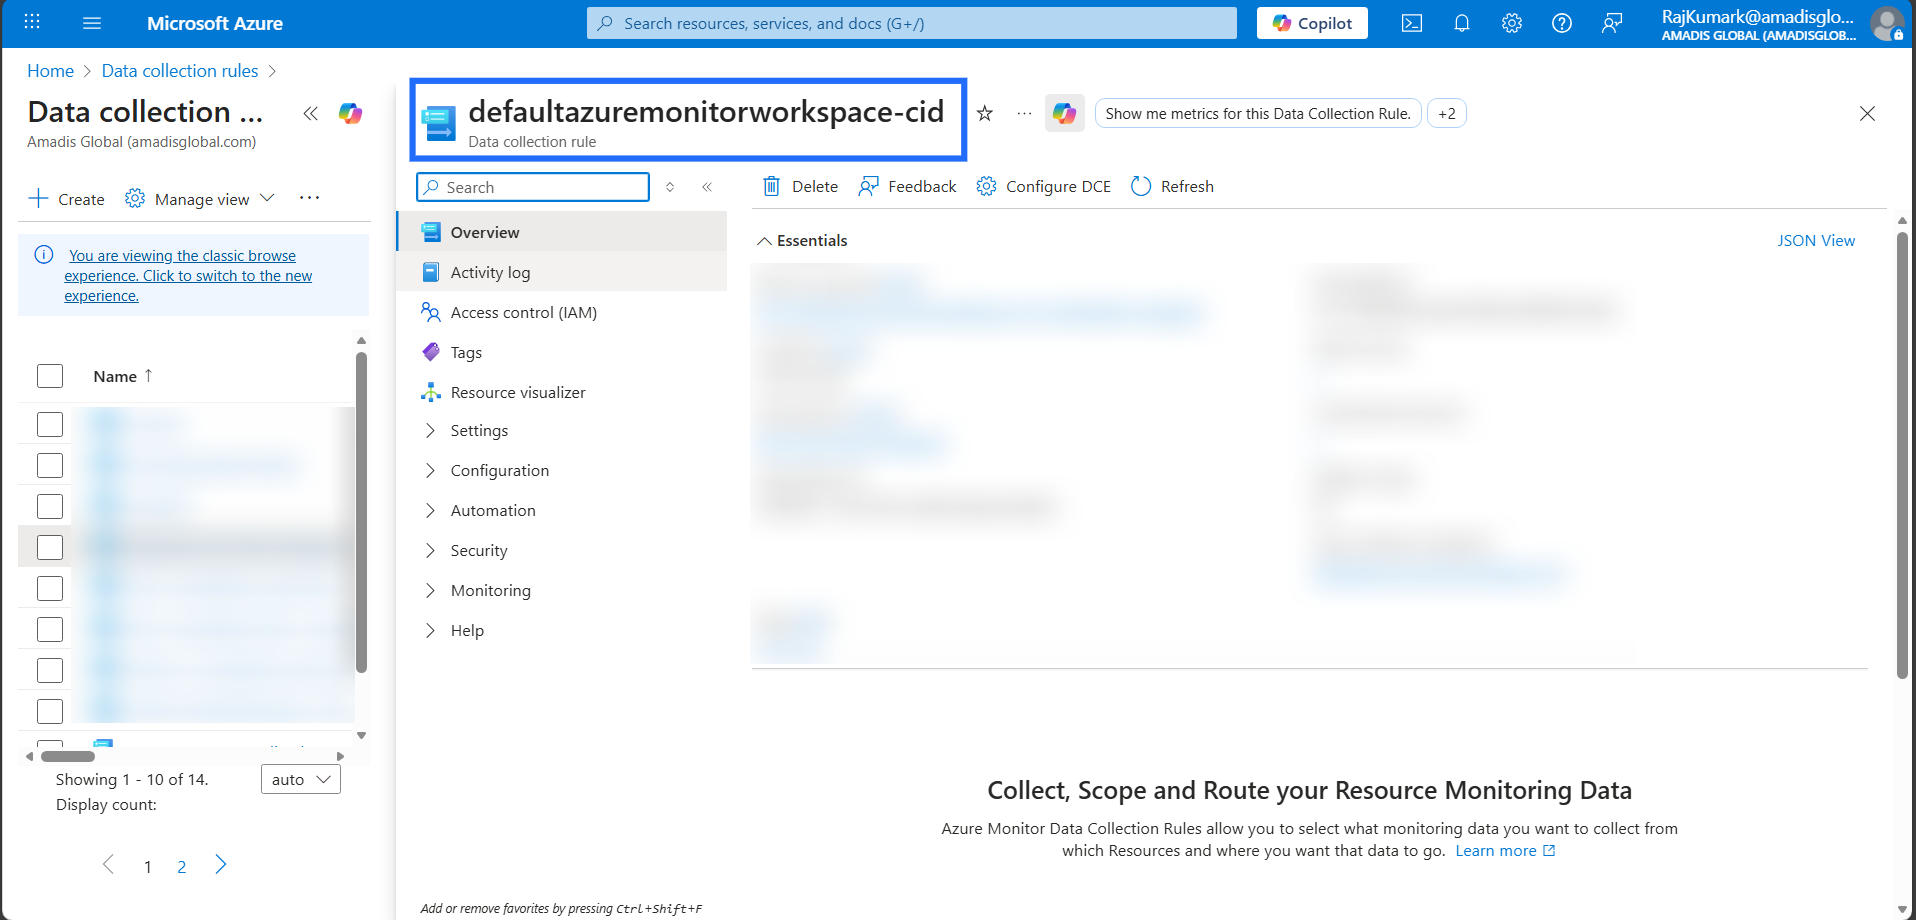
How to get DCR name ?
- Login to your Azure Portal.
- Search for "Data Collection Rules".
- Select the name which you have created during the setting up of data collection rule.
How to get Tenant Id, Client Id ?
- Login to your Azure Portal.
- Open the Microsoft Entra ID and click on the App registration.
- Open the Service principal which you created or selected during Managed App Creation.
- Under overview Tab, Copy the Application(client) ID and the Directory (tenant) ID.

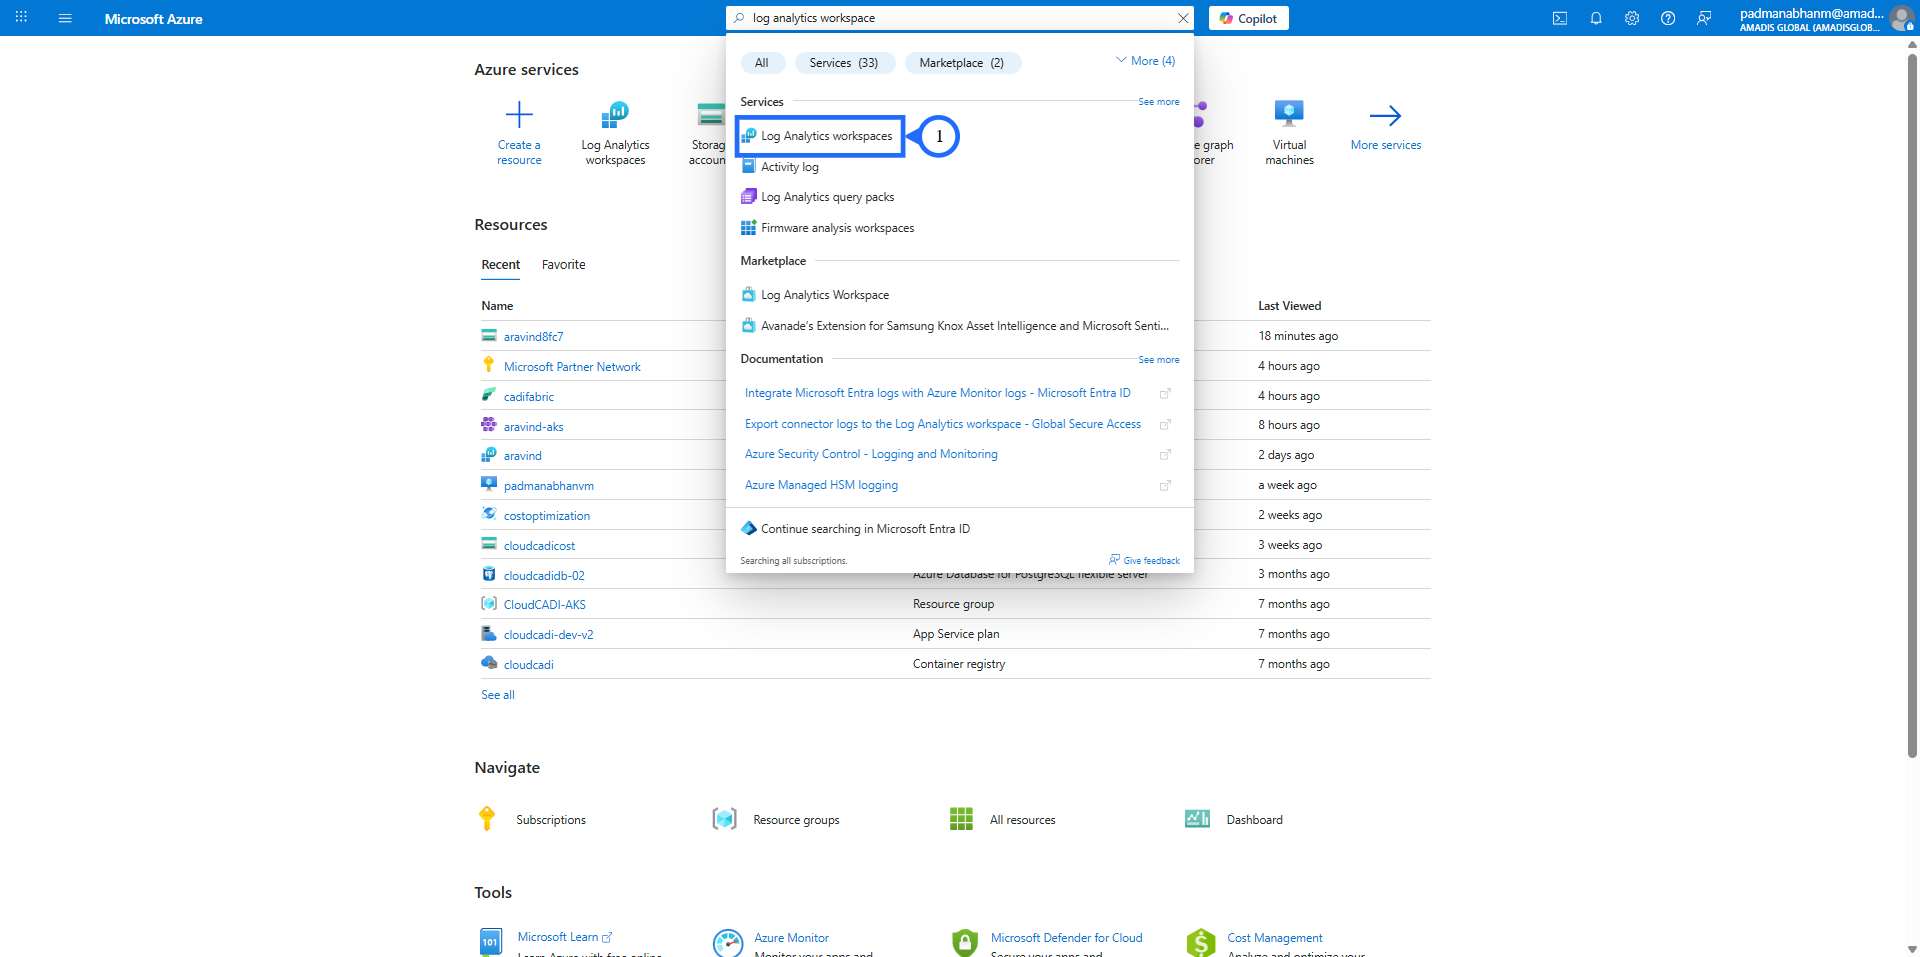
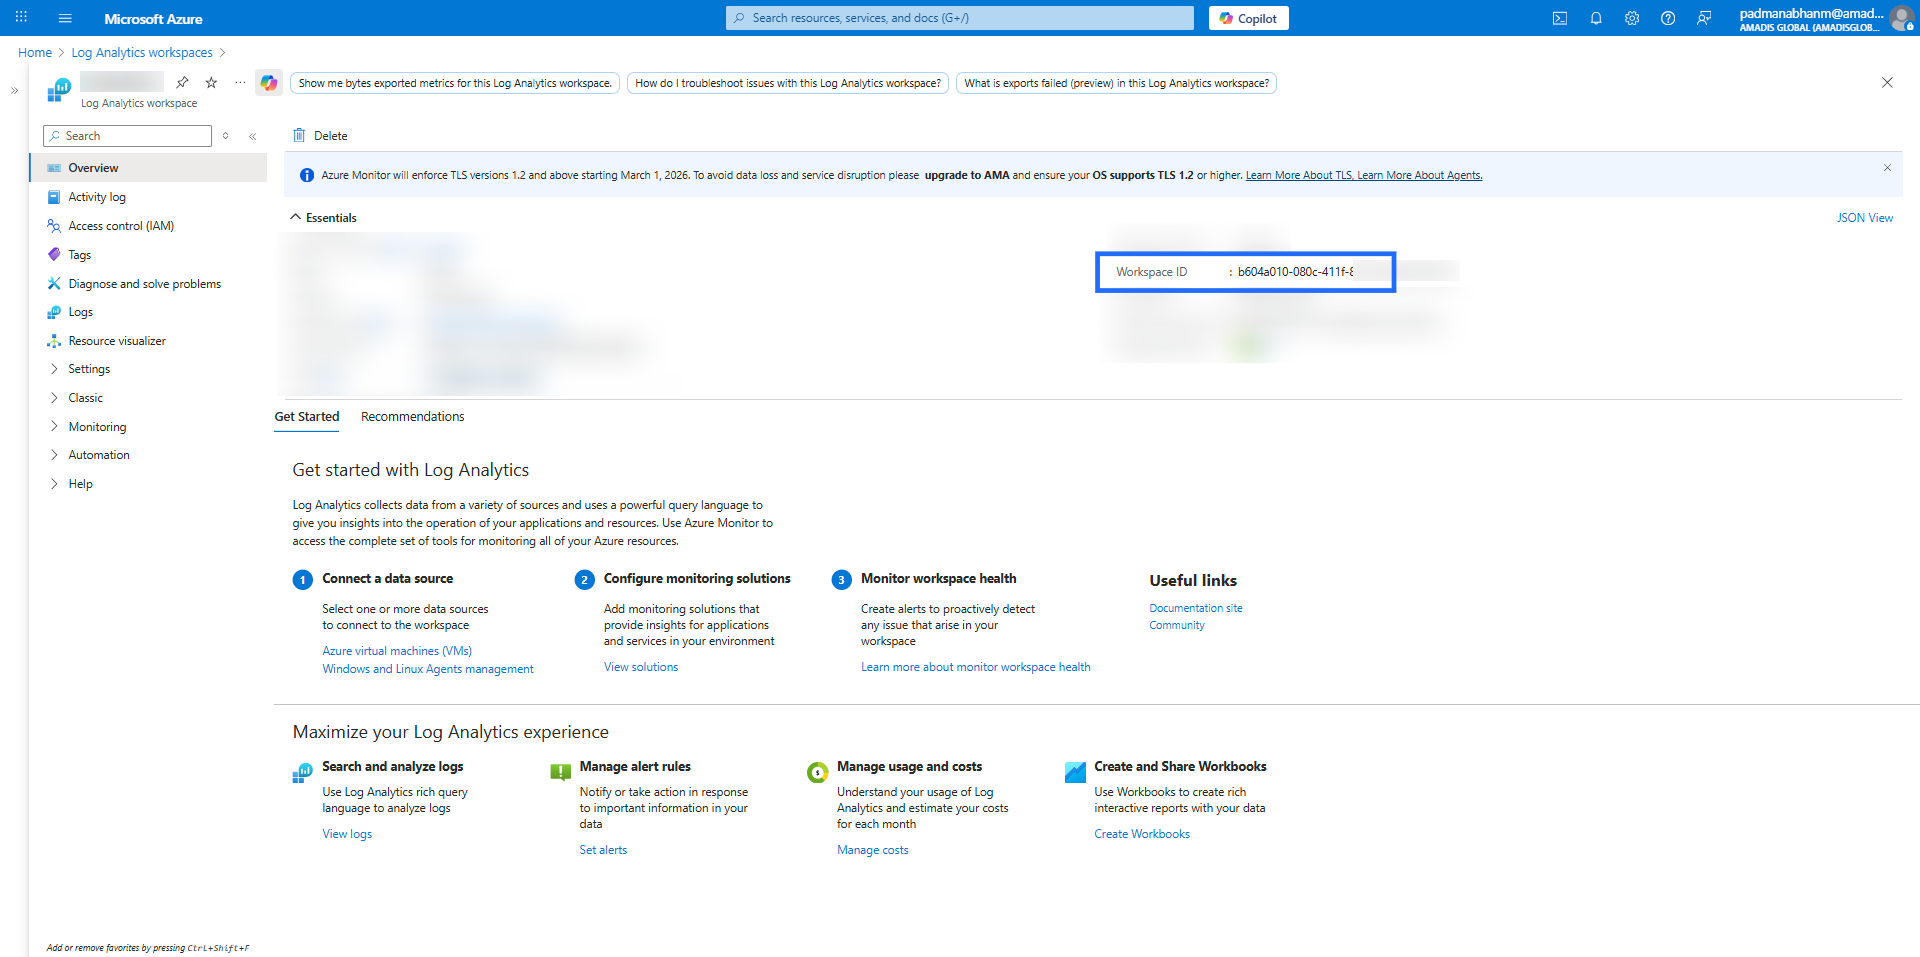
How to get Workspace Id?
- Login to your Azure Portal.
- Search for "Log Analytics workspaces", go to your workspace where diagostice settings is enabled for all resources and get the "workspace Id".
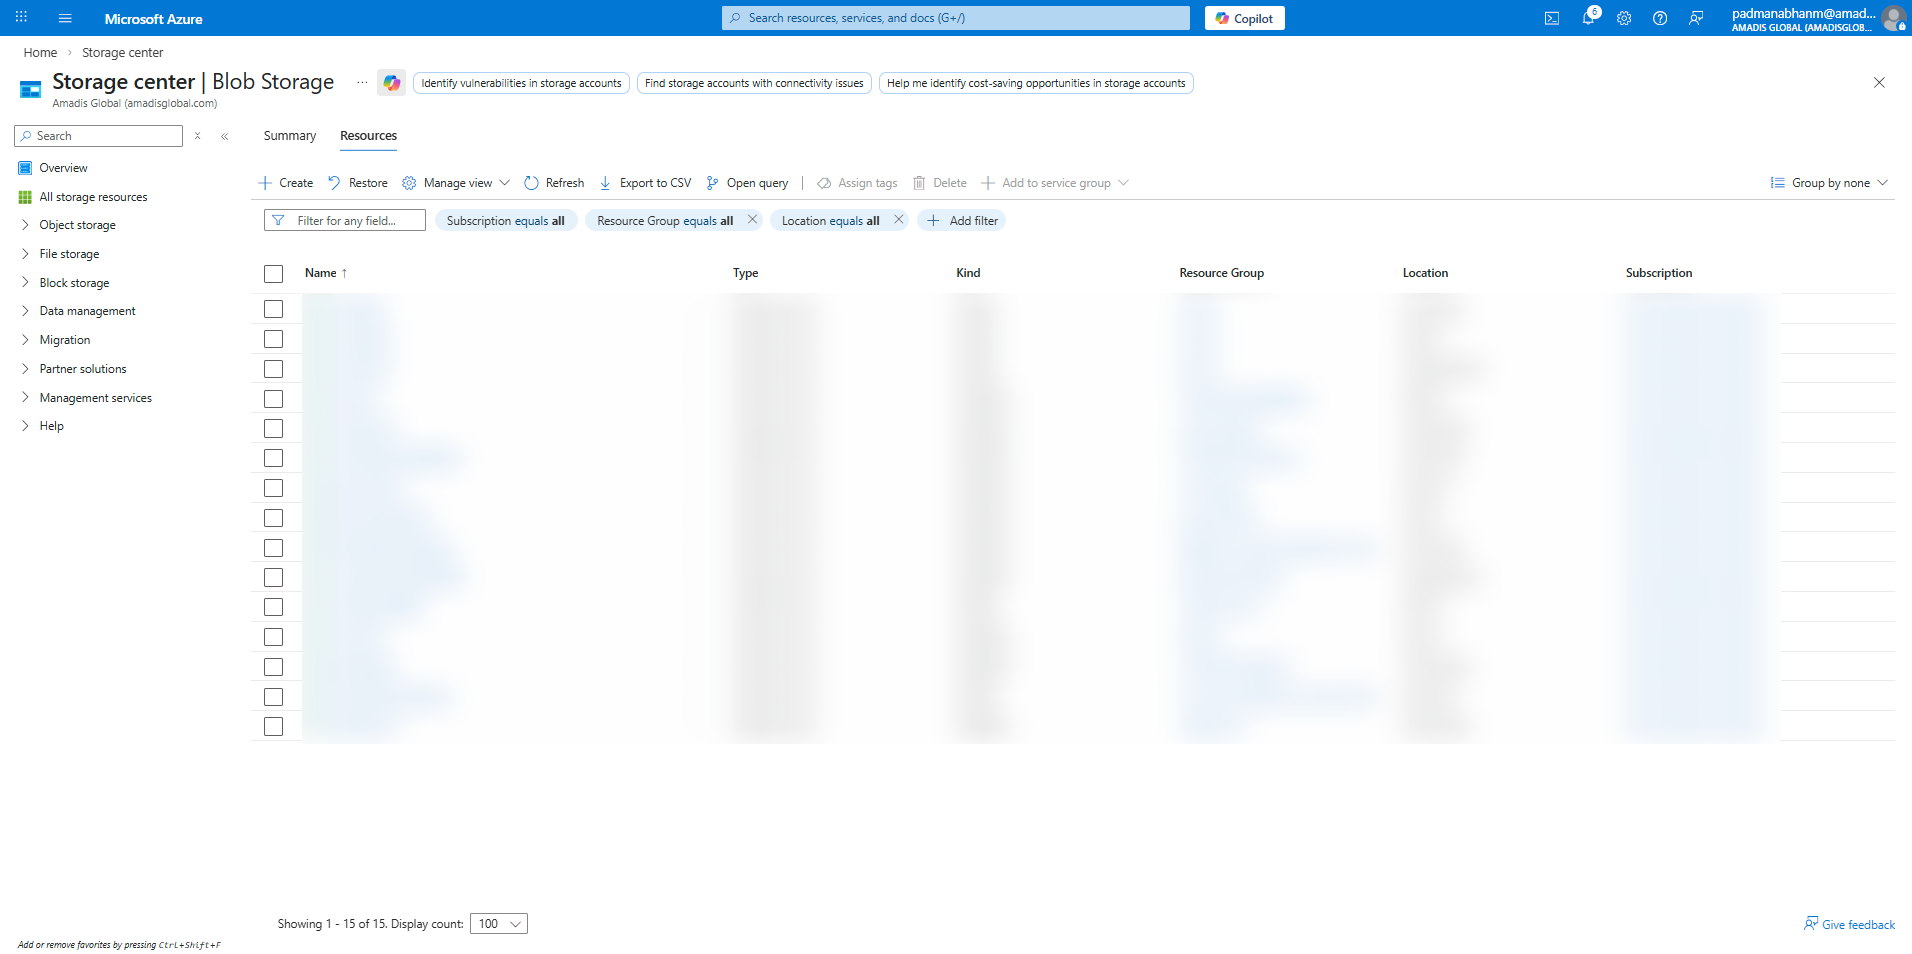
How to get Storage account name?
- Login to your Azure Portal.
- Search for "Storage accounts", and select the storage account name where you need to create the cost export.
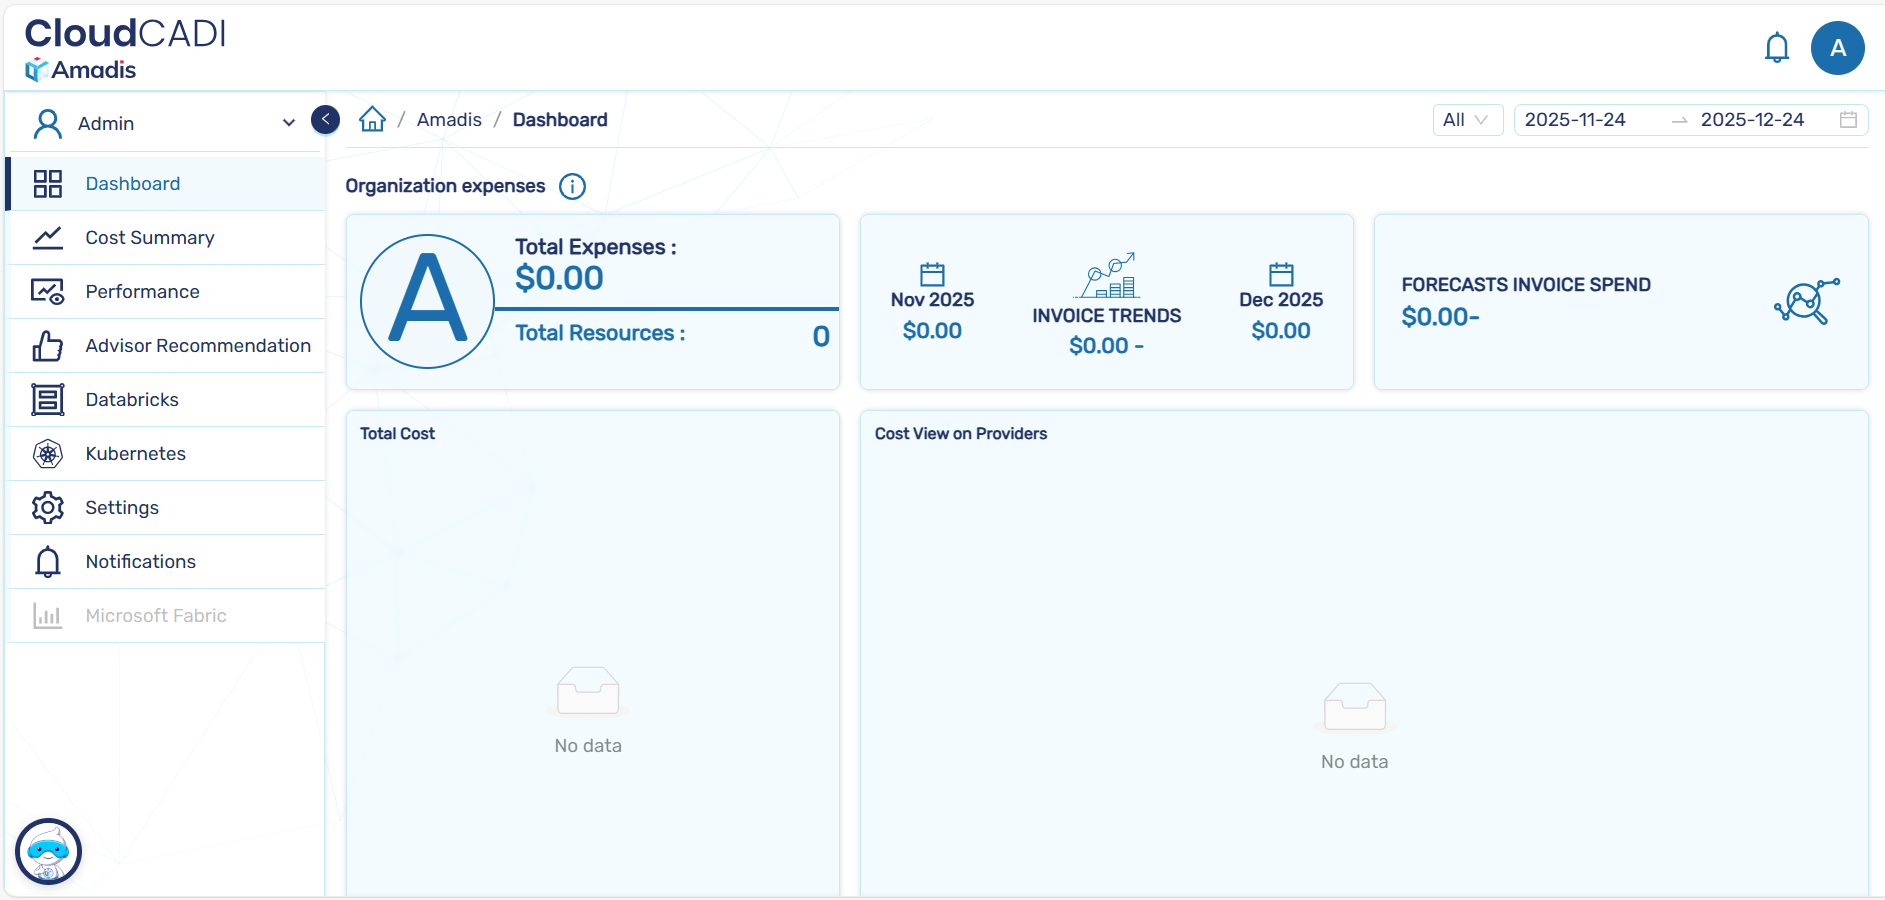
 5. Then after selecting "Confirm", it will direct it to the verification page.
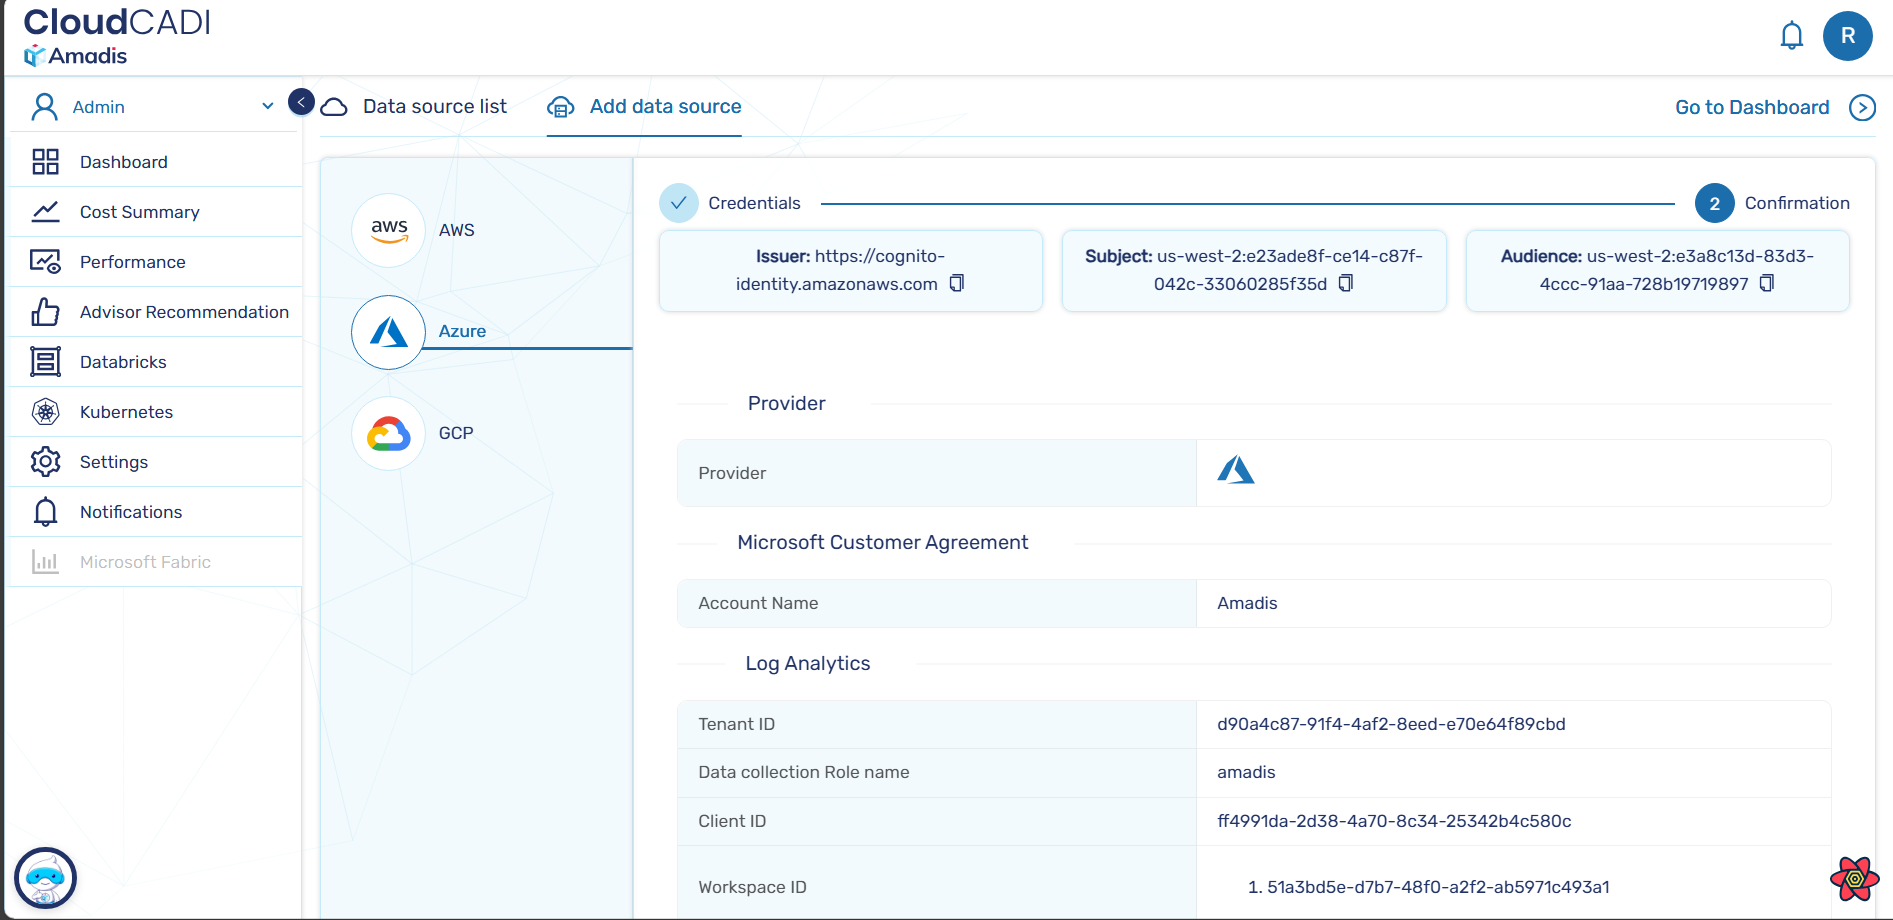 6. Select the subscription from the list where the cost export need to be created.
7. For that, some permissions are required. For the onboarding subscription’s storage account, two roles are needed: "Storage Account Contributor" and "Storage Blob Data Contributor".
And for the subscription where we create the cost export, one role is needed: "Cost Management Contributor".
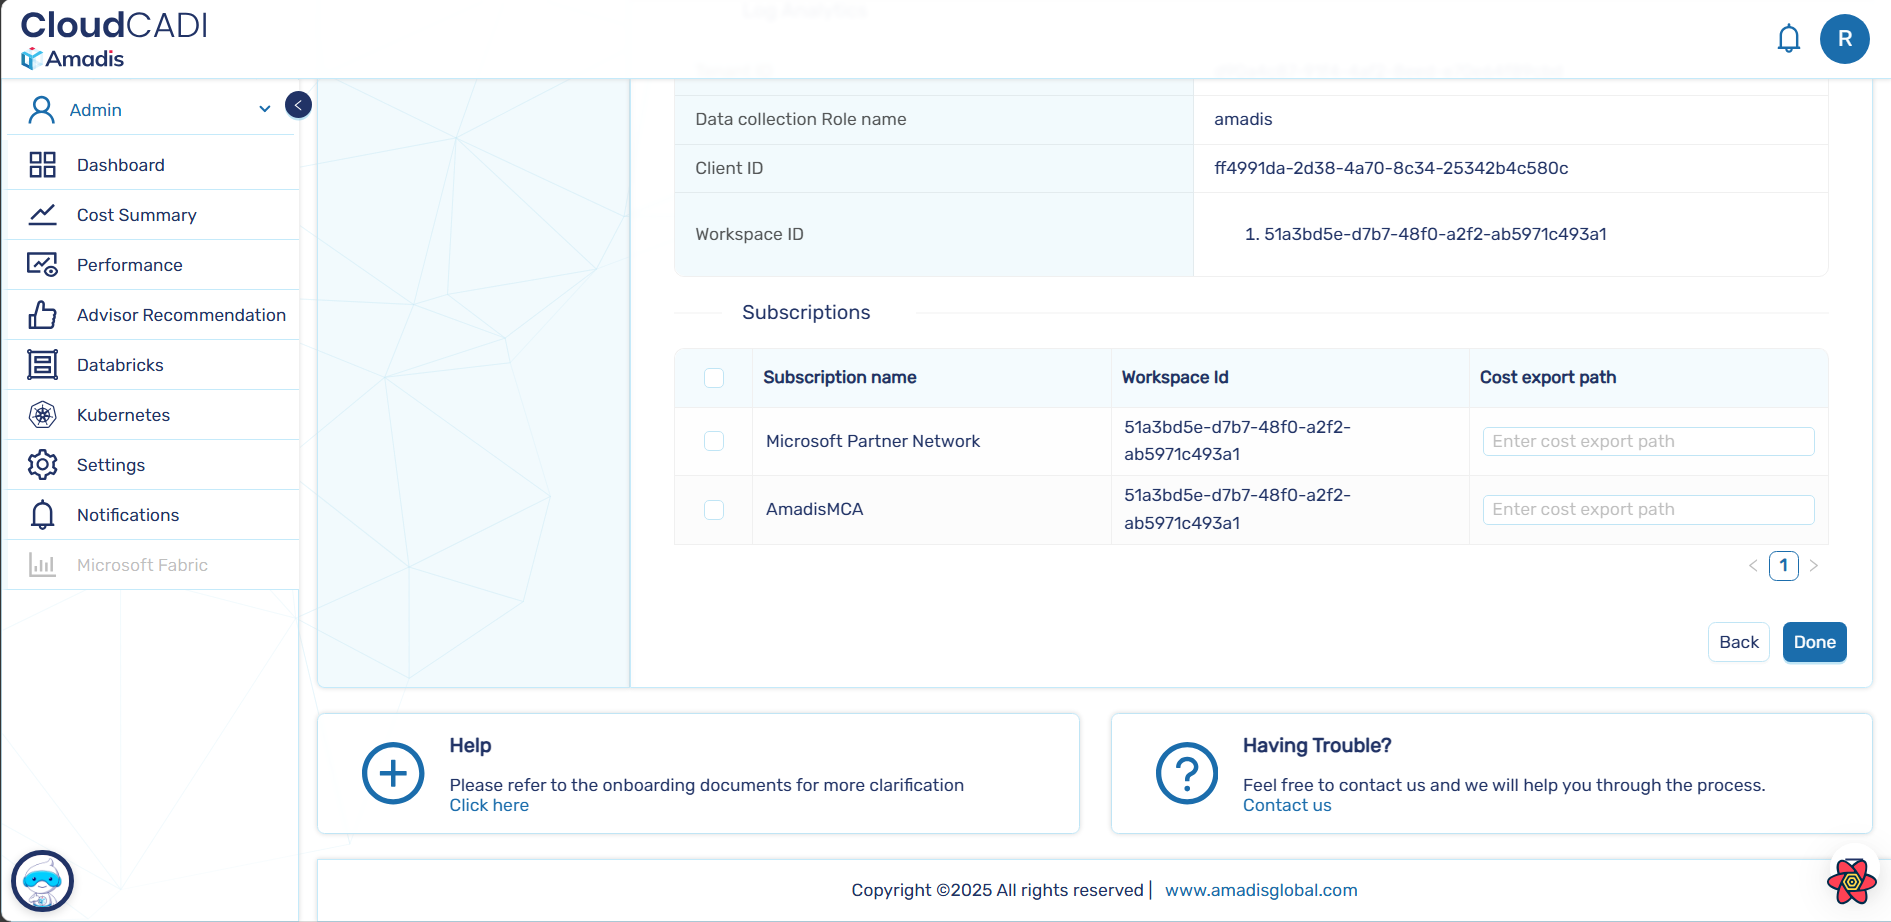 8. After clicking "Done", the cloud credentials are stored in the database and also the cost export is stored in the storage account.
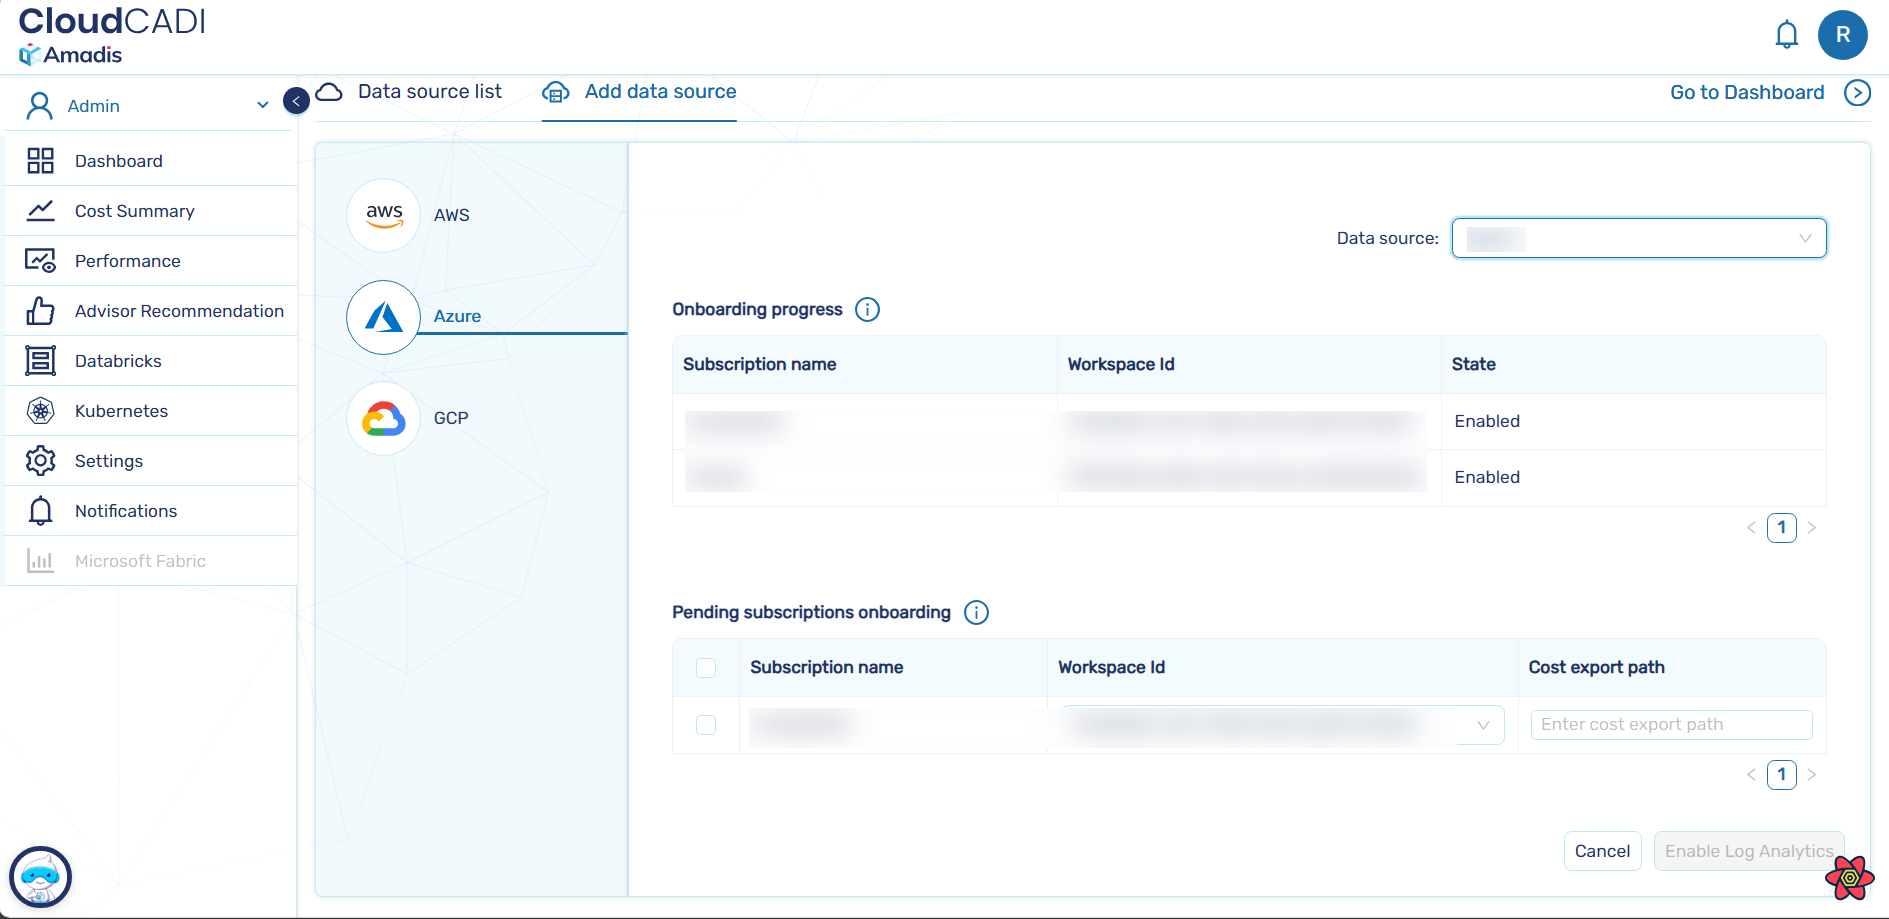
Manage Azure Subscriptions
-
Select Manage Azure Subscriptions.
-
Select the data source from the filter, and its subscriptions are listed below, either in "Onboarding Progress" or "Subscriptions Onboarding".
-
The subscriptions selected during Azure tenant onboarding are listed in the Onboarding Progress table with their state, either "Inprogress" or "Completed.
-
The unselected subscriptions are listed in the Subscriptions Onboarding table.
-
If the user needs to enable subscriptions onboarding, select the subscription from the list. And the same process creation of cost export for that subscription occurs and stored in the database.
-
Then click the “Enable Log Analytics” button.