Manual Setup
This section explains how an Admin can onboard AWS accounts into CloudCADI using the Manual Setup flow.
Step 1 - Configure Data Source for Deployed Account
-
In the Add Data Source tab, select Manual Setup.

-
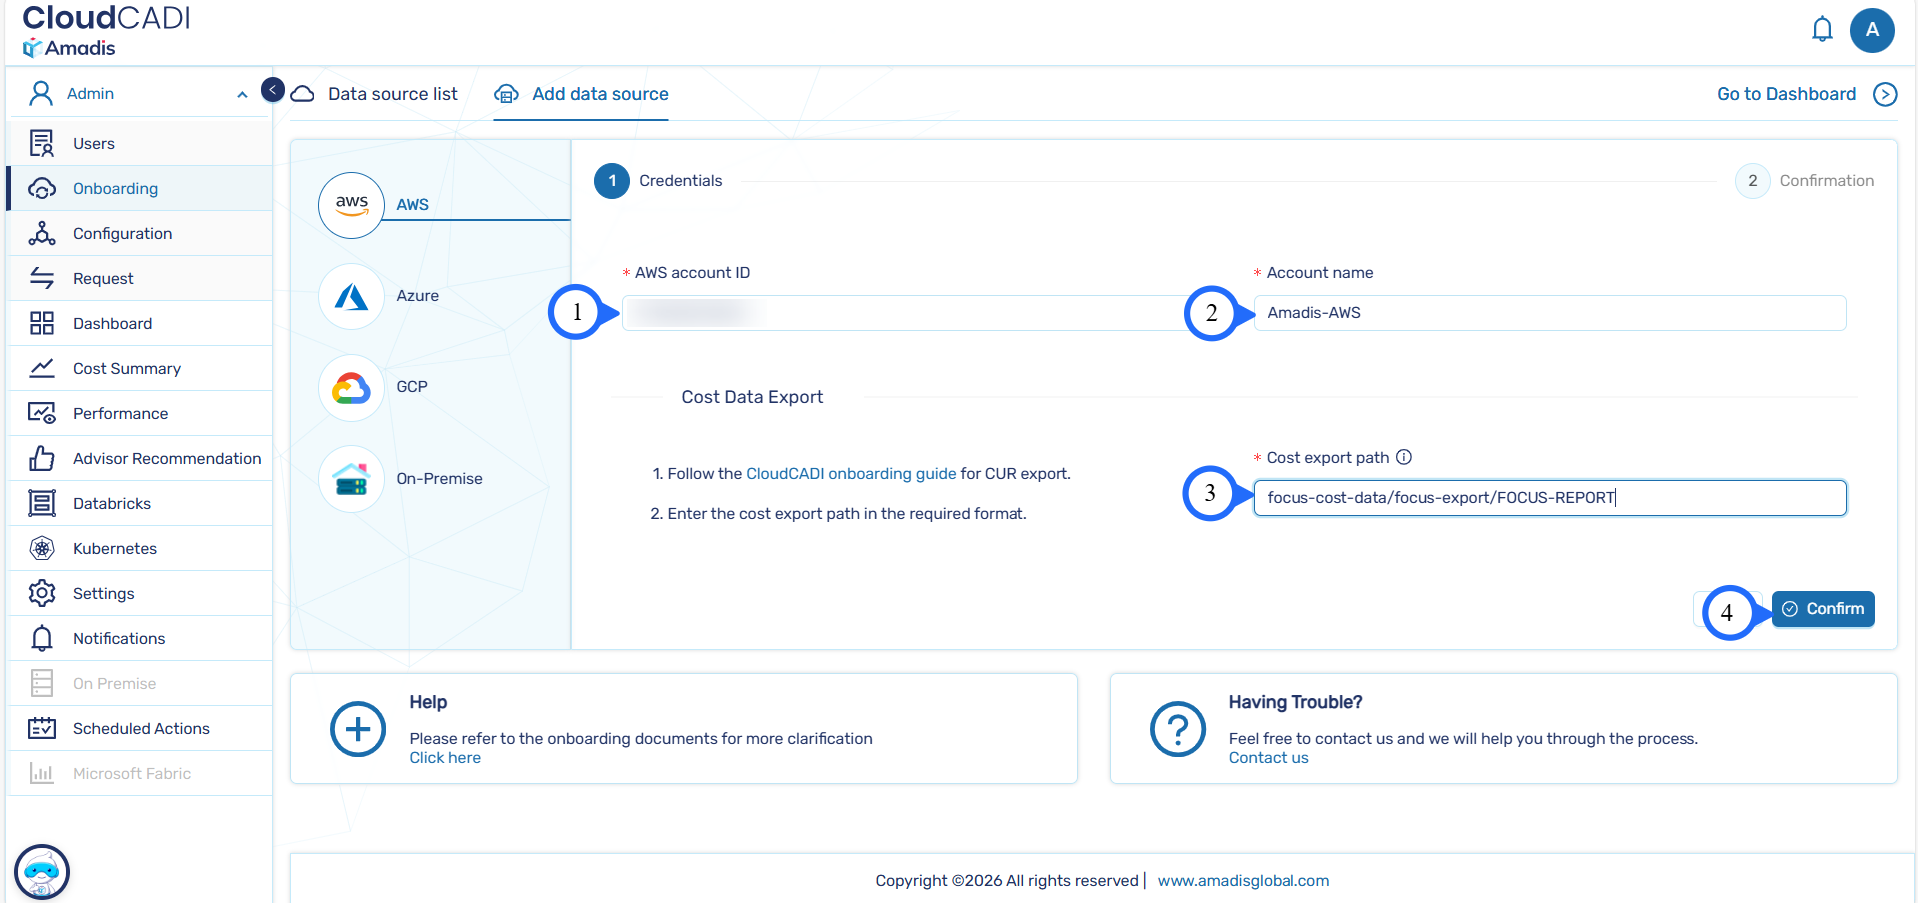
To onboard a CloudCADI-deployed account, enter the AWS Account ID, Account Name and Cost export path.
-
Click Next.
-
CloudCADI validates the cost export path and required permissions.
-
Refer to the AWS Cost & Usage Data Export (FOCUS) for detailed steps.
-
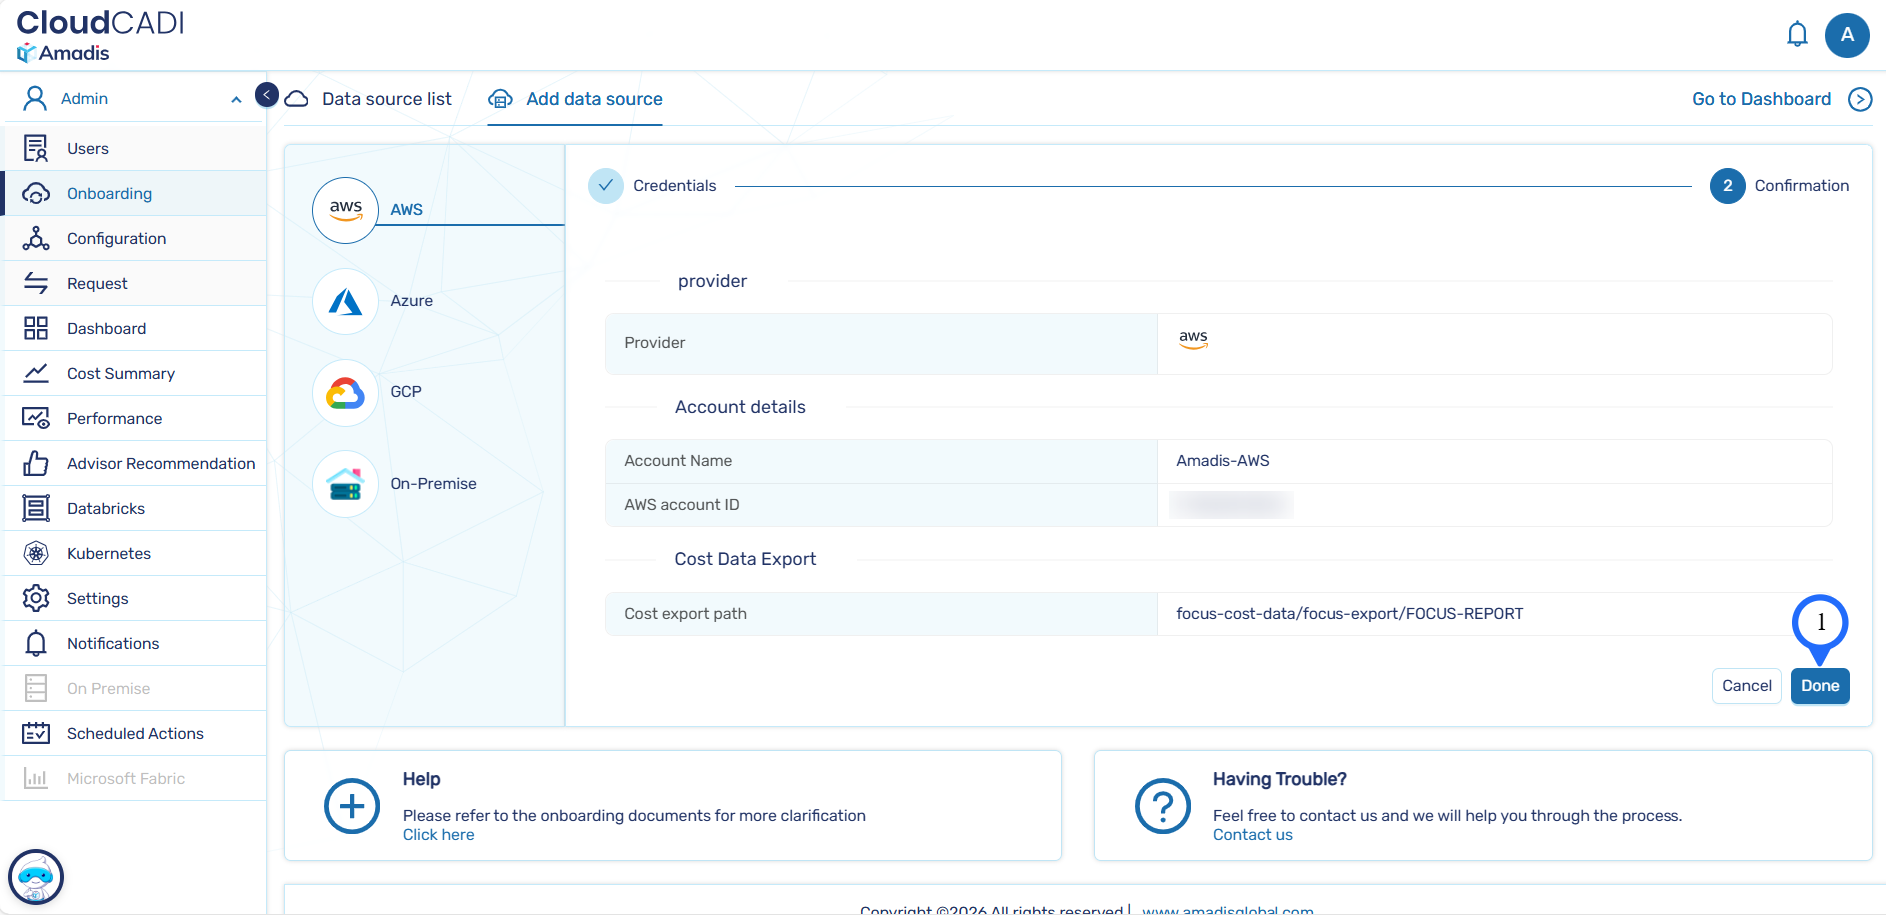
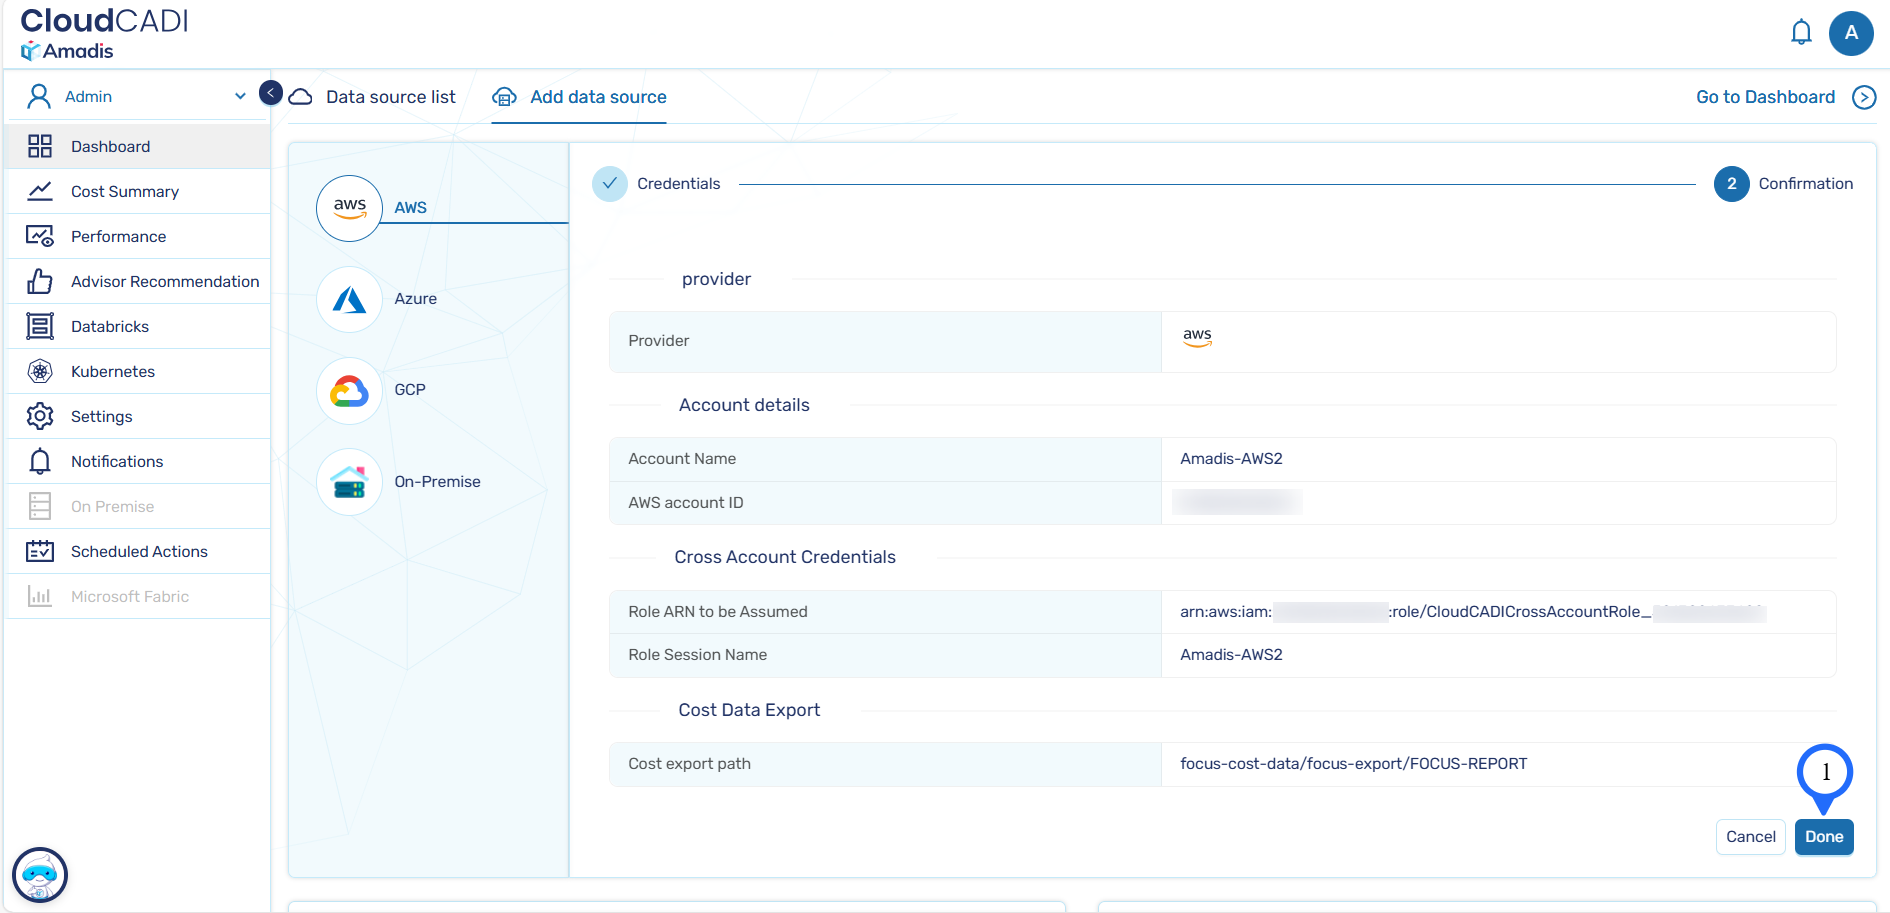
Once validation is complete, a confirmation page is displayed. Click Done to create the data source.
-
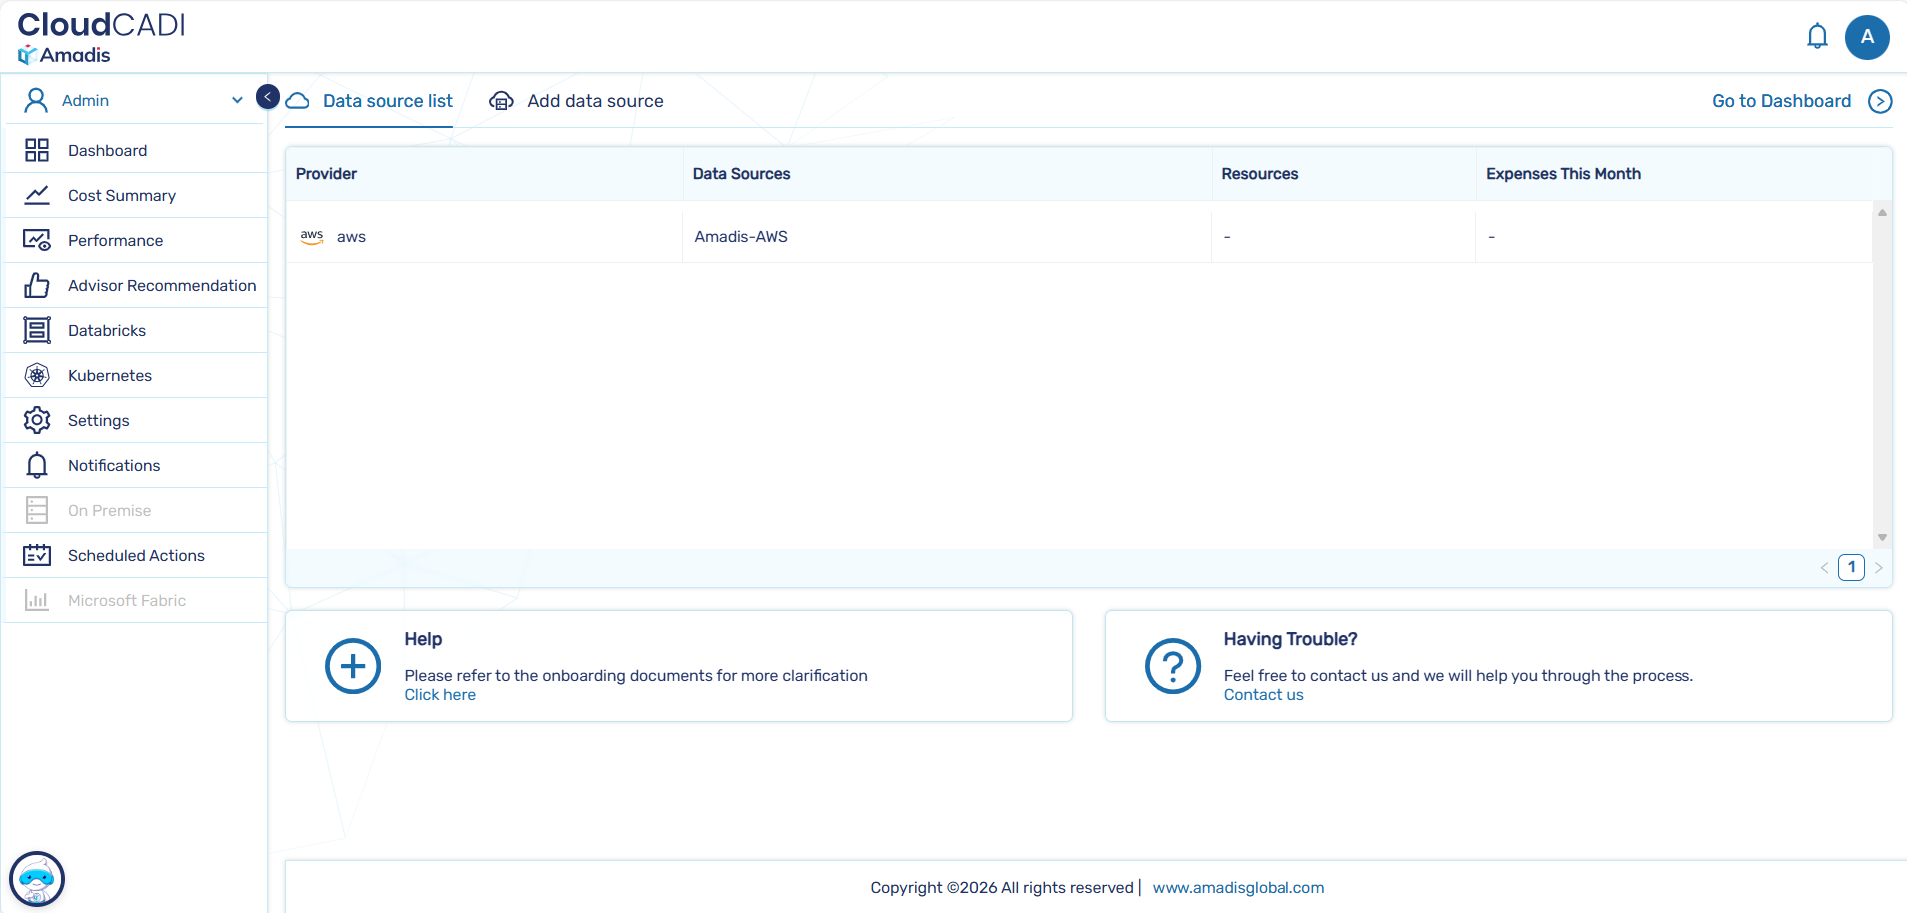
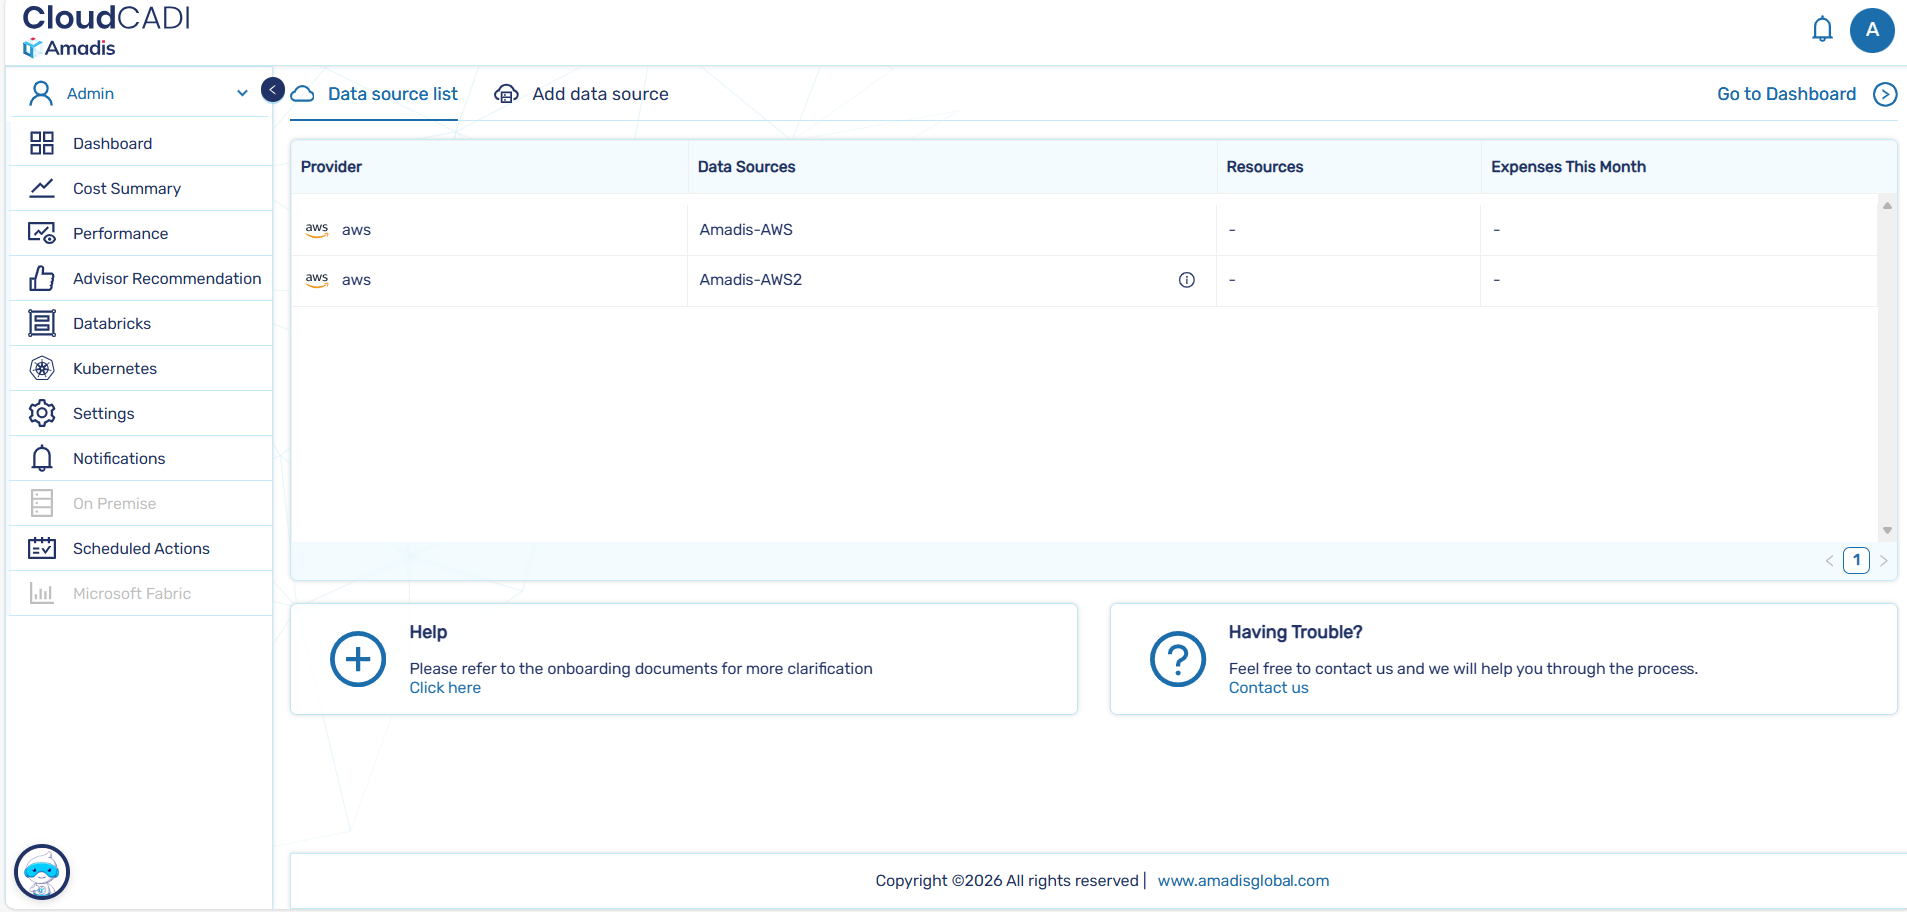
You will be redirected to the Data Sources list page.
Step 2 - Configure Cross-Account Setup
-
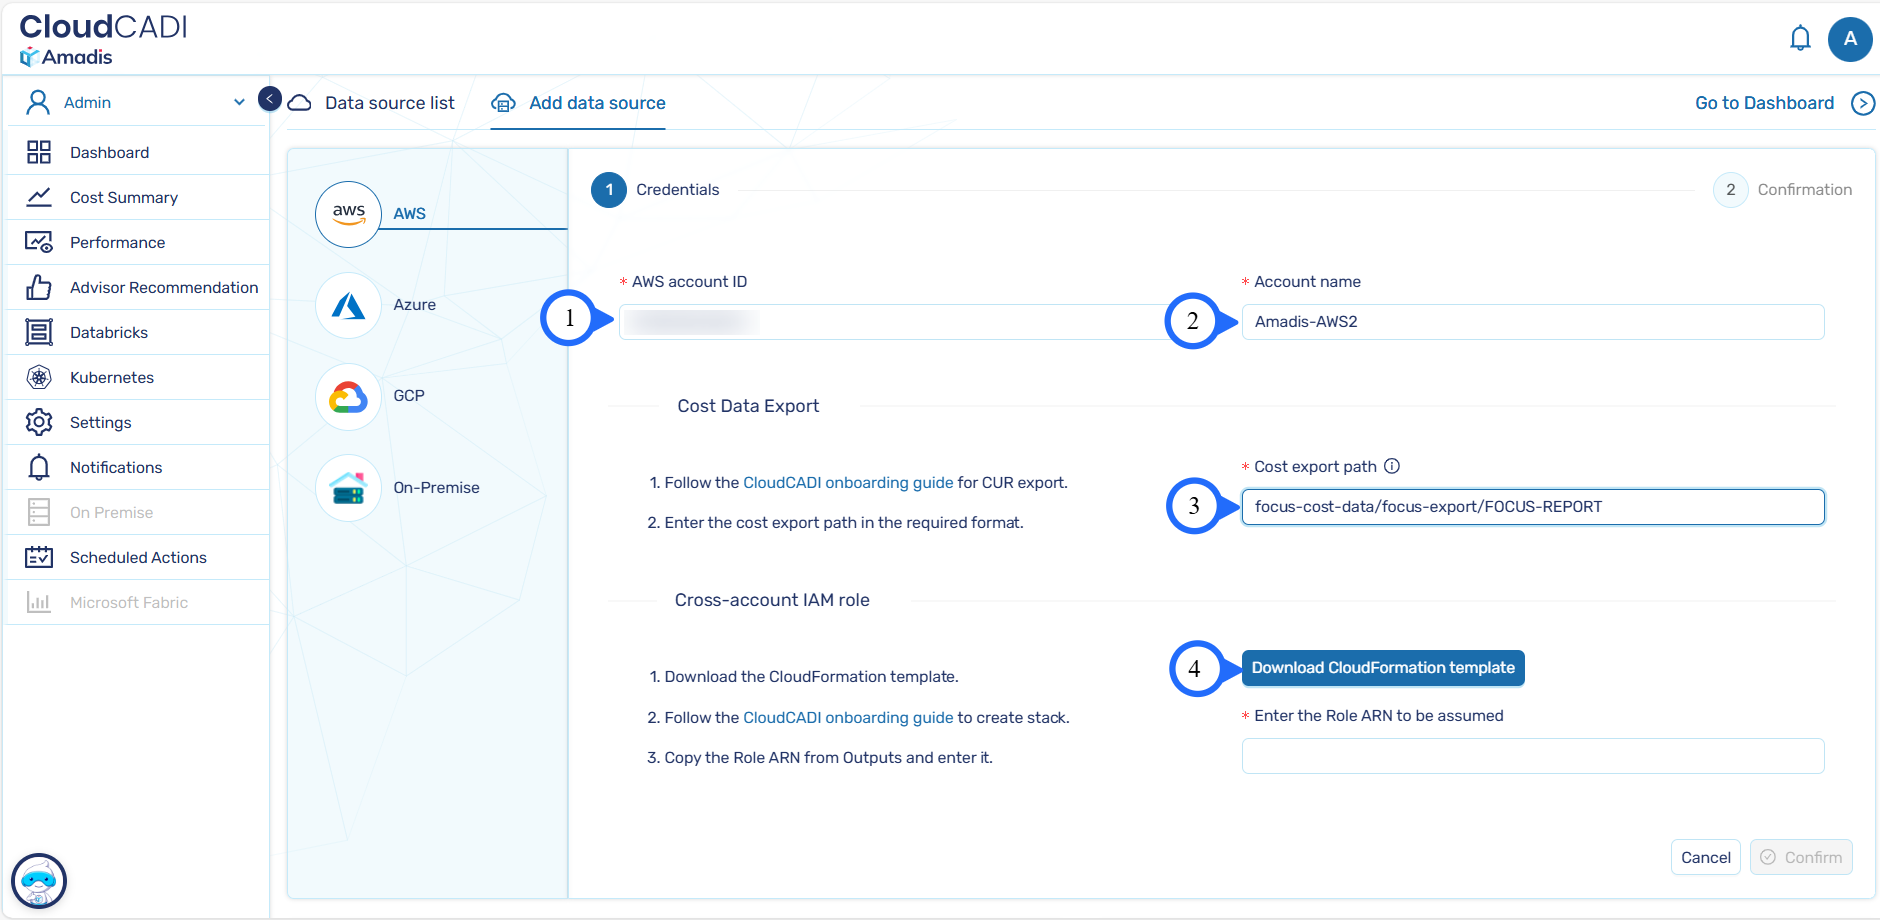
To onboard a cross-account setup, enter the AWS Account ID, Account Name and Cost export path, then follow the stack deployment steps mentioned below.
-
Click Download CloudFormation Template.
Step 3 - Deploy CloudFormation Stack
-
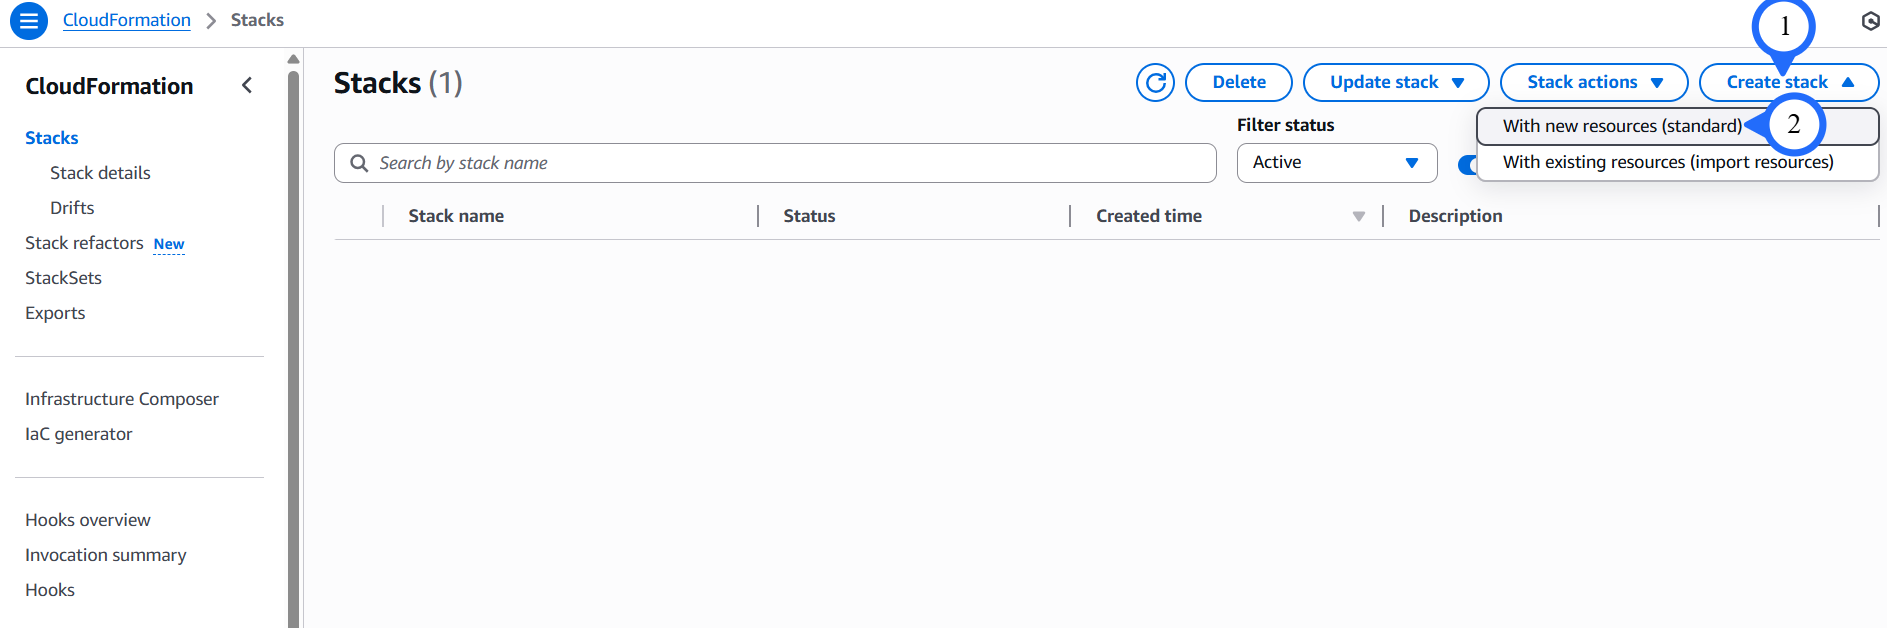
After downloading the script, go to the AWS Console for the respective account, navigate to the CloudFormation service, and create a stack with new resources.
-
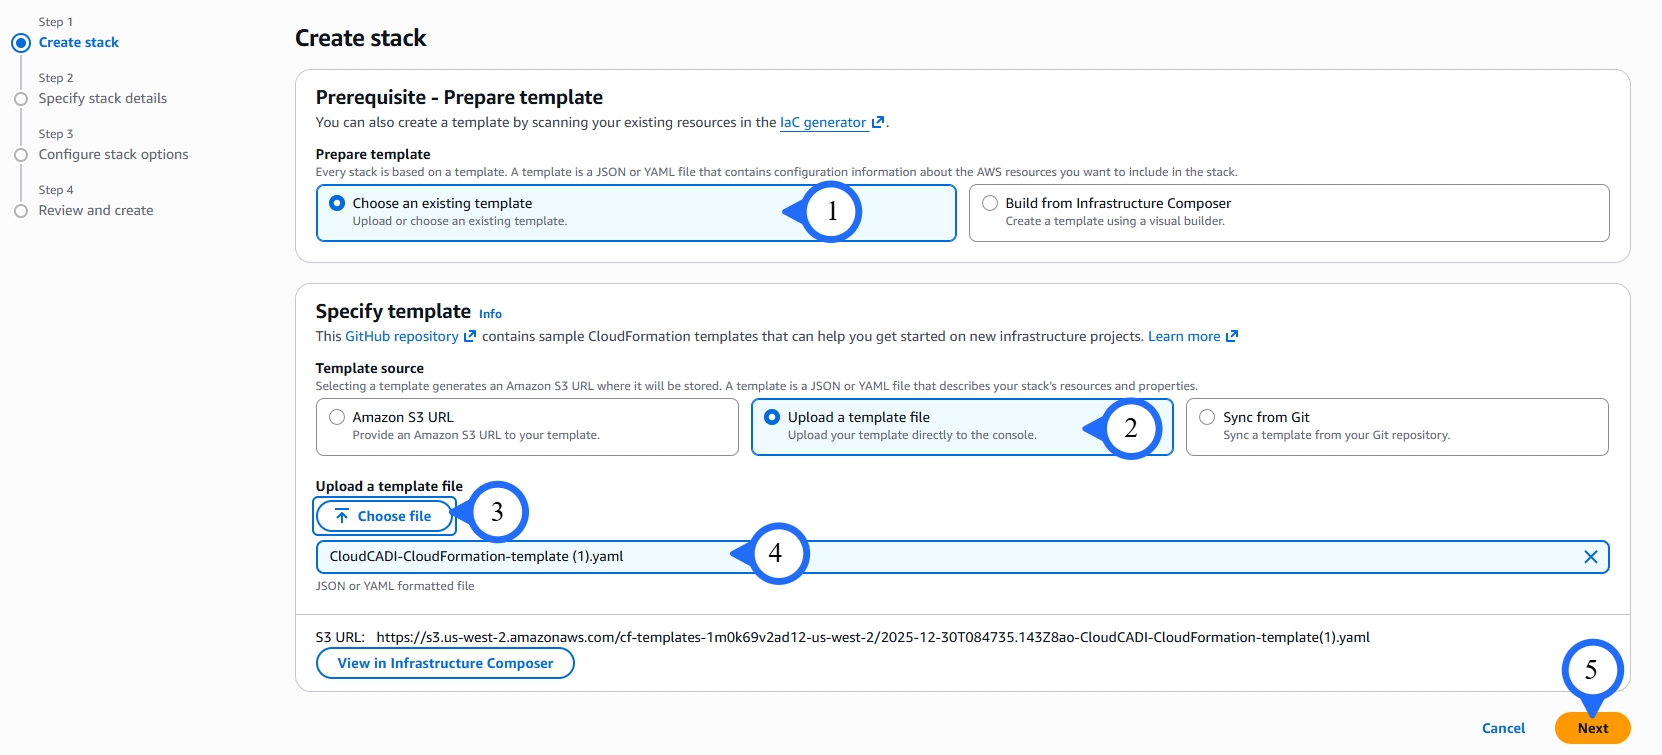
Select Choose an existing template.
- Then select Upload a template file.
- Click Choose file and upload the downloaded script.
-
Click Next.
-
Enter the Stack name and S3BucketName.
-
Click on Next.

-
Enter the tag key and tag value.
-
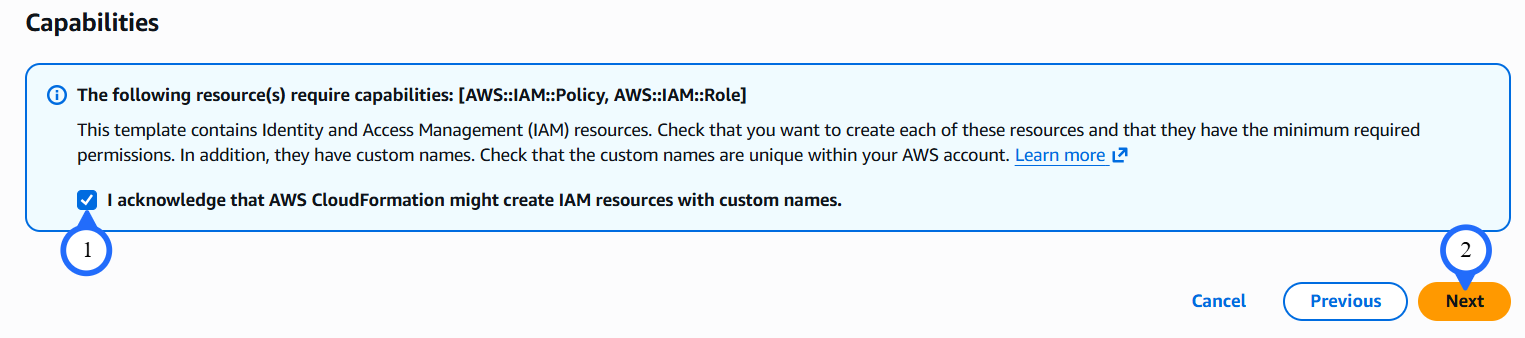
Click Next. The Review page appears. Review the details, and click Submit.

-
Review and click Submit and It'll take up to 5 minutes to finish the resource creation.
Step 4 - Complete Cross-Account Onboarding
-
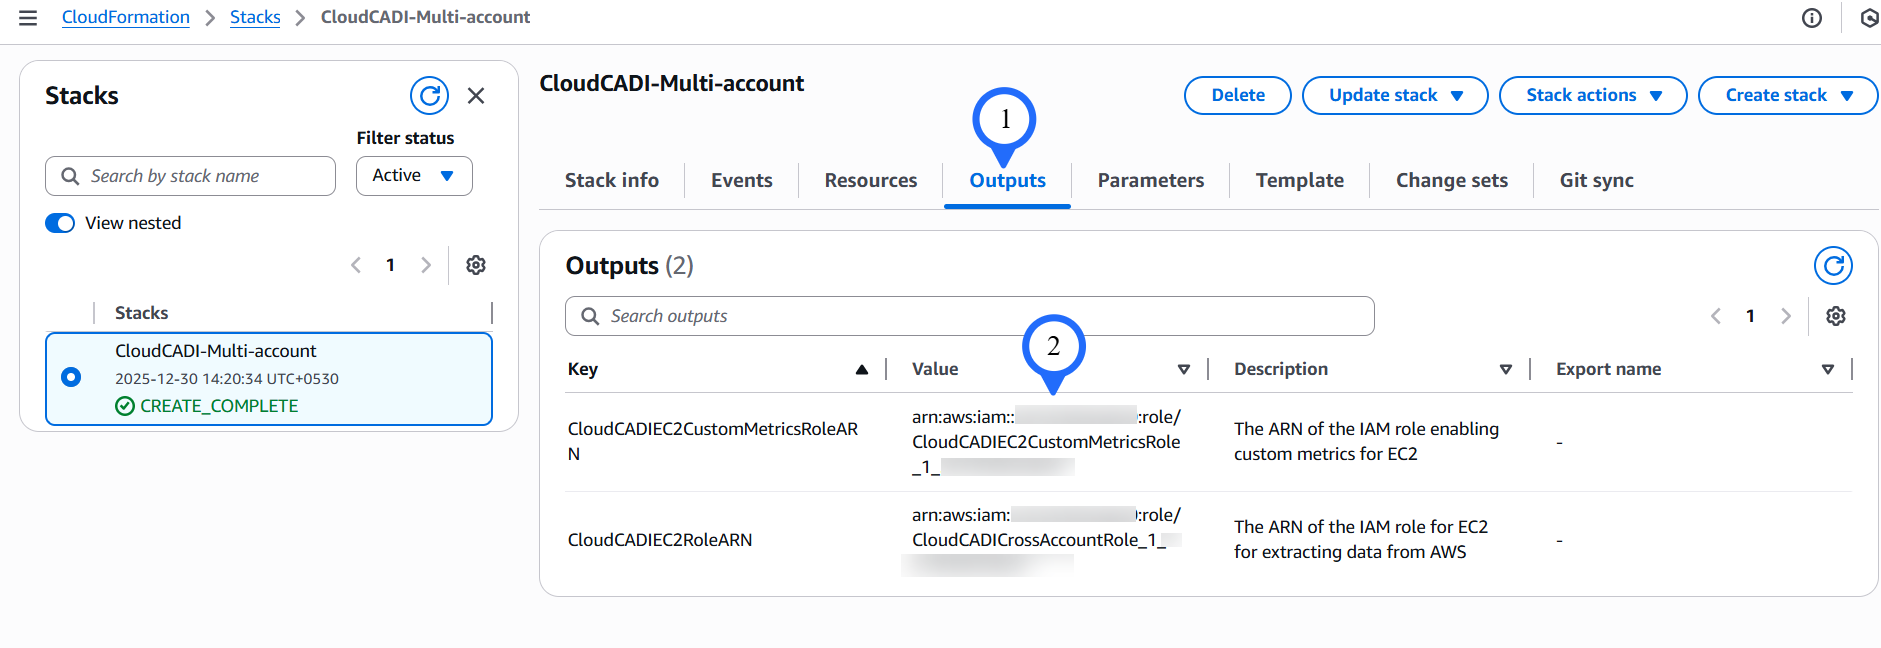
Once the stack has been created successfully, go to the Outputs tab. Copy the Role ARN
-
Paste the Role ARN in Enter the Role ARN to be assumed obtained during stack creation and click Confirm.

-
Once validation is complete, a confirmation page is displayed.
-
Verfiy the details and Click on Done to complete account creation.
-
You will be redirected to the Data Sources list page.
-
Confirm that the created AWS account appears in the list.
Troubleshooting
- Create Cost & Usage Data Export in AWS Management Account (recommended).
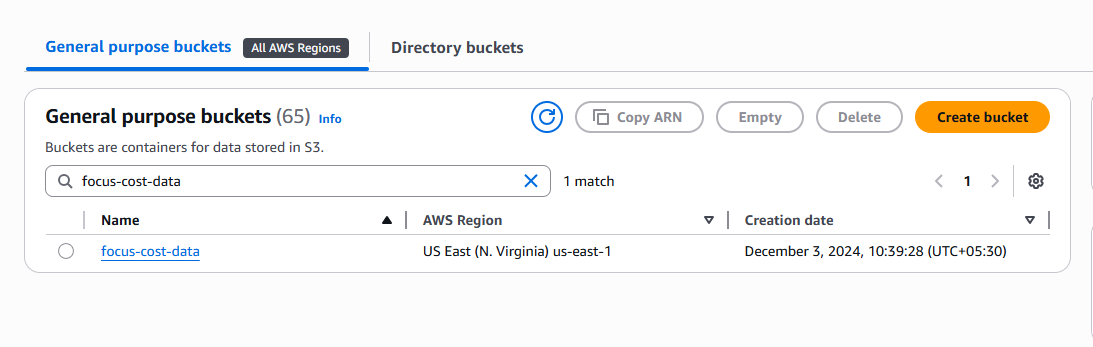
- If onboarding fails due to cost export path validation, check the S3 bucket policy.
- Existing bucket permissions can be reused for additional accounts.
Update S3 Bucket Policy
-
In the AWS Console, navigate to the S3 bucket configured for cost export path.
-
Go to the Permissions tab and click Edit.

-
Add the following statement to the existing bucket policy and click Save changes.
Tip
- Replace
<ROLE_ARN>with the Role ARN obtained during stack creation. - Replace
<BUCKET_NAME>with your S3 bucket name.
Warning
Do not remove existing statements in the bucket policy. Only add the above statement.