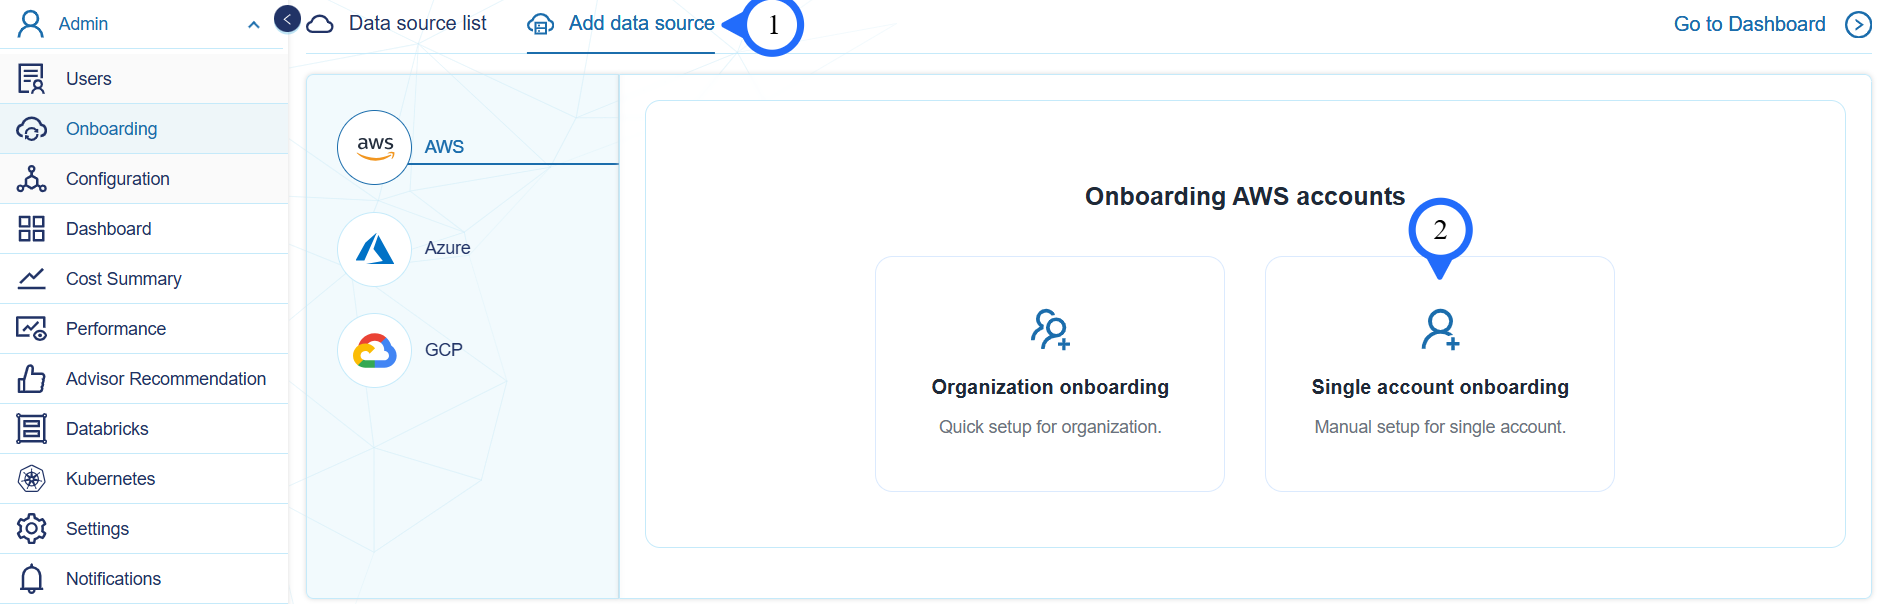
Single Account Onboarding
-
In the Add Data Source tab select Single Account Onboarding.
-
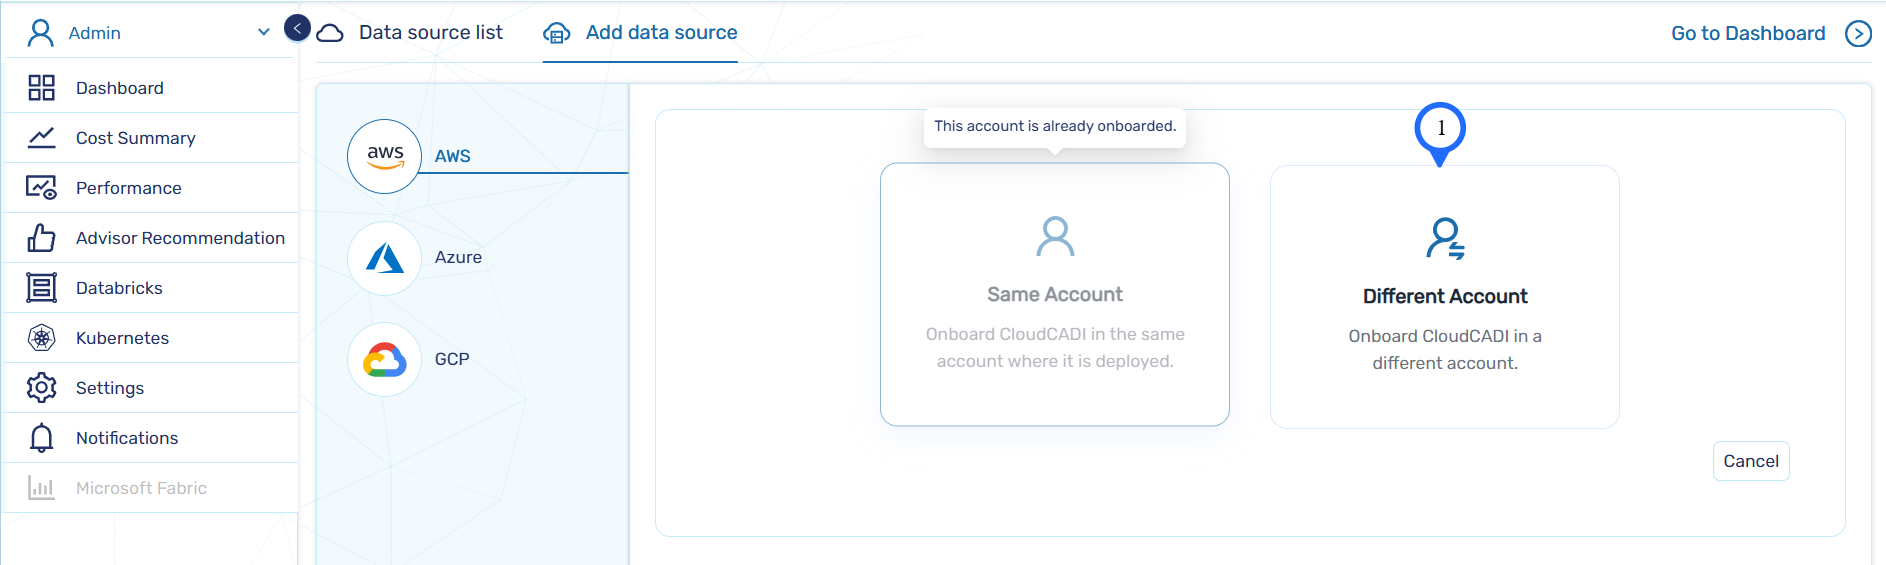
Single Account Onboarding supports the following two options:
Same Account – Used to onboard an AWS account where CloudCADI is currently deployed.
Different Account – Used to onboard an AWS account different from the one where CloudCADI is deployed.
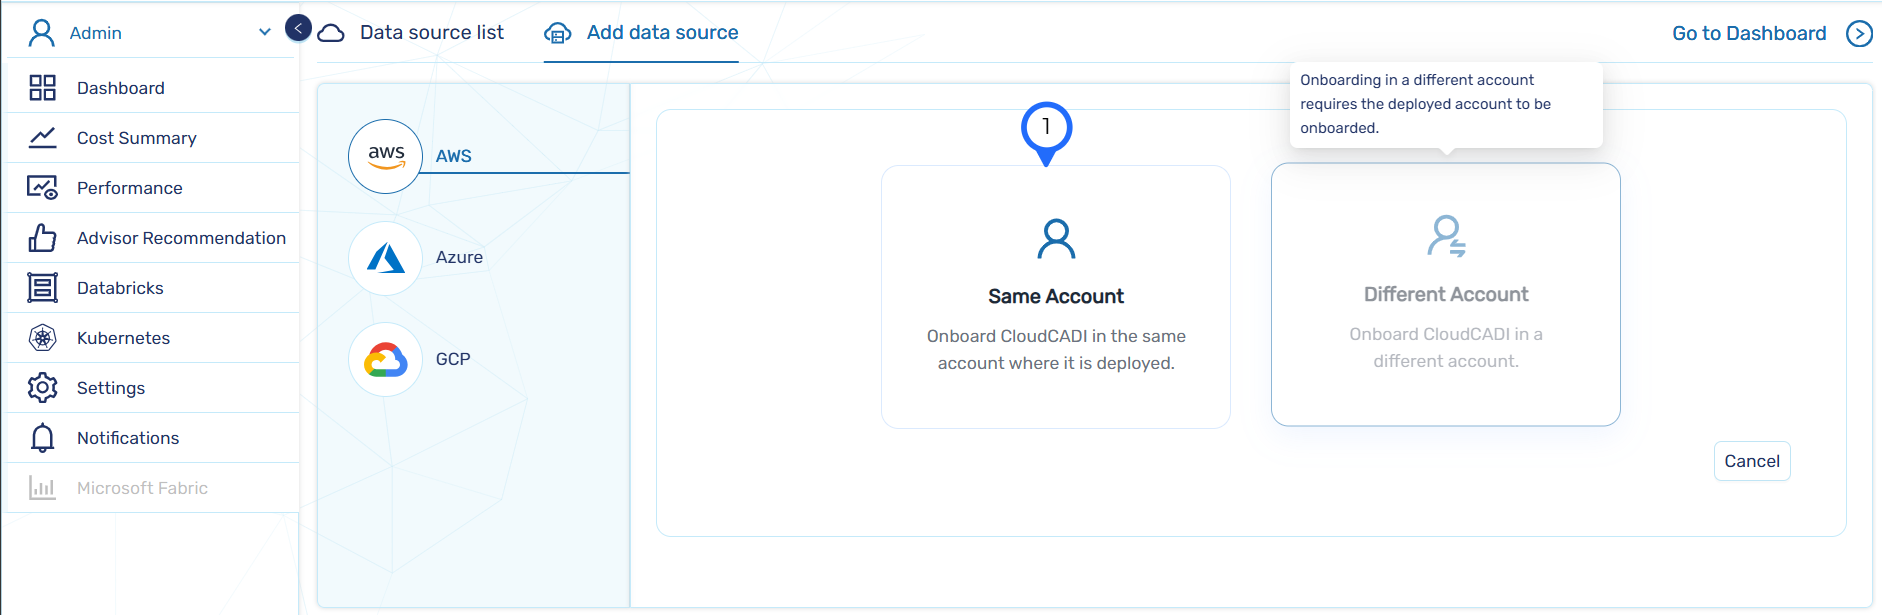
Step 1 - Same Account Onboarding
-
Select Same Account.
-
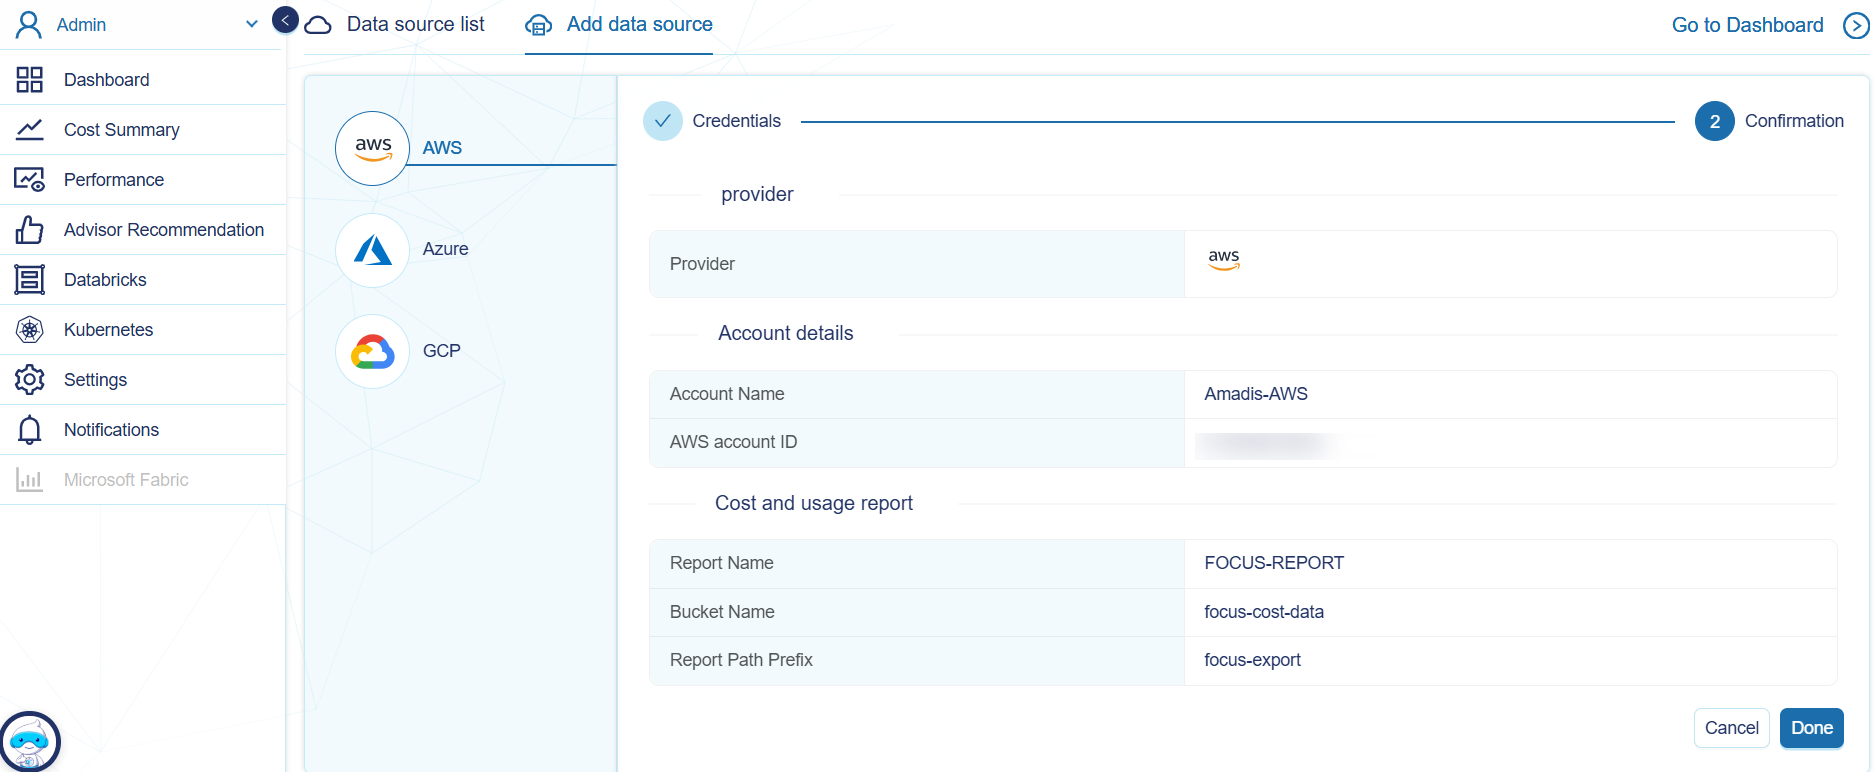
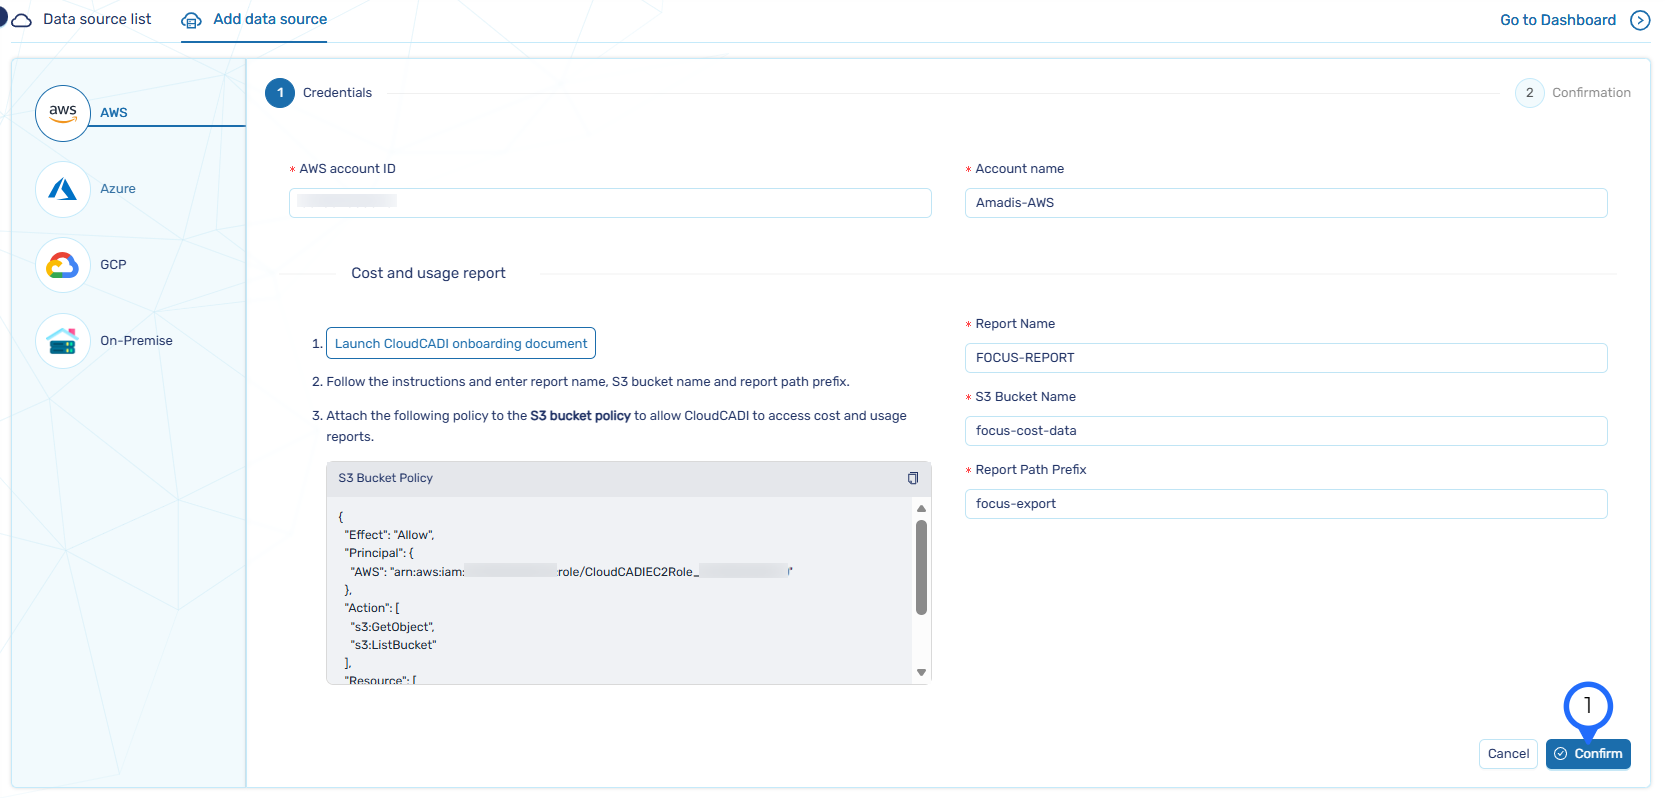
If deployed in management account. Review and verify the AWS account details. Click Confirm to validate.
-
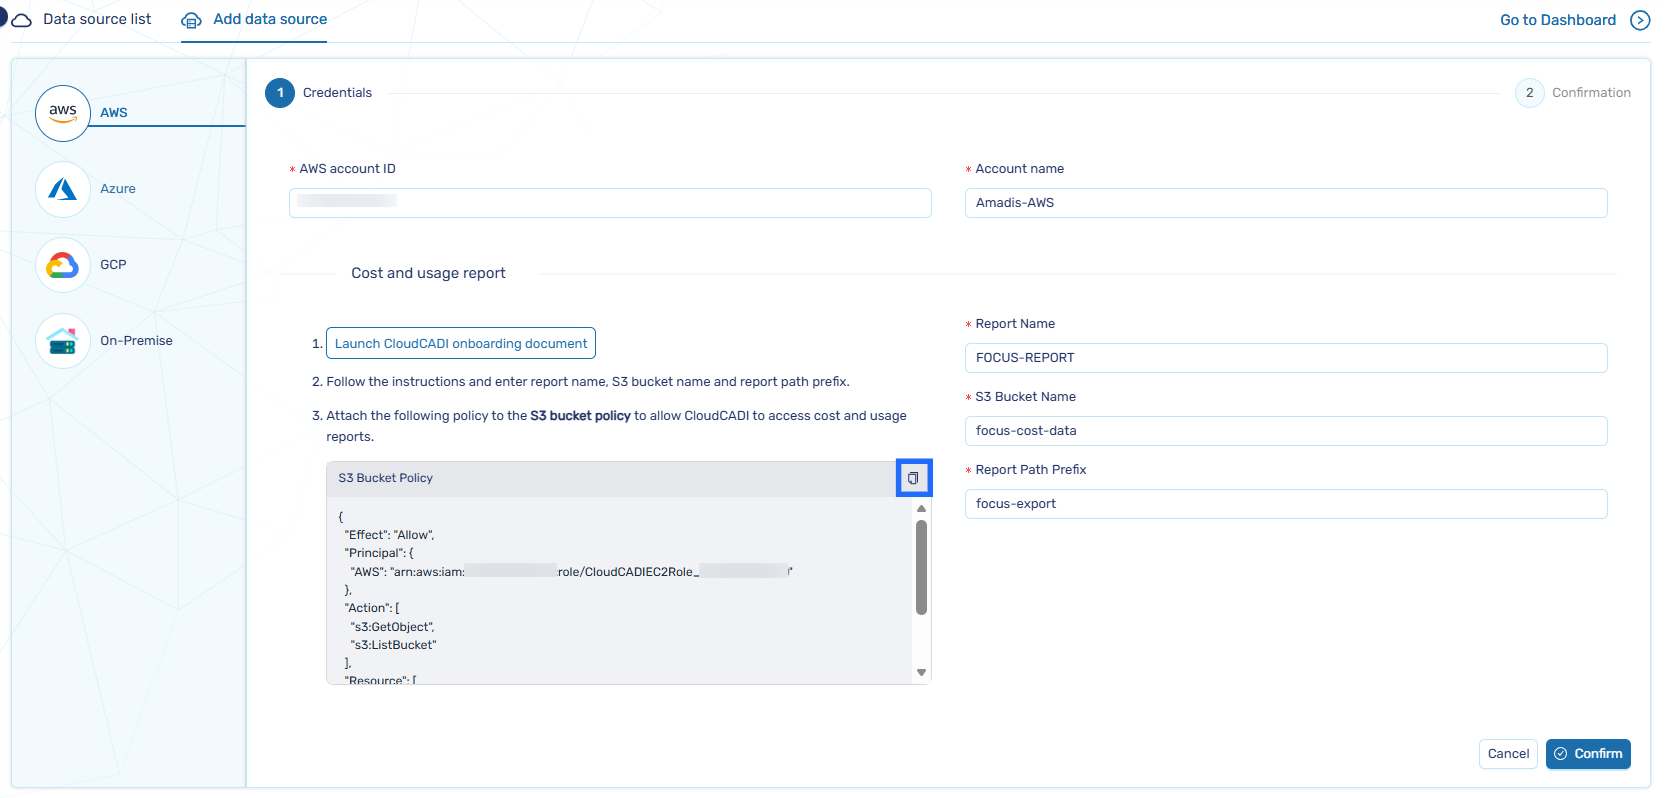
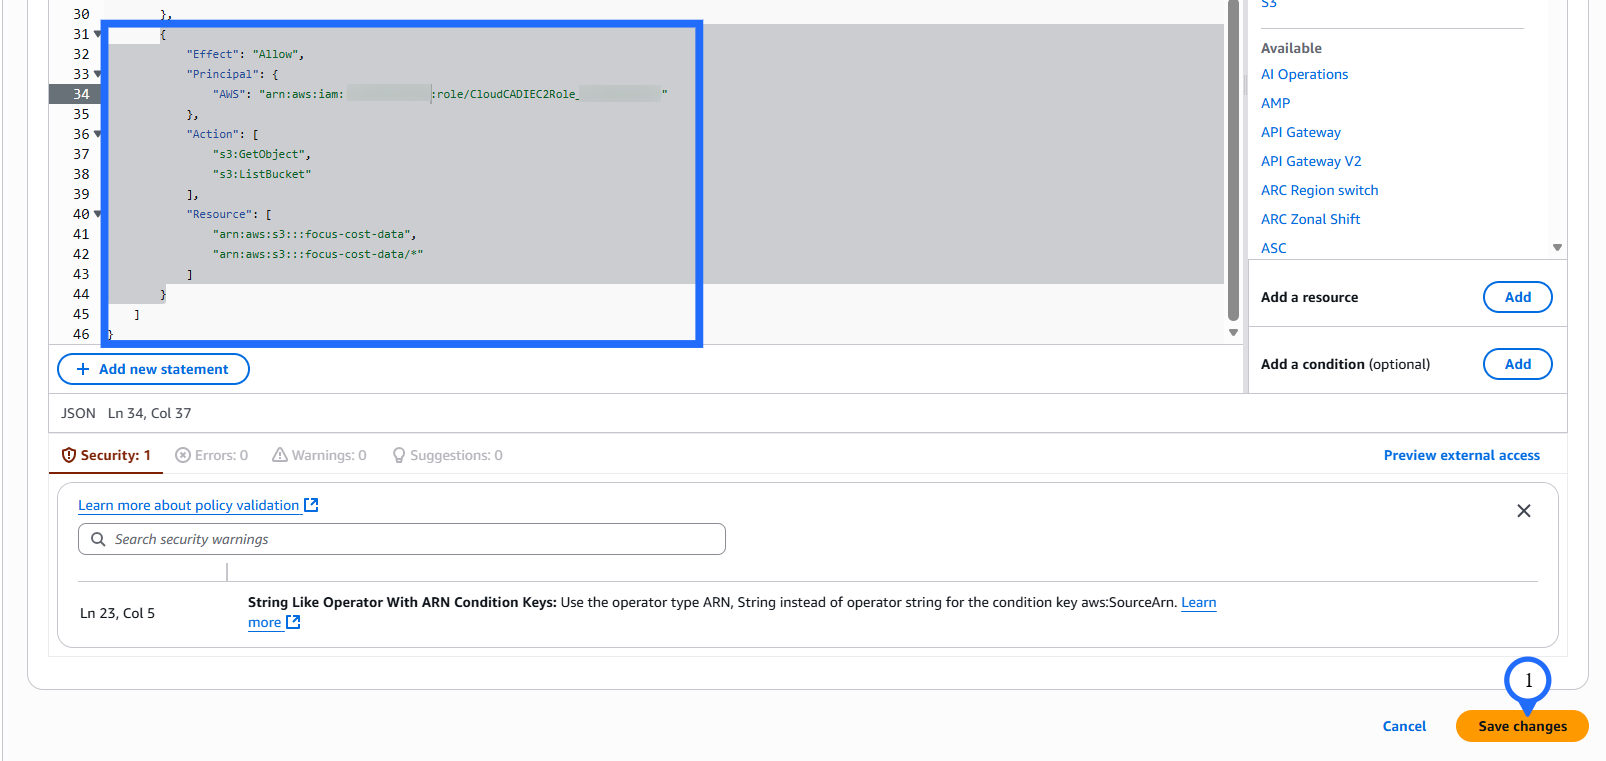
If not deployed in management account , Copy the policy and attach in the respective S3 bucket (Refer to Cost & Usage Data Export).
-
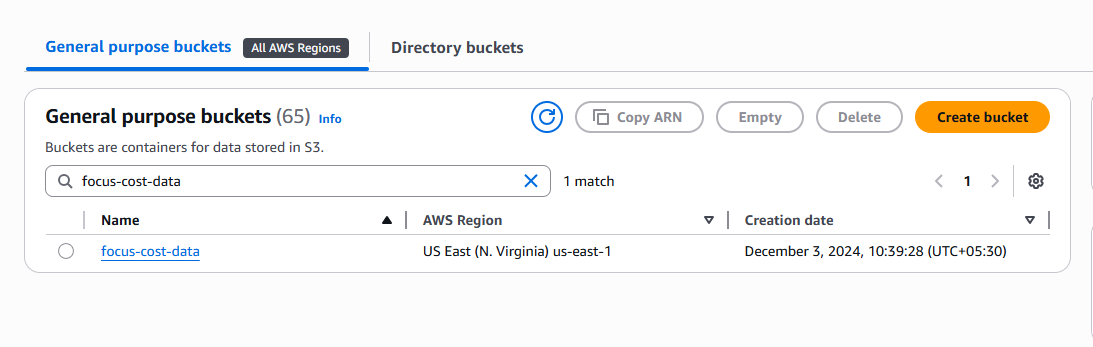
In the AWS Console and navigate to the focus-cost-data S3 bucket.
-
Go to Permission tab and click Edit.

-
Paste the copied policy and click Save Changes.
-
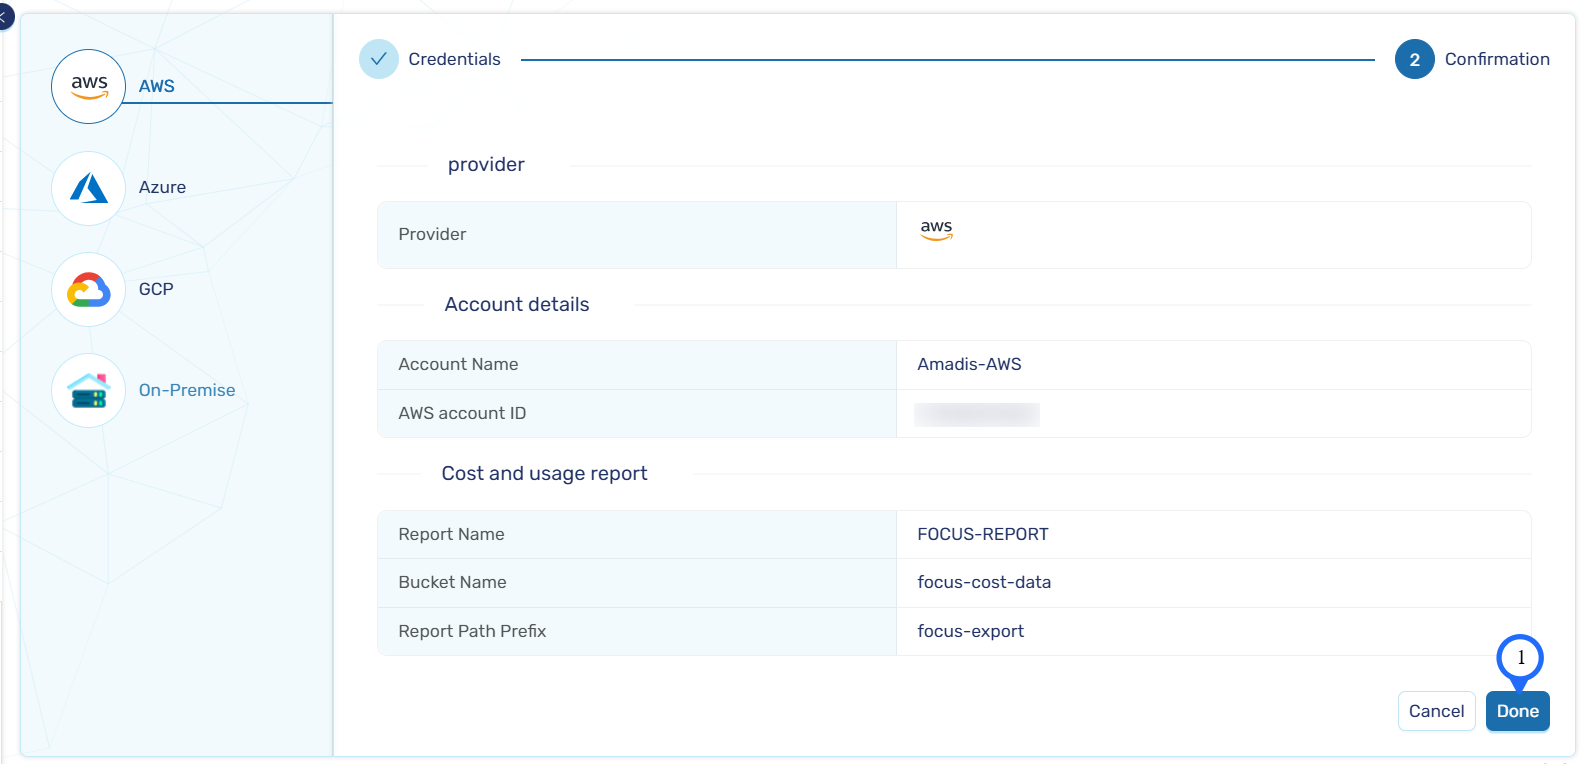
Click Confirm and then click Done to complete the onboarding process.
-
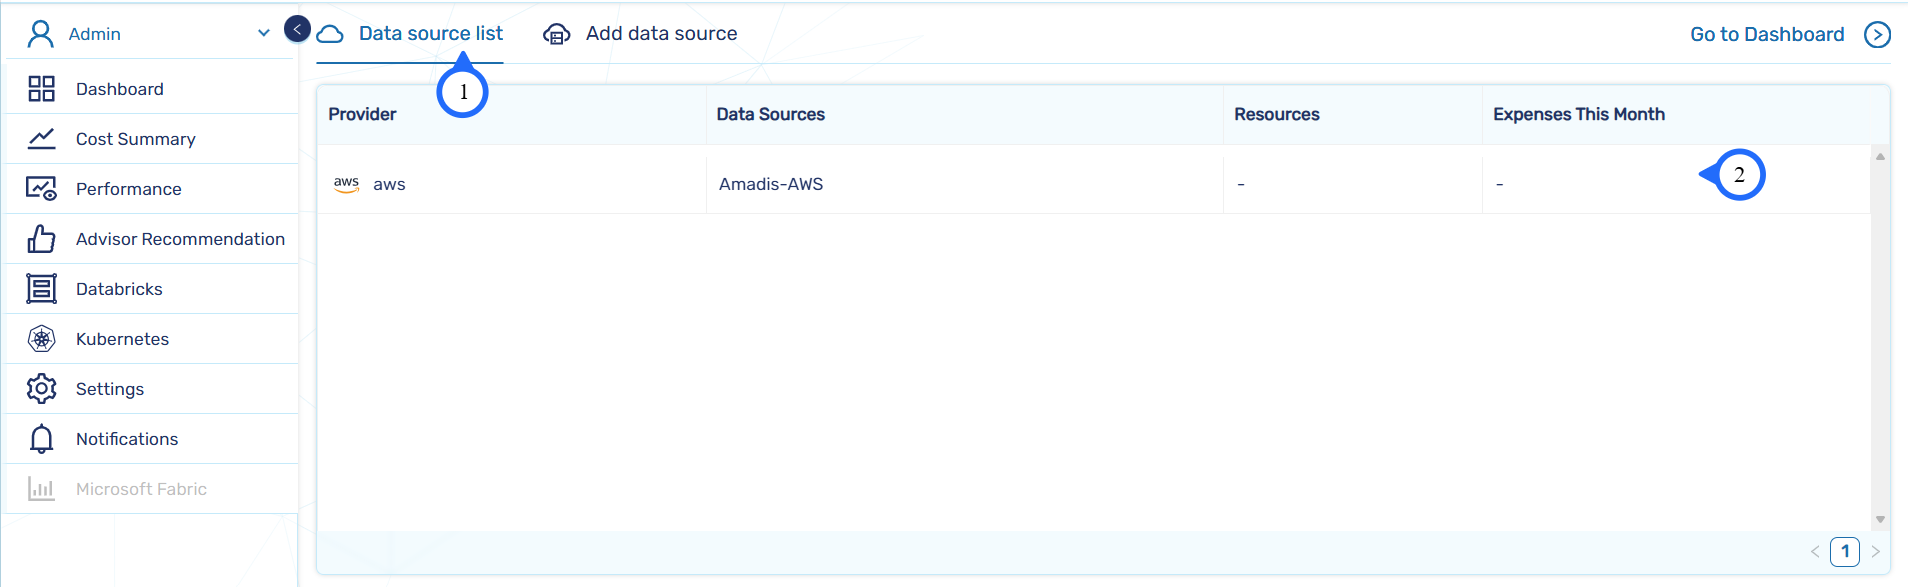
Navigate to the Data Source List tab and verify that the AWS account has been successfully onboarded.
Step 2 - Different Account Onboarding
-
Select Different Account.
-
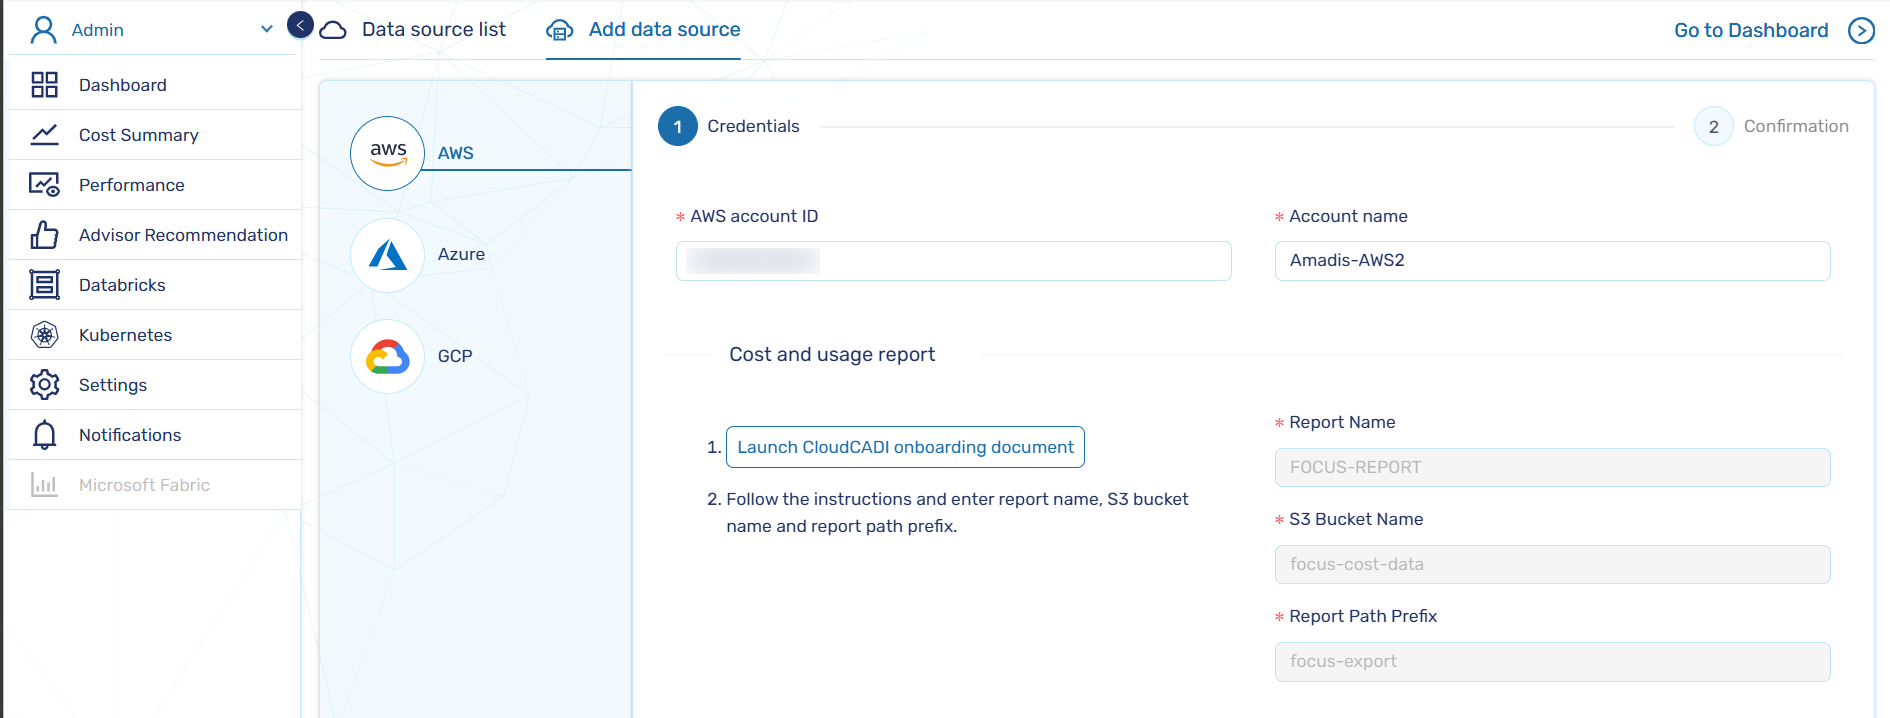
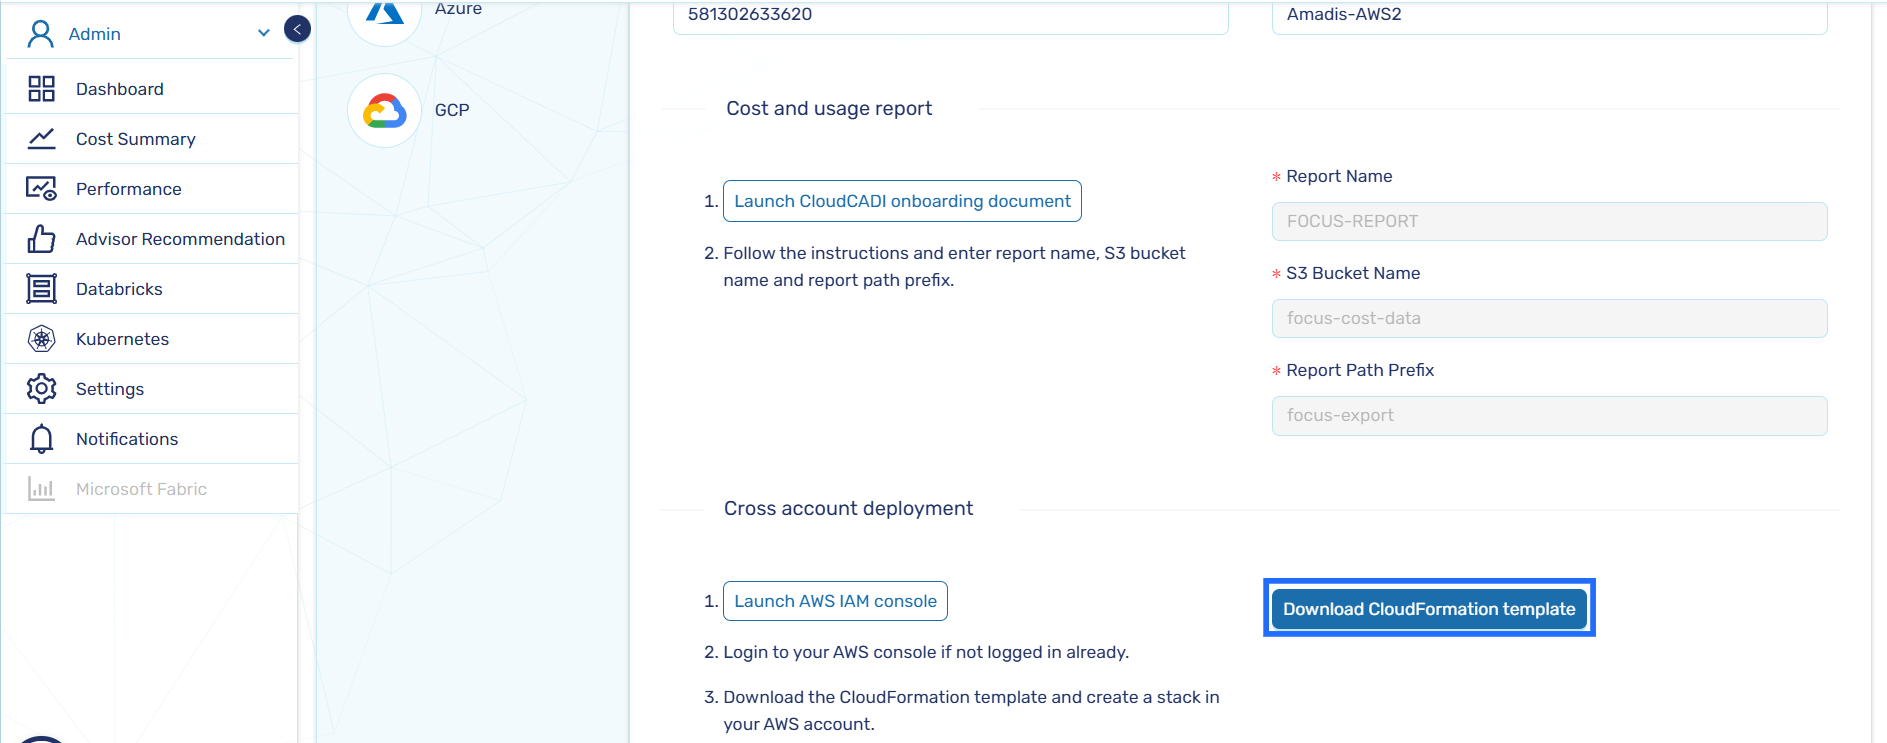
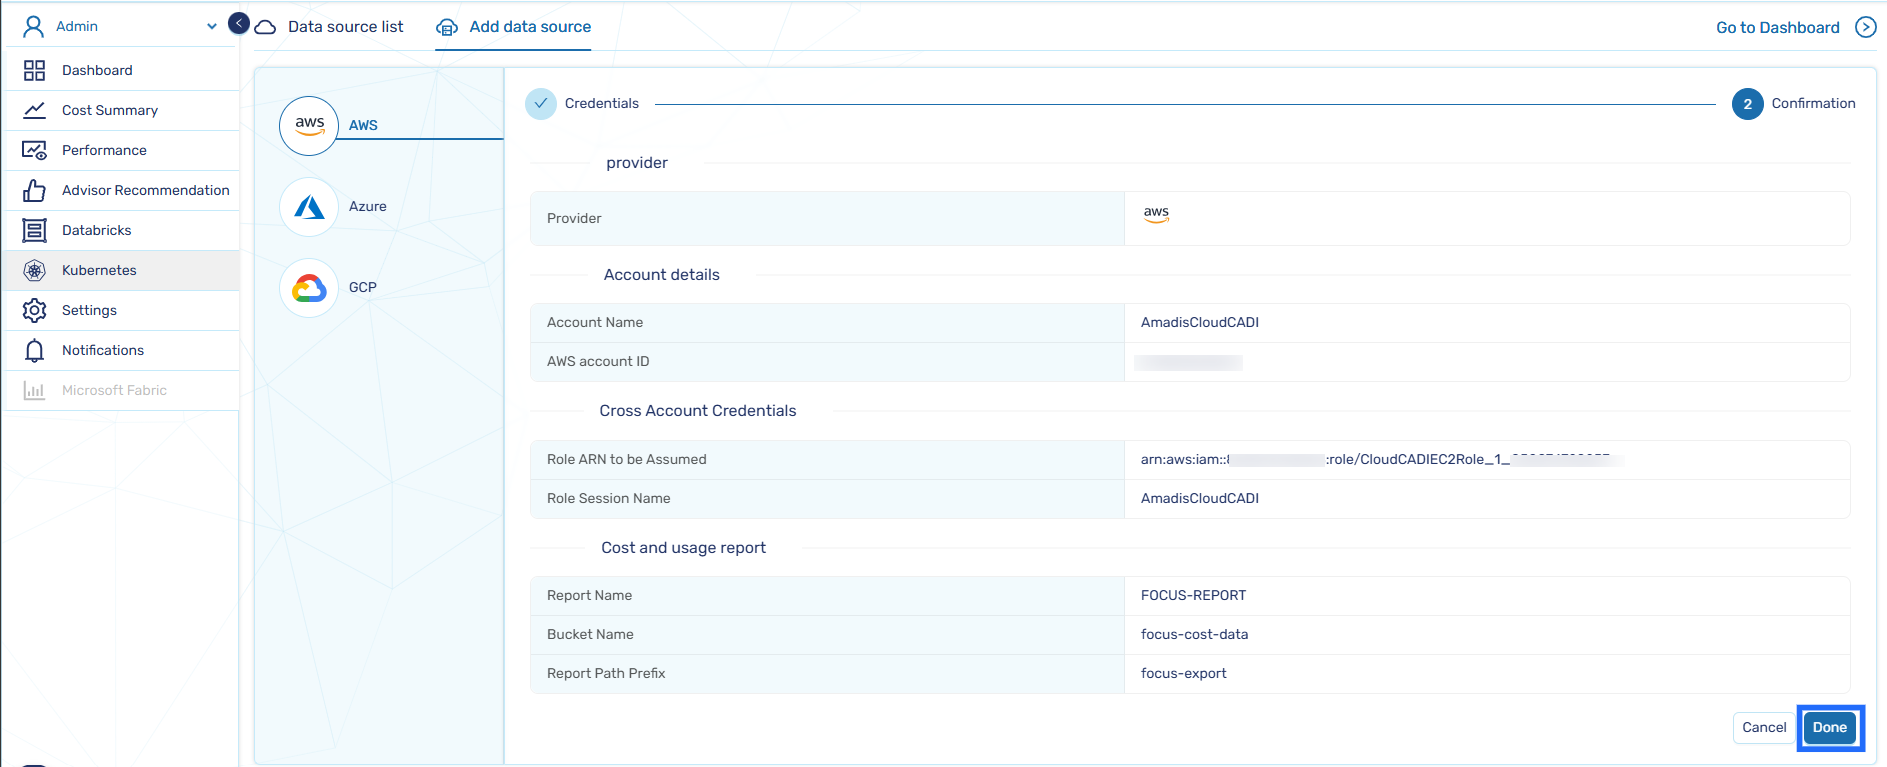
Enter the required details such as Account ID, Account Name. Enter the Report Name, S3 Bucket Name, and Report Path Prefix (Refer to the Cost & Usage Data Export section).
Note
If the onboarding was completed using a different account without onboarding the same account, please follow Step3 of the same-account onboarding to configure the S3 bucket policy.
-
Click Download CloudFormation Template.
-
After downloading the script, go to the AWS Console for the respective account, navigate to the CloudFormation service, and create a stack with new resources.
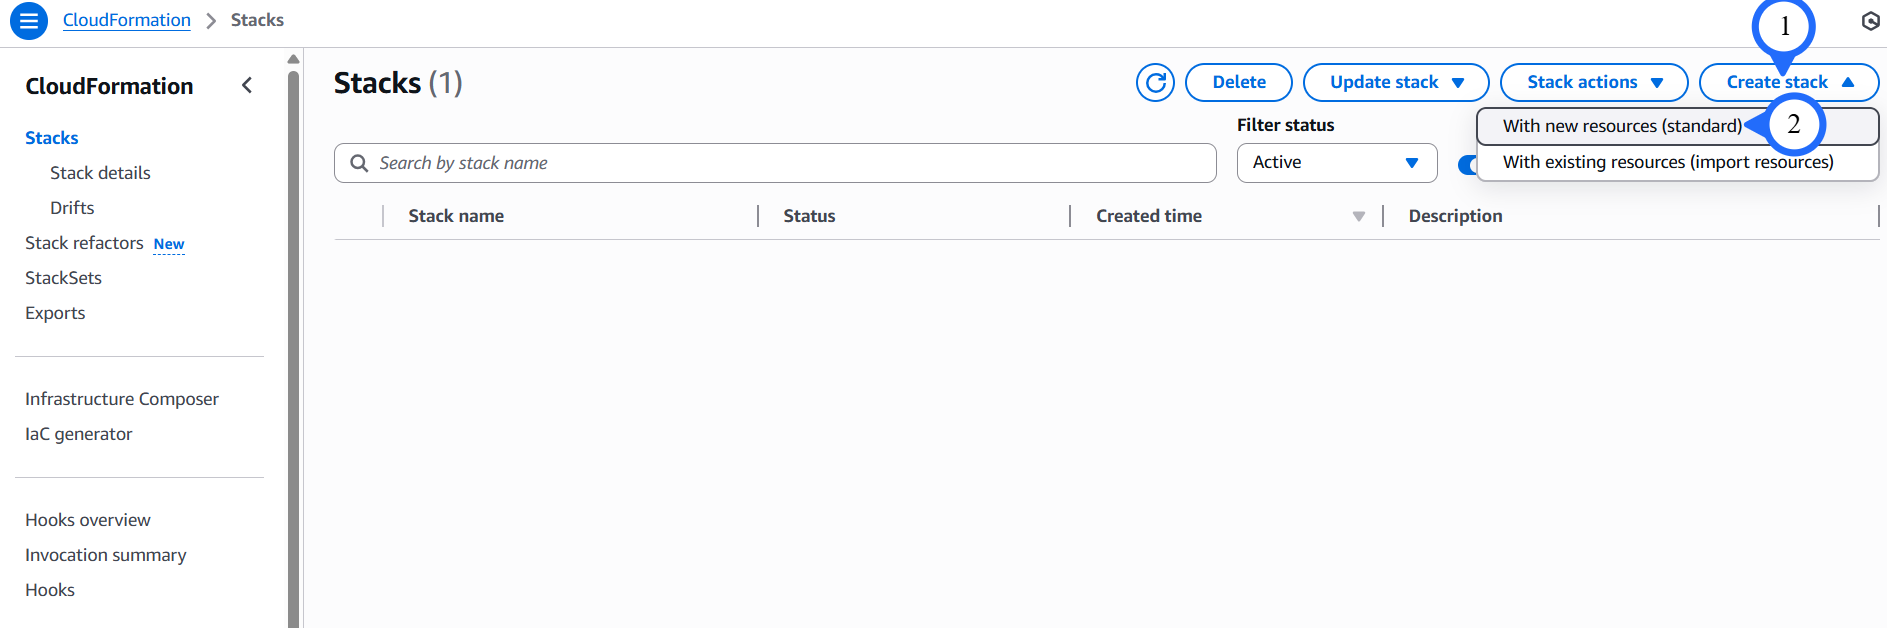
-
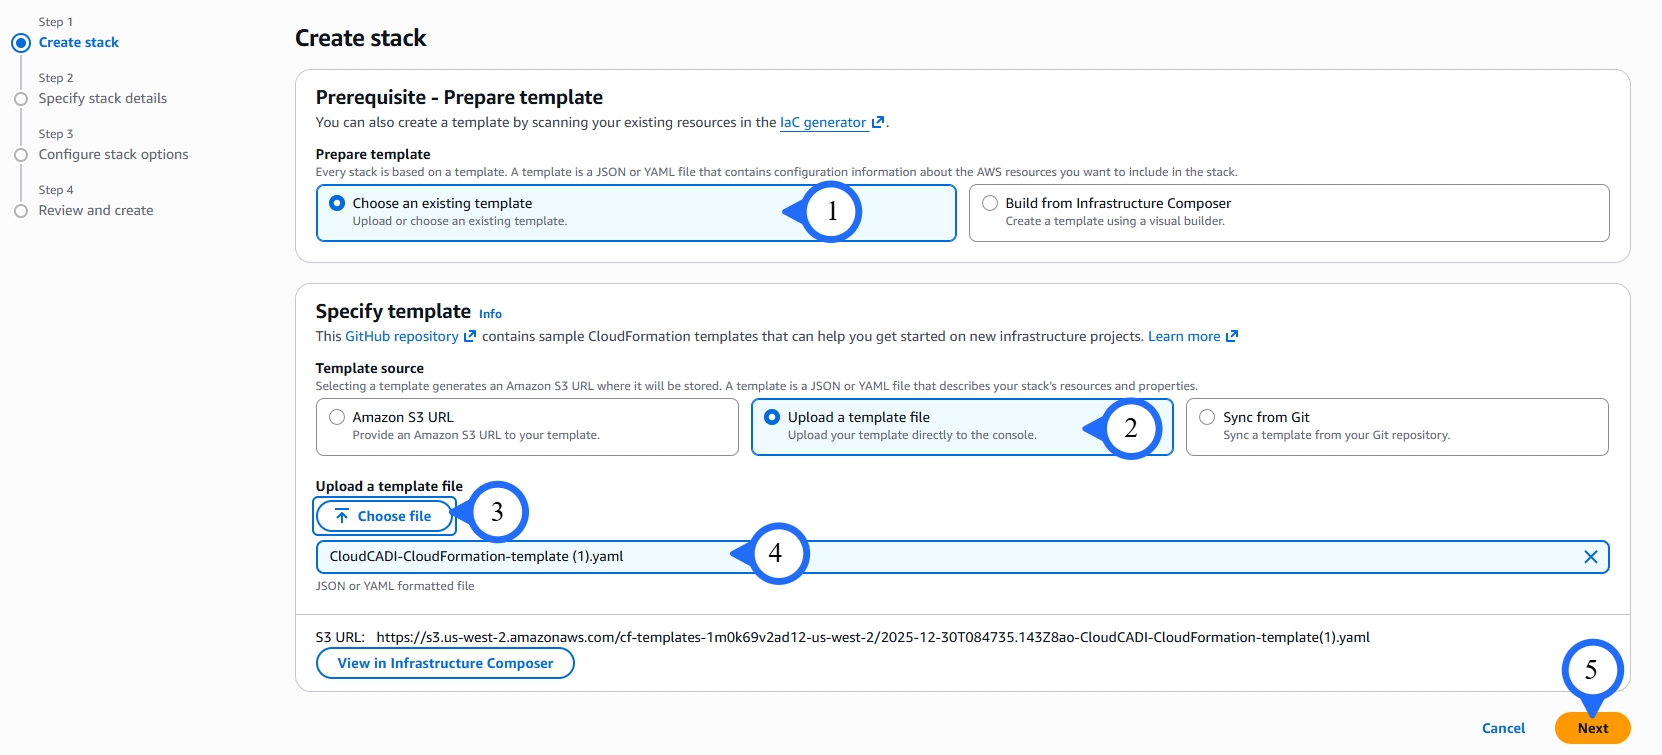
Select Choose an existing template.
- Then select Upload a template file.
- Click Choose file and upload the downloaded script.
-
Click Next.
-
Enter the Stack name and S3BucketName.
-
Click on Next.

-
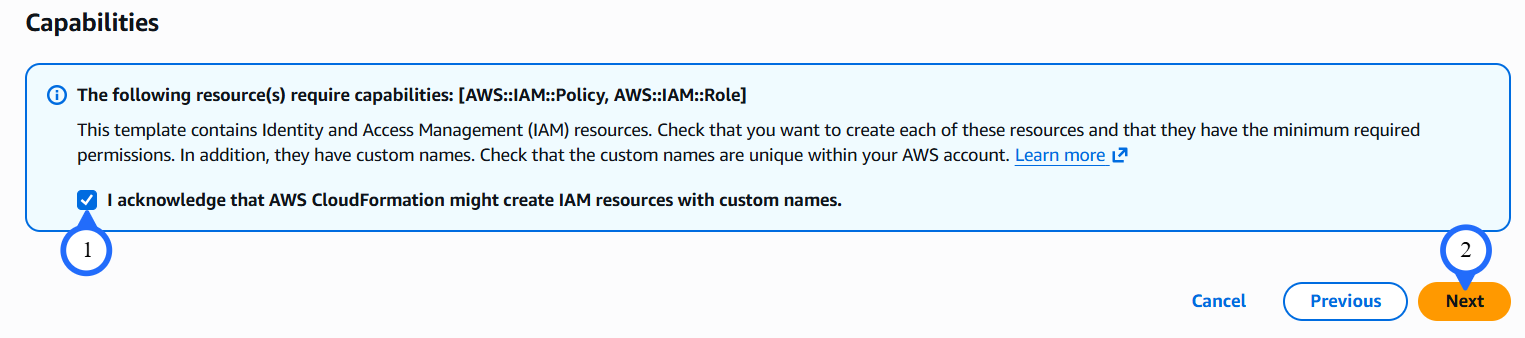
Enter the tag key and tag value.
-
Click Next. The Review page appears. Review the details, and click Submit.

-
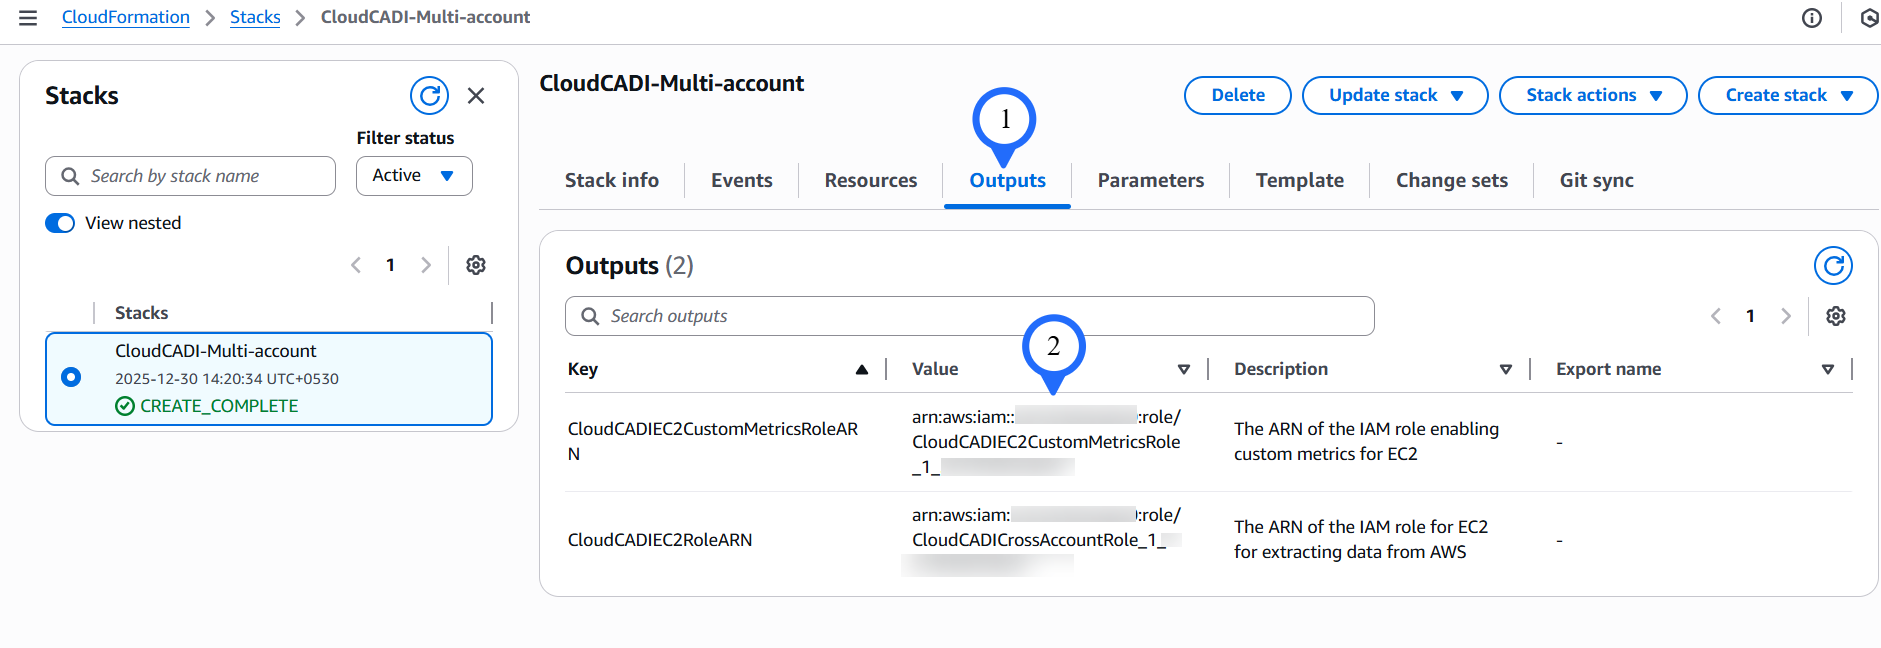
Review and click Submit and It'll take up to 5 minutes to finish the resource creation.
-
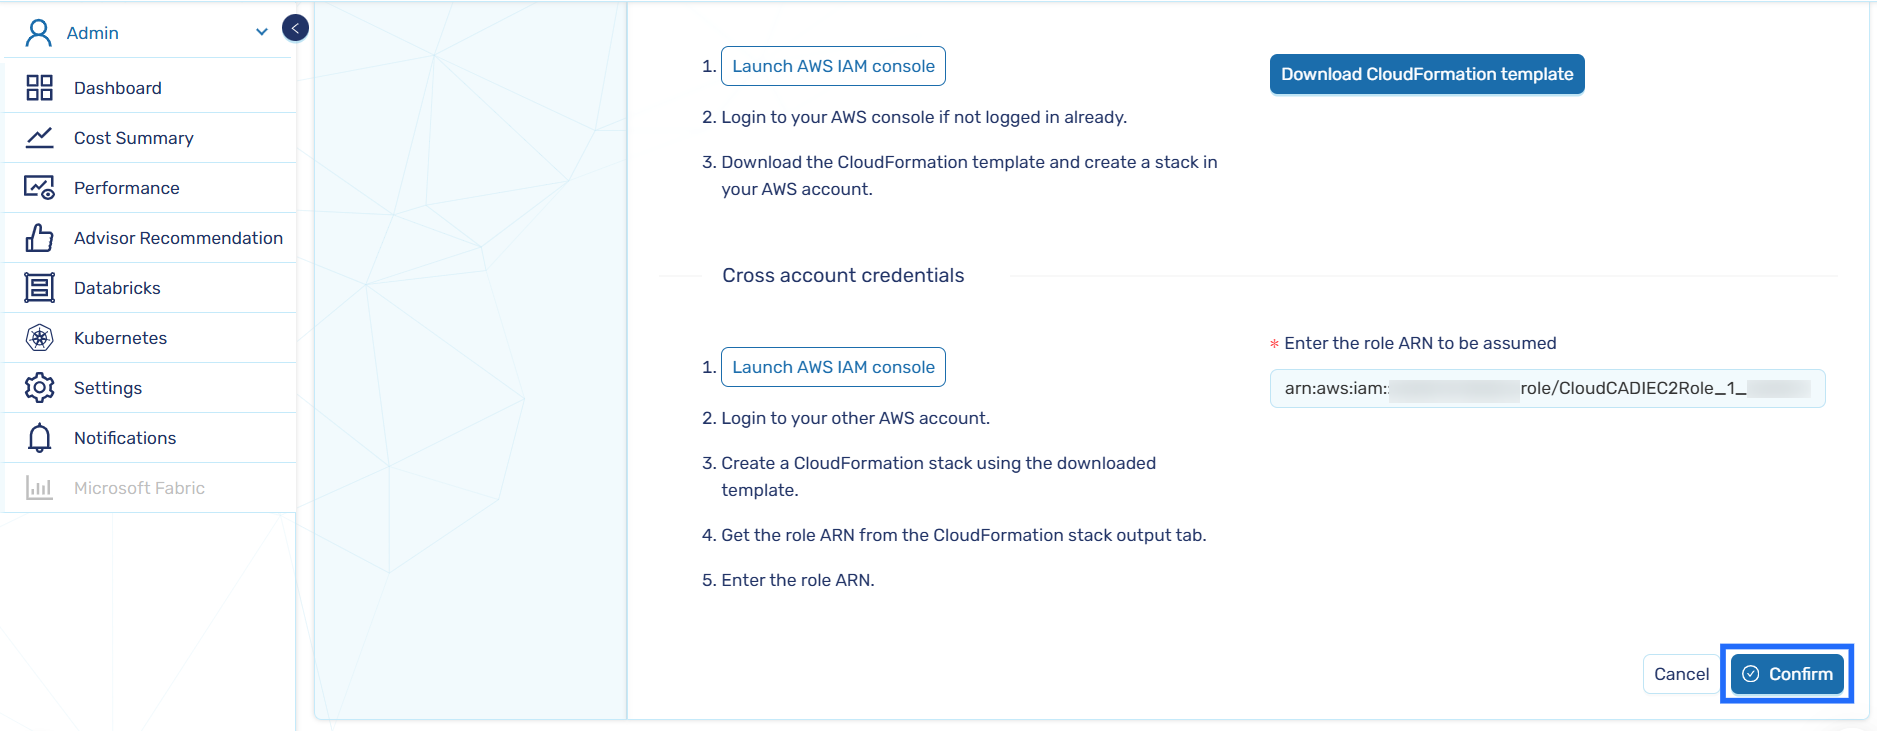
Once the stack has been created successfully, go to the Outputs tab. Copy the Role ARN
-
Paste the Role ARN obtained during stack creation and click Confirm.
-
Verfiy the details and Click on Done to complete account creation.
-
Navigate back to Data Source List tab.
-
Confirm that the created AWS account appears in the list.
