GCP Project Onboarding
Step 1: Access the CloudCADI Onboarding Section
- Log in to CloudCADI using an Admin account.
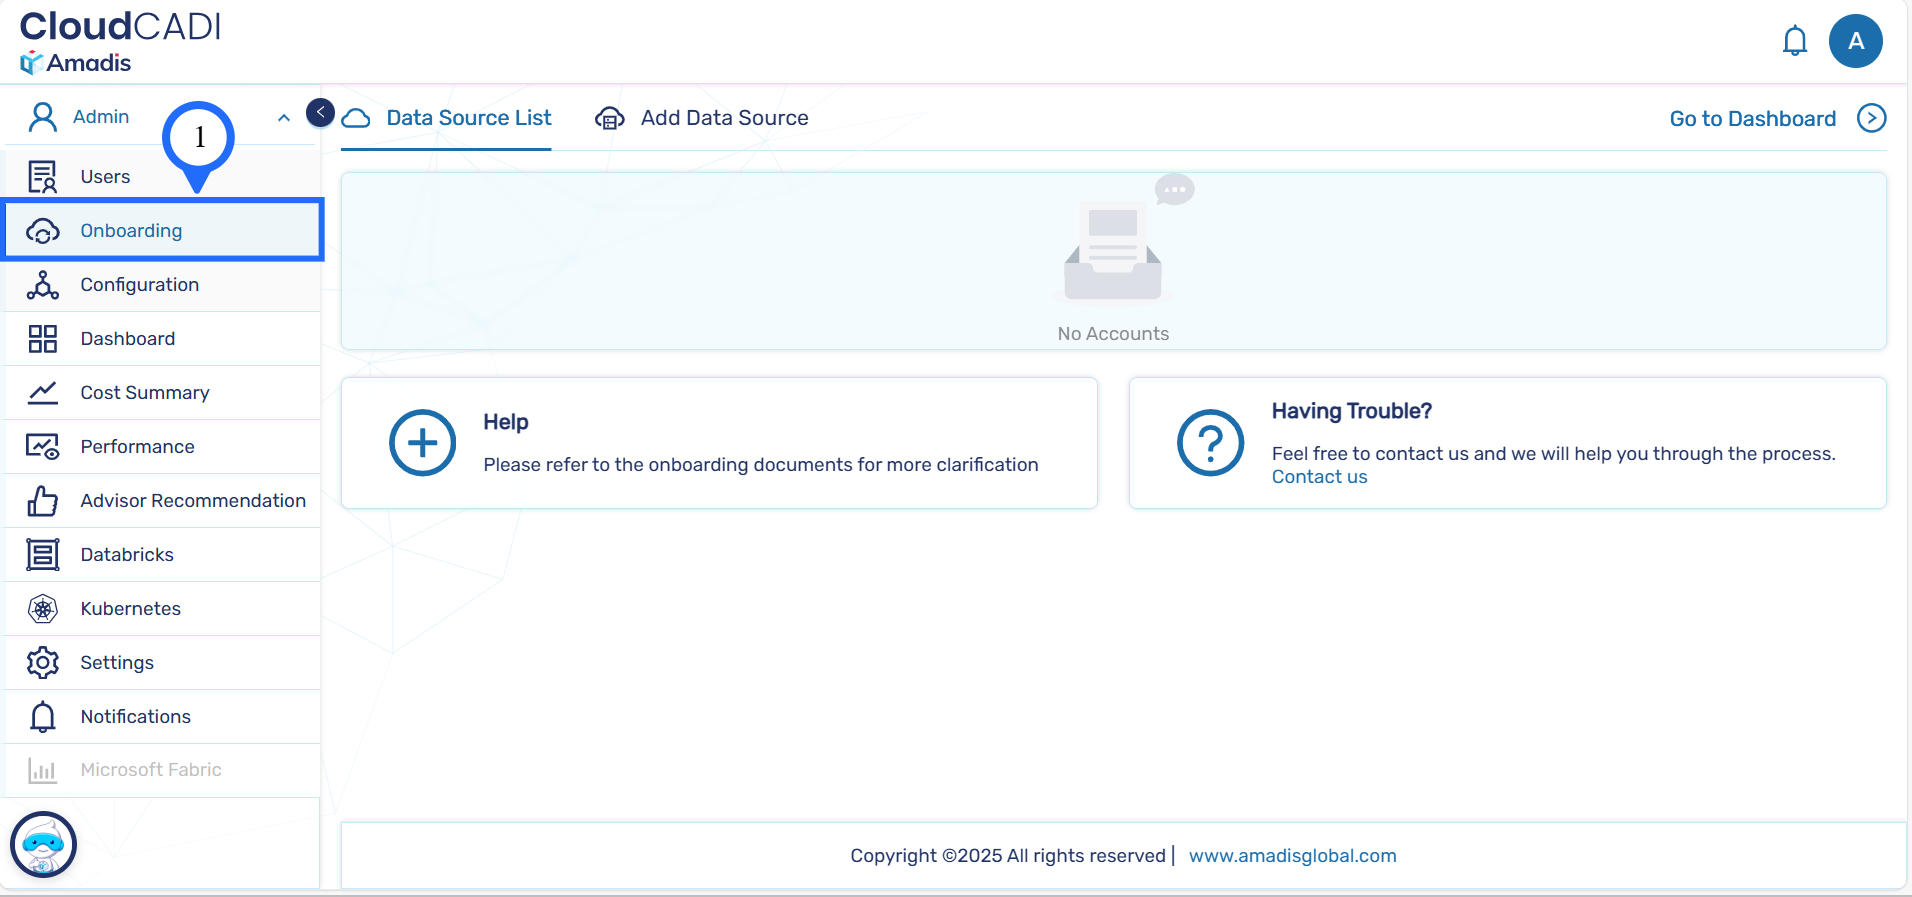
- From the left navigation menu, click Onboarding.
- You will be redirected to the Data Source List page.
Step 2: Add a New Data Source
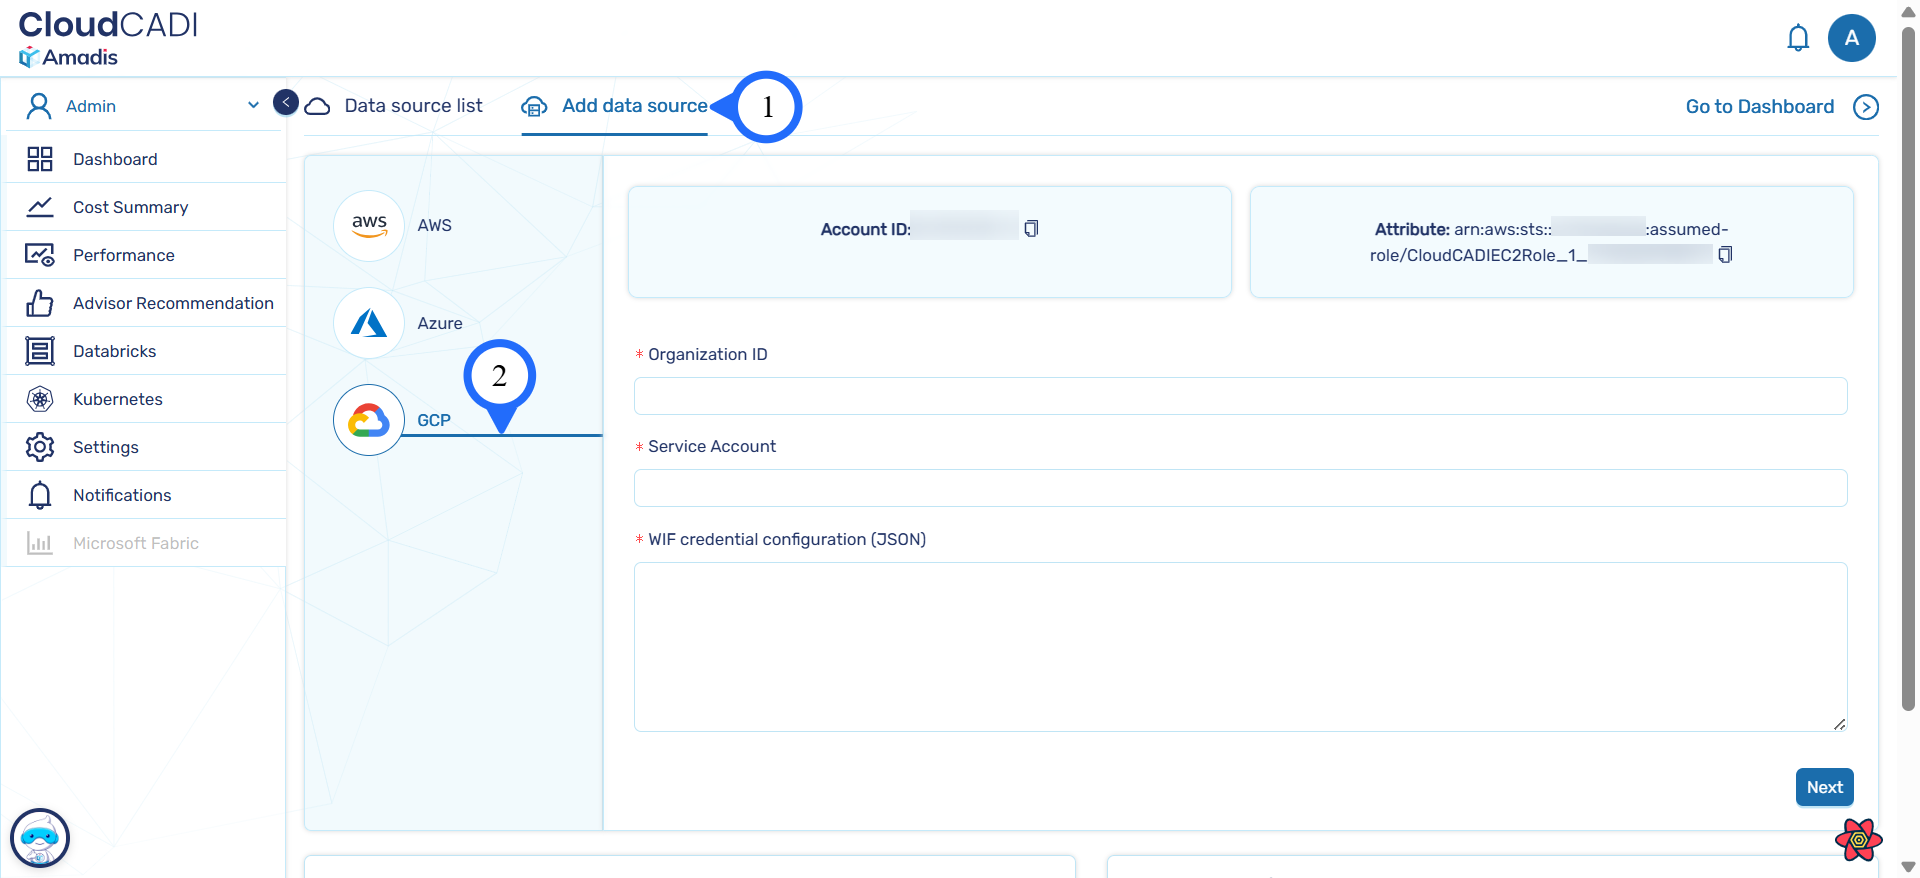
- Click Add Data Source at the top of the page.
- From the list of cloud providers, select GCP.
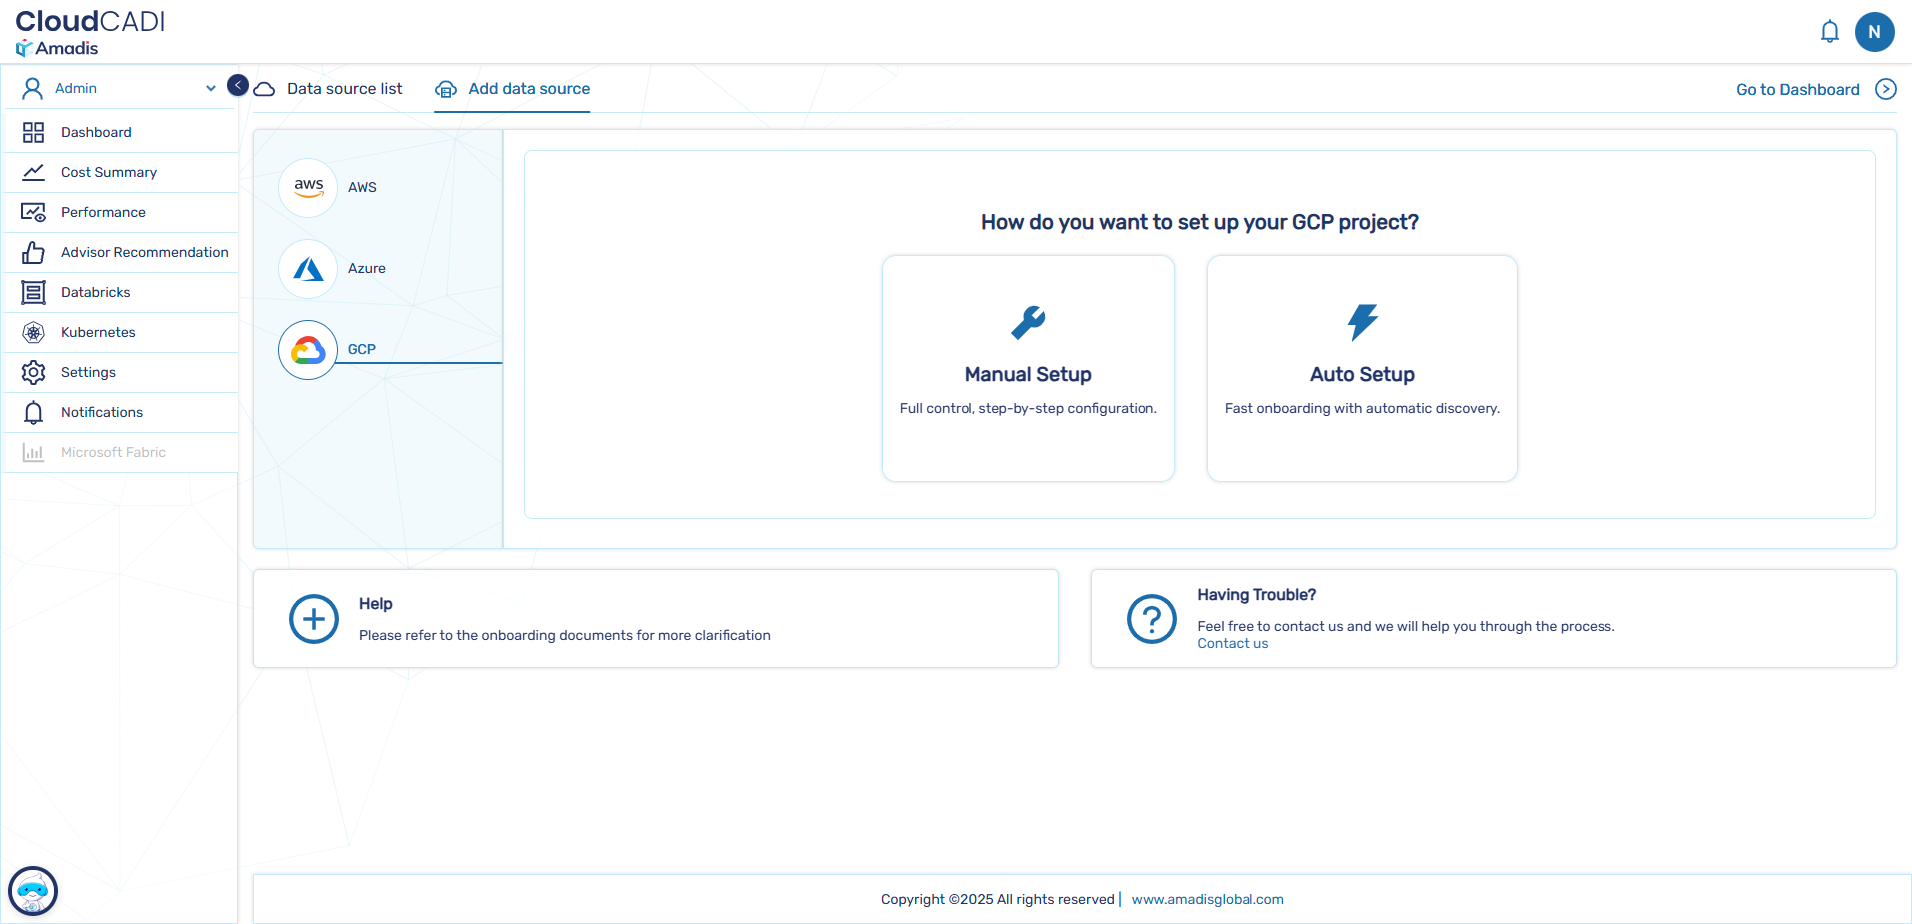
Step 3 - Select Onboarding Method
- Fill in the form with the correct GCP Organization ID, created Service Account, and the downloaded WIF Credential Configuration (JSON).
- Then click Next.
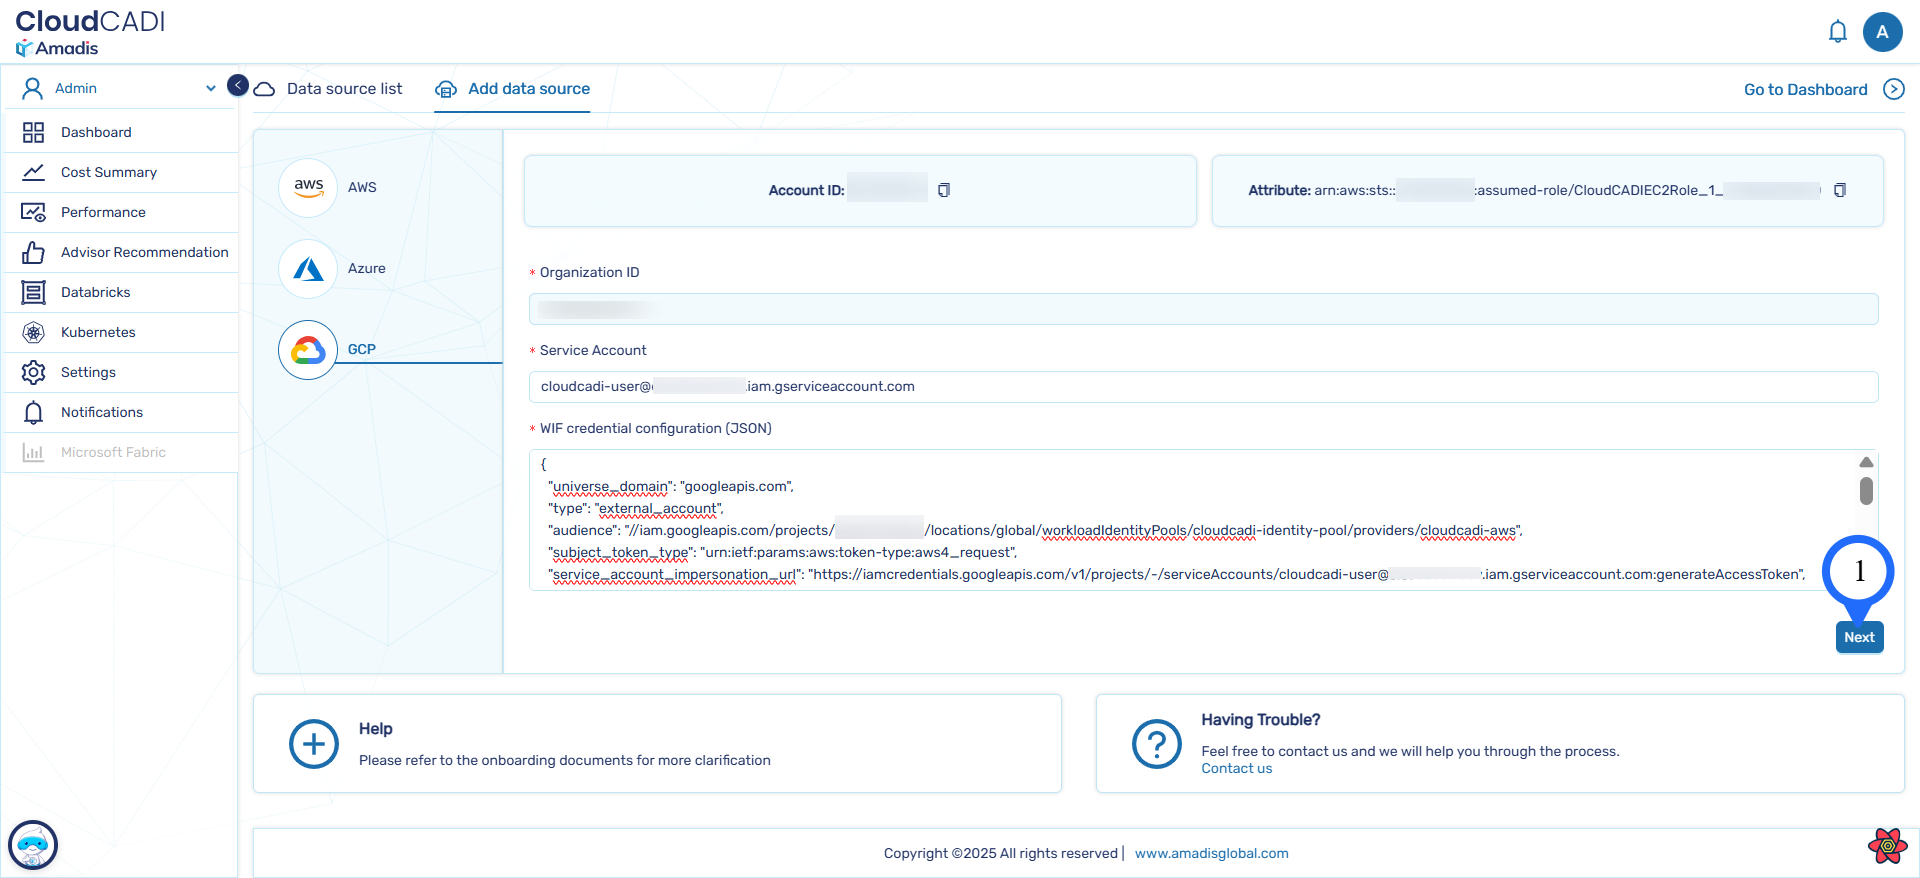
- You will be redirected to a page where you can choose either Manual Onboarding or Auto Onboarding.
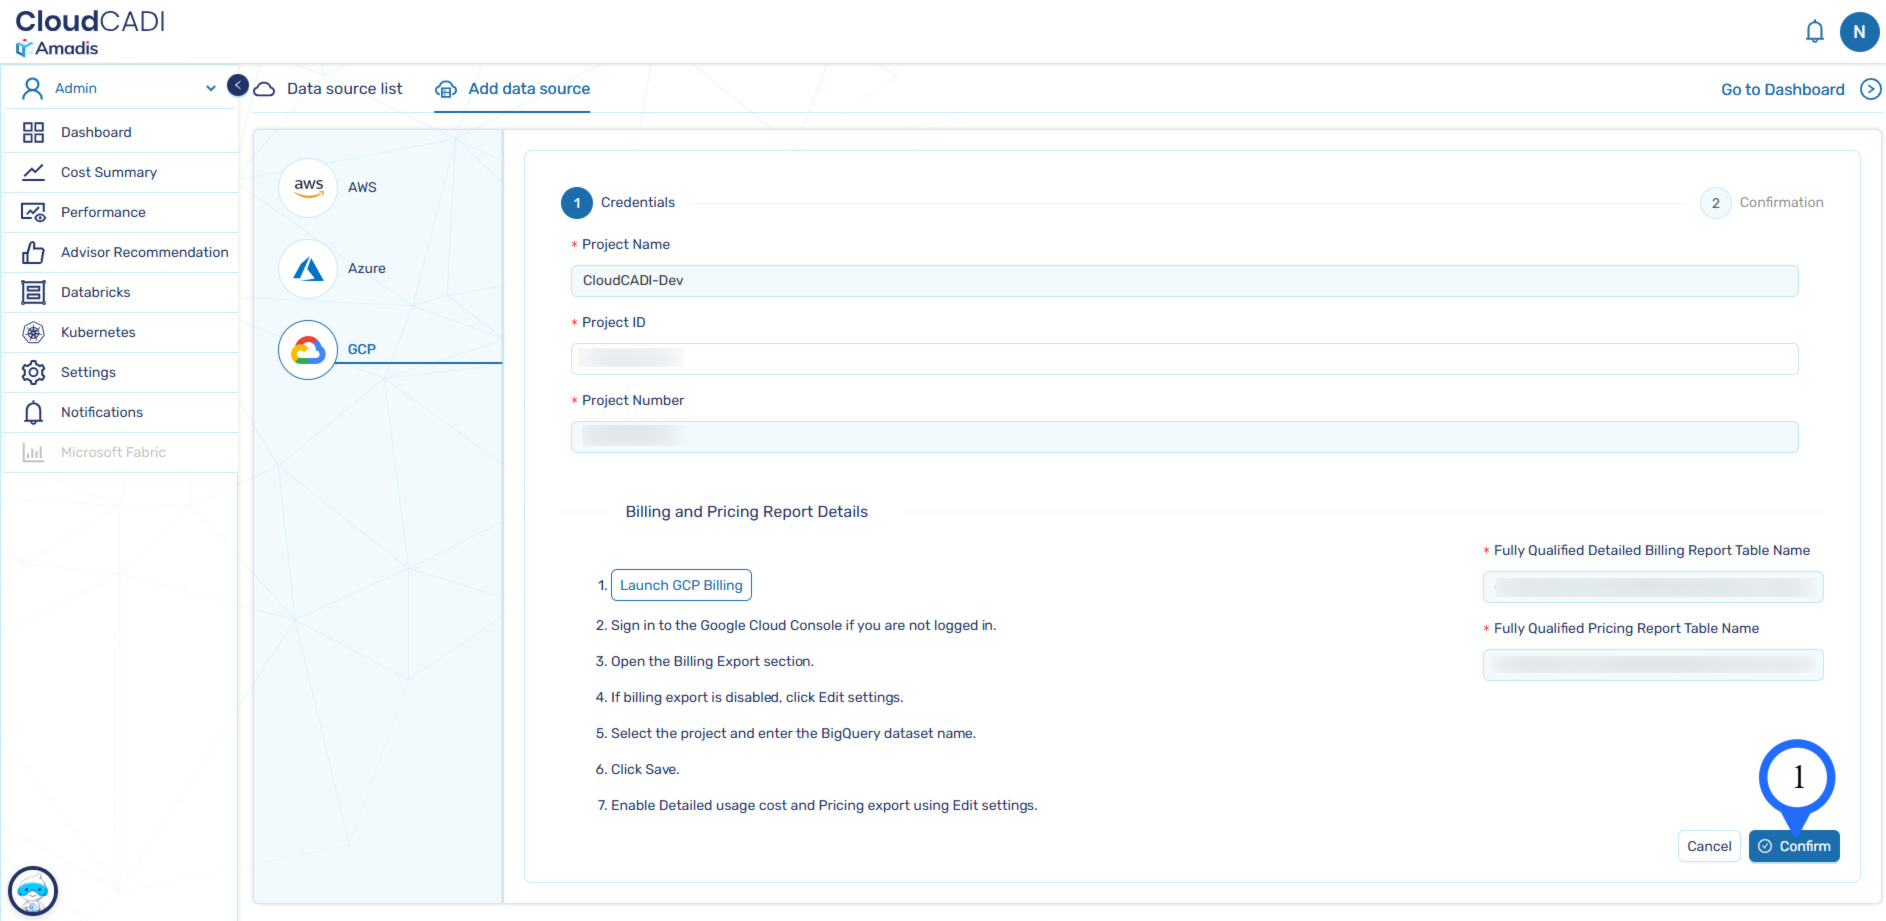
Step 4 - Manual Onboarding
-
This is the page you will be redirected to when you click Manual Onboarding.

-
Fill in the form with the correct Project Name, Project ID, and Project Number.
-
Also provide the correct Billing Report Table Name and Pricing Report Table Name.
For proper naming conventions, Refer to the Billing and Pricing Report Table Names section.
-
Then click Confirm.
-
You will be redirected to the Confirmation Page. Recheck all the details, verify them, and then click Done.

-
The project will be onboarded successfully.
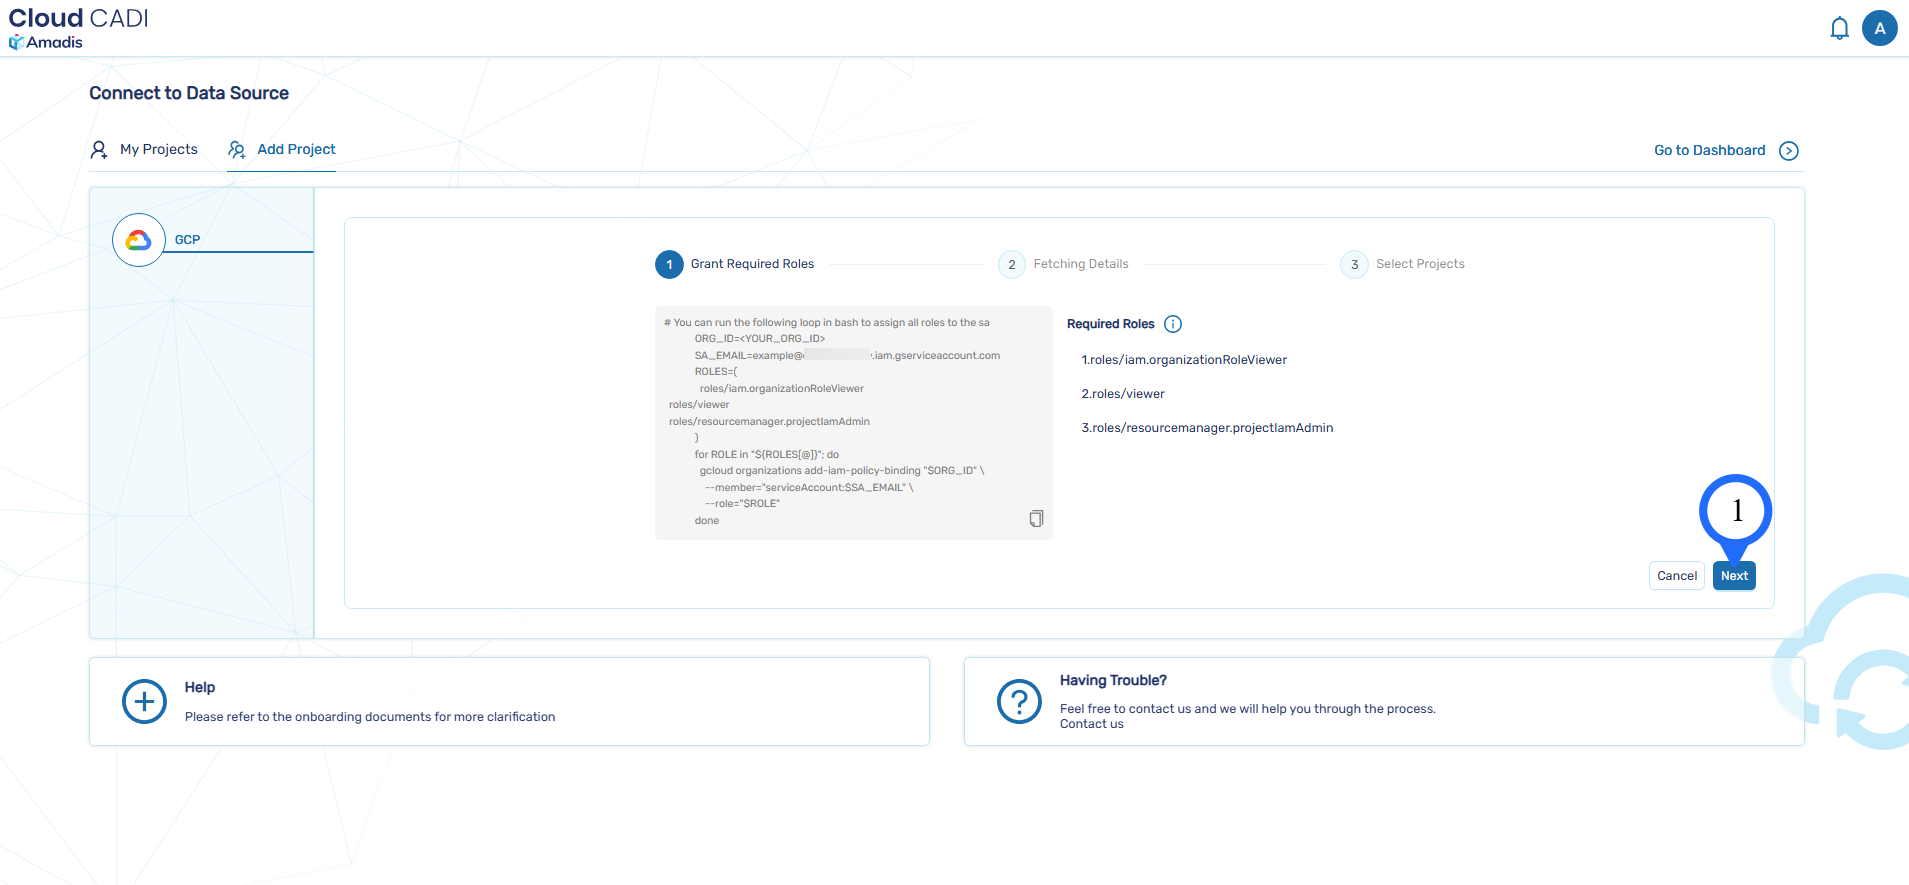
Step 5 - Automatic Setup
-
To automatically discover projects, temporarily grant the following roles to the service account at the organization level:
roles/iam.organizationRoleViewerroles/viewerroles/resourcemanager.projectIamAdmin
-
After assigning the roles, click Next to proceed.
-
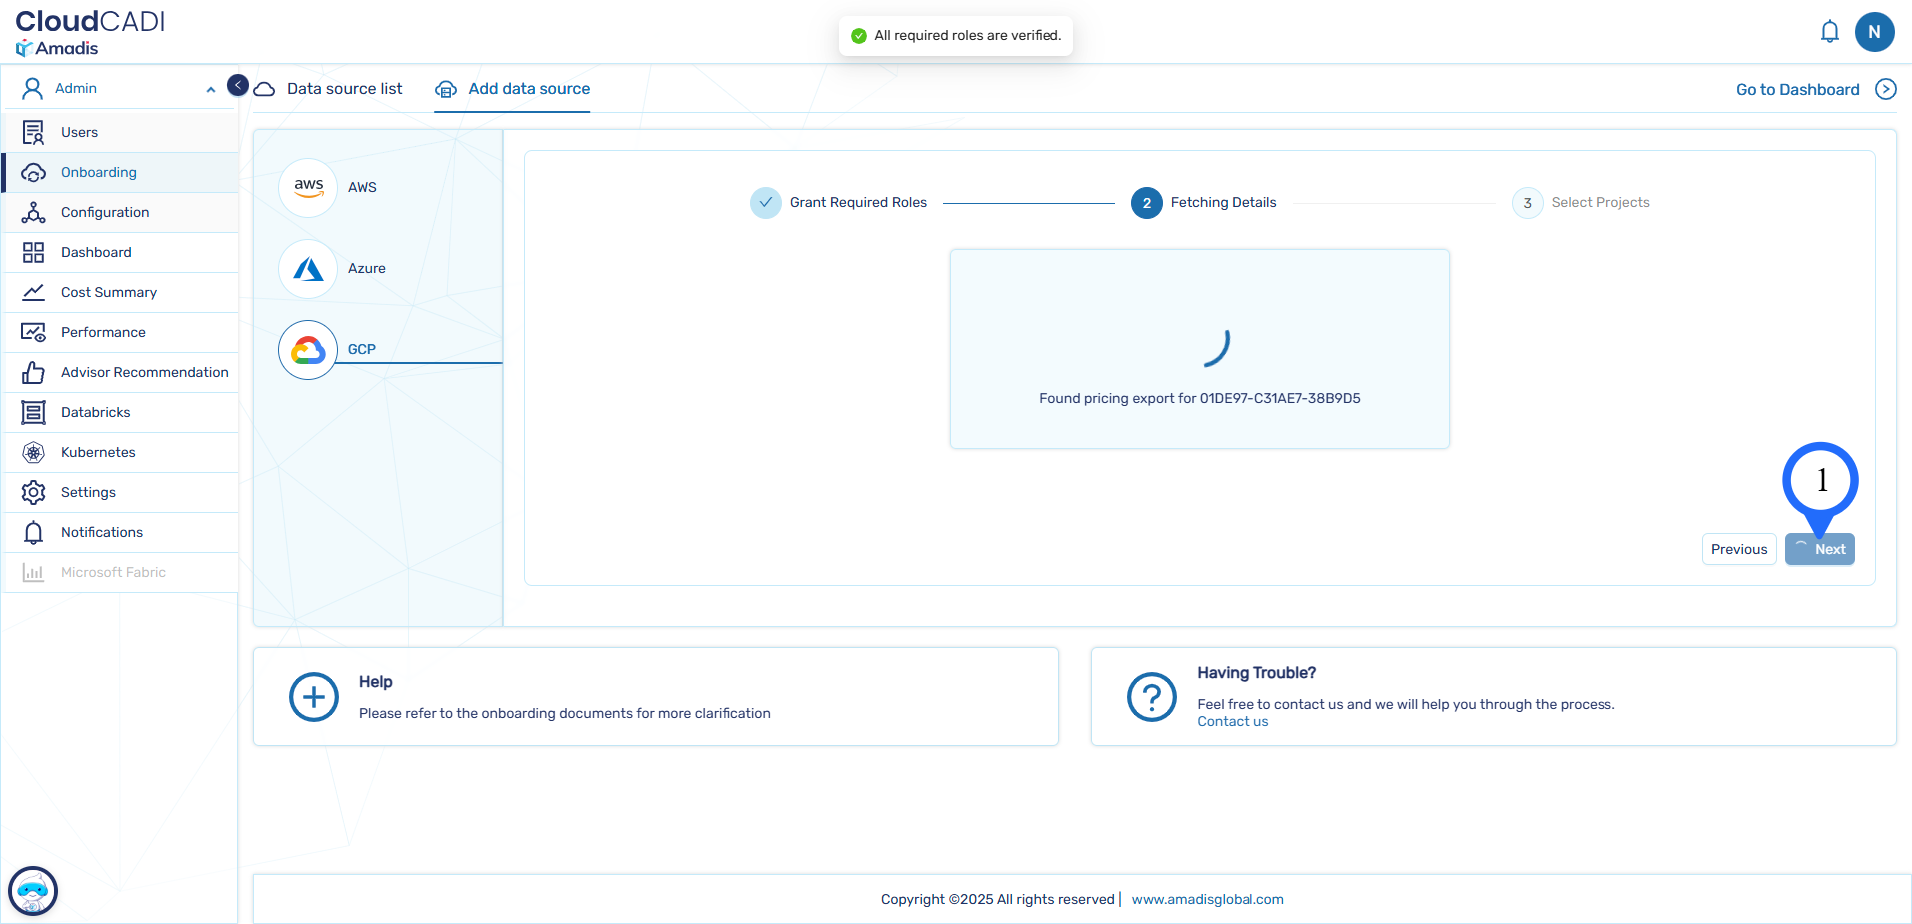
All roles will be verified one by one. This process takes about a minute.
Once completed, you will see the message All required roles are verified.
-
Then click Next.
-
All projects will be fetched and displayed in a table.
Select the projects you want to onboard and click Done to complete the process.
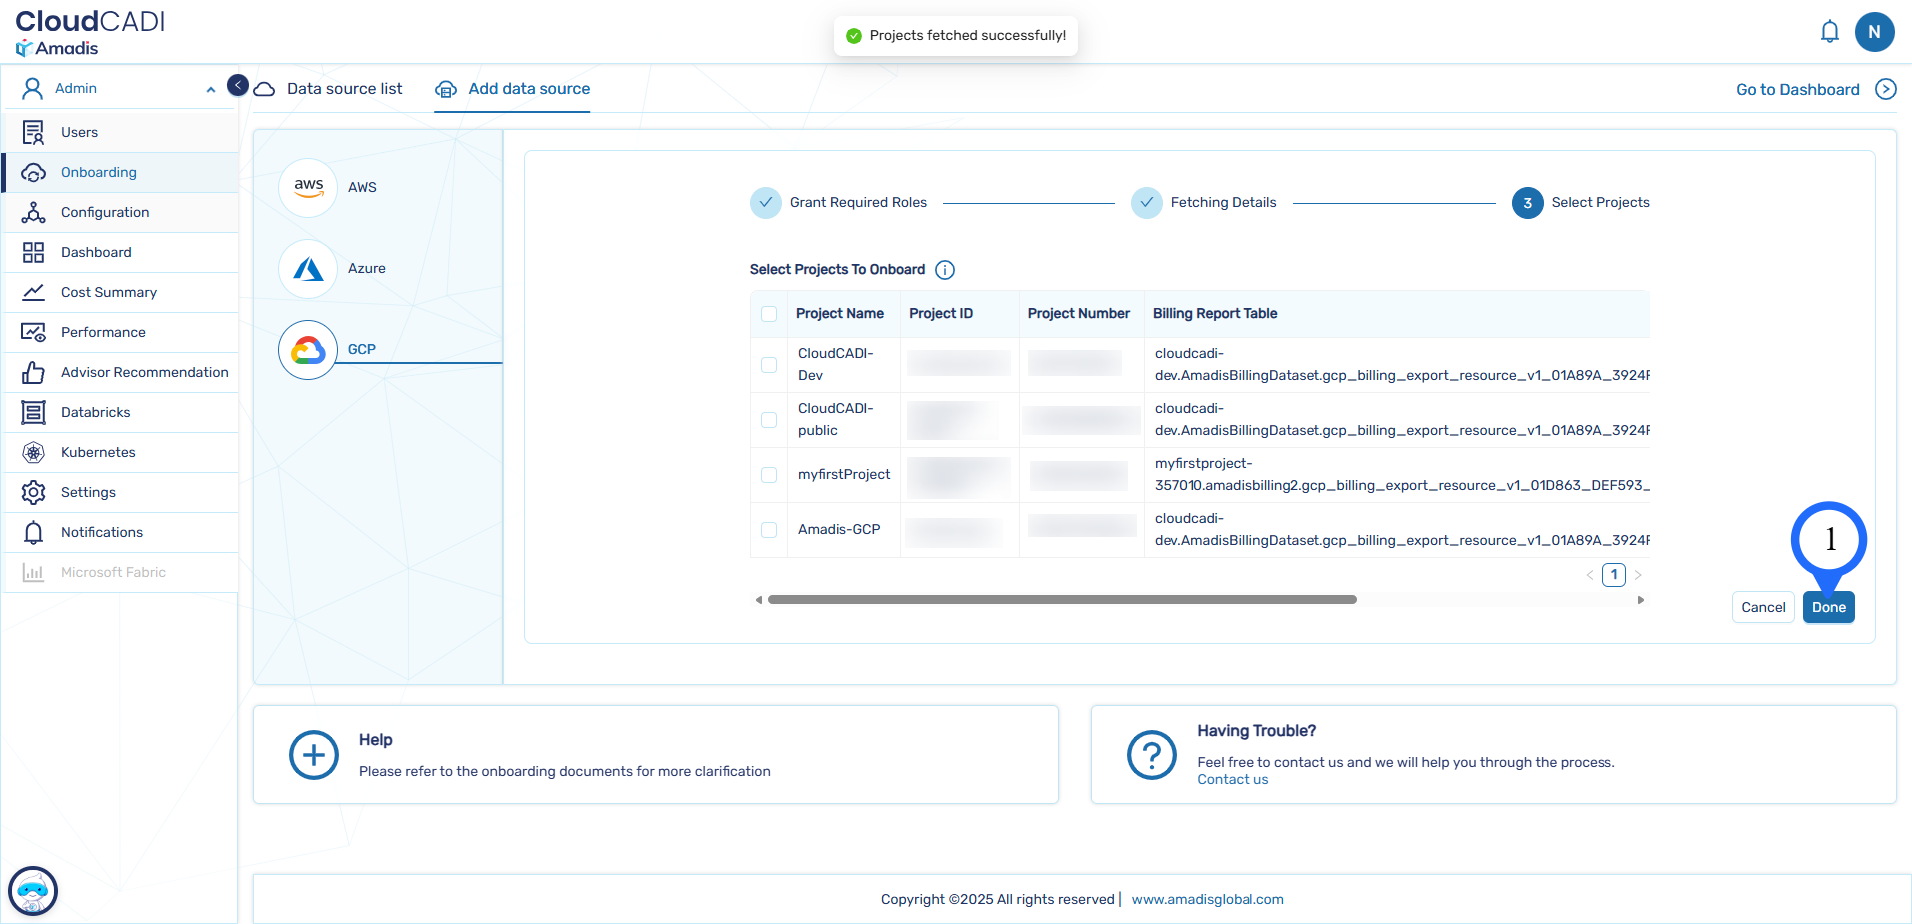
-
After that, your project will be onboarded successfully.